
DIY bathroom tile installation guide
DIY Bathroom Tile Installation Guide
Bathroom tile is a popular choice for homeowners because it is durable, easy to clean, and can add a stylish touch to any bathroom. If you are considering installing tile in your own bathroom, this guide will walk you through the process step-by-step.
Tools and Materials
Before you begin, gather all of the tools and materials you will need. This includes:
- Tile saw
- Grout float
- Grout sponge
- Tile trowel
- Level
- Tape measure
- Pencil
- Safety glasses
- Gloves
- Waterproof sealant
- Tile adhesive
- Ceramic or porcelain tiles
- Thinset mortar
- Backer board
- Waterproof membrane
Preparing the Subfloor
The first step is to prepare the subfloor. This will ensure that the tiles are installed properly and will not come loose over time.
If you are installing tile over an existing floor, you will need to remove any old flooring material. If you are installing tile over concrete, you will need to make sure that the surface is level and smooth. You can do this by using a self-leveling compound.
Once the subfloor is prepared, you will need to install a moisture barrier. This will protect the tiles from moisture damage. You can use a plastic sheeting or a rubber membrane.
Installing the Backer Board
The next step is to install the backer board. This will provide a sturdy surface for the tiles to adhere to.
Backer board is typically made of cement board or plywood. If you are installing tile over a concrete subfloor, you will need to use cement board. If you are installing tile over a wood subfloor, you can use either cement board or plywood.
To install the backer board, start by measuring the area where you will be installing the tiles. Then, cut the backer board to size.
Next, apply a thin layer of thinset mortar to the subfloor. Then, press the backer board into the mortar. Make sure that the backer board is level and that there are no gaps between the boards.
Allow the mortar to dry completely before moving on to the next step.
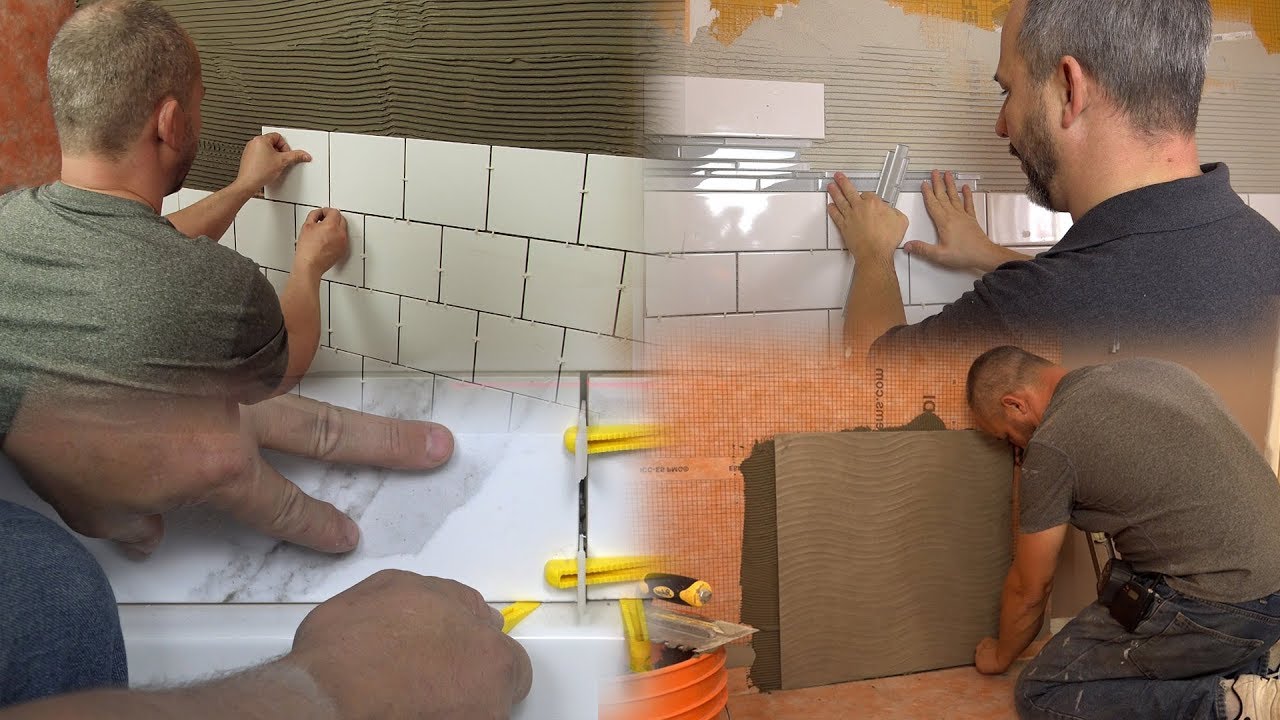
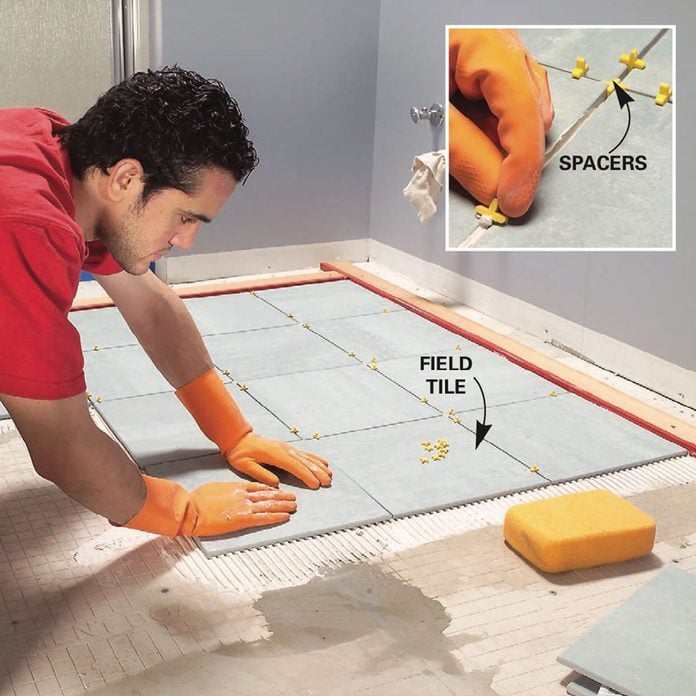
Installing the Tiles
Now it is time to start installing the tiles.
Start by measuring the area where you will be installing the tiles. Then, cut the tiles to size.
Next, apply a thin layer of tile adhesive to the back of the tiles. Then, press the tiles into place. Make sure that the tiles are level and that there are no gaps between the tiles.

Use a tile trowel to apply pressure to the tiles and to spread the adhesive evenly.
Allow the adhesive to dry completely before moving on to the next step.
Grouting the Tiles

Once the adhesive has dried, you will need to grout the tiles.
Grouting is the process of filling the gaps between the tiles with a sealant. This will protect the tiles from moisture damage and will also give them a finished look.
To grout the tiles, start by mixing the grout according to the package directions. Then, apply the grout to the tiles using a grout float.

Use the grout float to spread the grout evenly between the tiles. Be careful not to overfill the gaps.
Allow the grout to dry completely before wiping it off with a damp cloth.
Sealing the Tiles
The final step is to seal the tiles. This will protect the tiles from moisture damage and will also give them a long-lasting shine.
To seal the tiles, apply a sealant according to the package directions. Be sure to read the directions carefully and follow them exactly.
Allow the sealant to dry completely before using the bathroom.
:max_bytes(150000):strip_icc()/how-to-install-ceramic-wall-tile-1824817-10-473071b2fef94af381ad02bc4c1ba8a8.jpg)
Tips for DIY Bathroom Tile Installation
Here are a few tips to help you get the best results when installing tile in your bathroom:
- Use a level to make sure that the tiles are installed level.
- Use a grout float to spread the grout evenly between the tiles.
- Wipe off any excess grout immediately with a damp cloth.
- Allow the tiles to dry completely before sealing them.
- Read the instructions carefully before using any products.
With a little planning and effort, you can install tile in your bathroom like a pro.
Troubleshooting
If you run into any problems during the installation process, here are a few troubleshooting tips:

- If the tiles are not sticking to the subfloor, you may need to apply more adhesive.
- If the grout is not filling the gaps between the tiles, you may need to apply more grout.
- If the tiles are cracking or chipping, you may have used too much
Thank you for exploring our website by DIY bathroom tile installation guide. Your presence fuels our commitment to excellence. Come back for a more enriching experience!
