DIY Living Room Wire Shelving Installation
DIY Living Room Wire Shelving Installation
Wire shelving is a great way to add storage and organization to your living room. It's also a relatively easy project to DIY, even if you're not very handy.
In this article, we'll walk you through the steps of installing wire shelving in your living room. We'll cover everything from choosing the right materials to measuring and cutting your shelves.
So if you're ready to get started, let's get started!

Choosing the Right Materials
The first step is to choose the right materials for your project. You'll need:
- Wire shelving units
- Shelf brackets
- Screws
- Drill
- Level
- Tape measure
- Pencil

Wire shelving units come in a variety of sizes and styles. You'll need to choose a unit that's the right size for your space and that will accommodate the items you want to store.
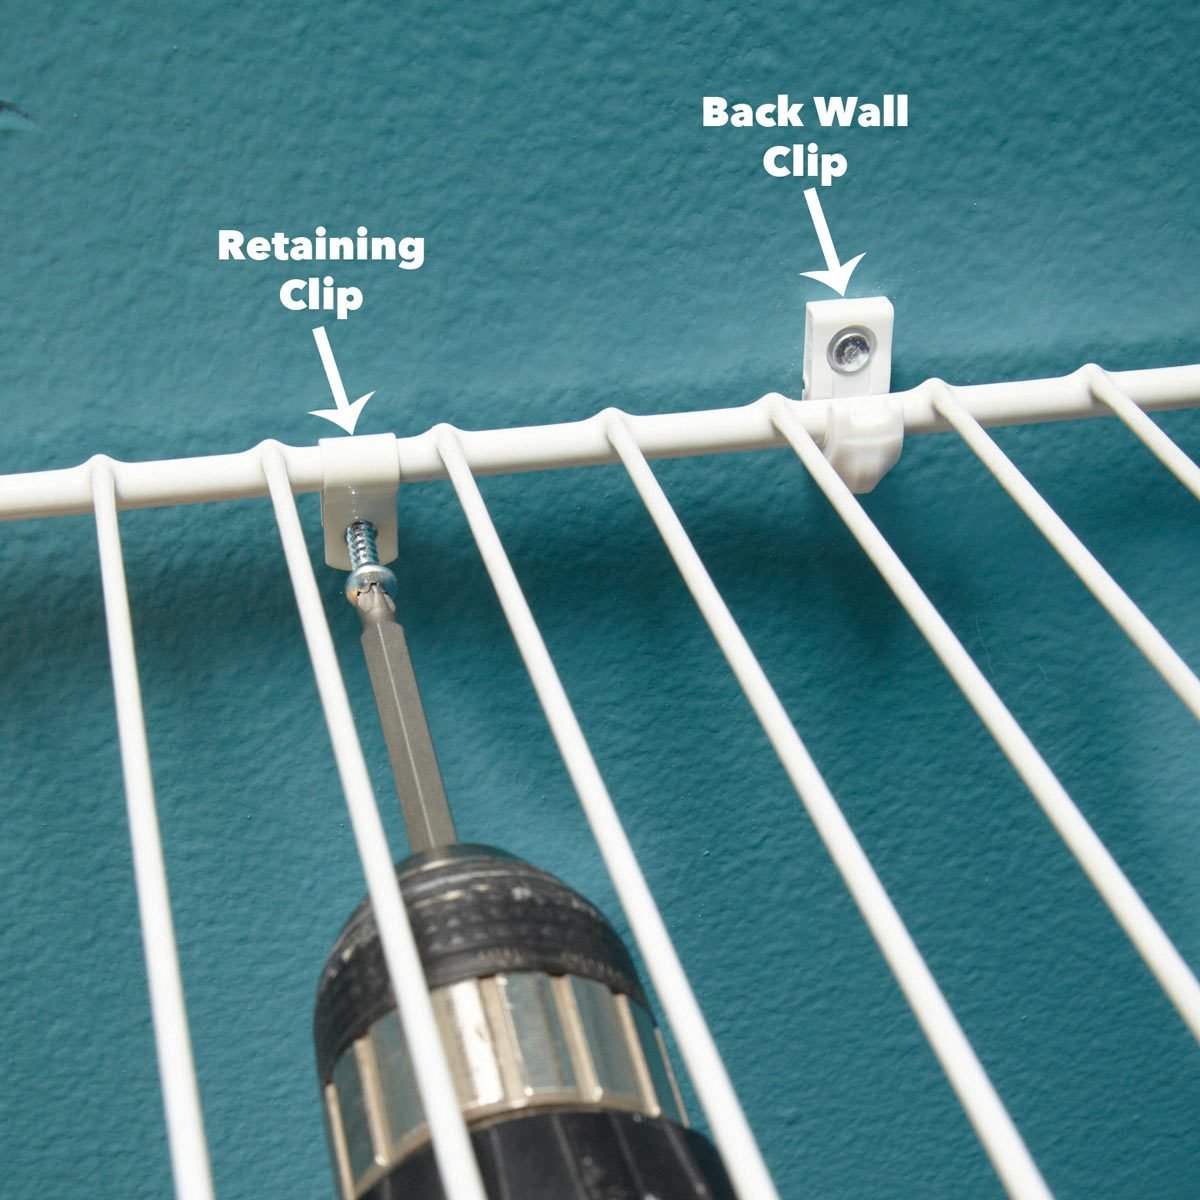
Shelf brackets are used to attach the wire shelving units to the wall. You'll need to choose brackets that are the right size for your shelves and wall.
Screws are used to attach the shelf brackets to the wall. You'll need to choose screws that are the right length and type for your wall.

A drill is used to drill holes in the wall for the screws. You'll need a drill that's powerful enough to drill through the wall material.
A level is used to make sure that the shelves are installed level.
A tape measure is used to measure the distance between the studs in the wall.
A pencil is used to mark the locations of the holes for the screws.
Measuring and Cutting Your Shelves
Once you've chosen your materials, it's time to measure and cut your shelves.
First, measure the space where you want to install the shelves. You'll need to know the width and length of the space so you can order the right size of wire shelving units.
Once you have the measurements, you can cut the shelves to size. Most wire shelving units come with pre-cut shelves, but you may need to cut the shelves to fit your space.
To cut the shelves, use a hacksaw or a jigsaw to make a straight cut along the line you marked.
Installing the Shelves
Now it's time to install the shelves!
First, mark the locations of the holes for the shelf brackets on the wall. Use a stud finder to find the studs in the wall. The shelf brackets should be attached to the studs to ensure that the shelves are sturdy.
Once you have marked the locations of the holes, drill holes in the wall using a drill and a masonry bit. The holes should be the same diameter as the screws you're using.
Next, insert the shelf brackets into the holes in the wall. Make sure that the brackets are level.
Now you can attach the shelves to the brackets. Use screws to attach the shelves to the brackets.
Once the shelves are attached, you can add your belongings.
Tips for Installing Wire Shelving
Here are a few tips for installing wire shelving:
- Use a level to make sure that the shelves are installed level. This will ensure that your shelves are sturdy and that your belongings won't fall off.
- Use screws that are long enough to go through the shelf brackets and into the wall stud. This will ensure that the shelves are securely attached to the wall.
- Don't overload the shelves. The weight of the items on the shelves should be evenly distributed. If you overload the shelves, they could collapse.
- Use a stud finder to find the studs in the wall before you drill any holes. This will prevent you from drilling into a stud and damaging your wall.
Conclusion
Installing wire shelving in your living room is a great way to add storage and organization. It's a relatively easy project to DIY, even if you're not very handy.
By following the steps in this article, you can install wire shelving in your living room in no time. So what are you waiting for? Get started today!
