
DIY bathroom vanity makeover on a budget
DIY Bathroom Vanity Makeover on a Budget
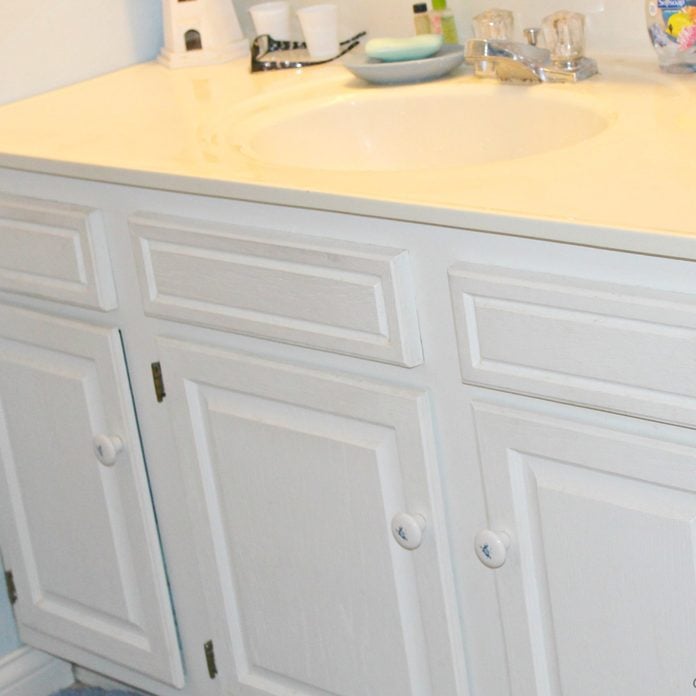
Bathroom vanities can be expensive, but they don't have to be. With a little bit of time and effort, you can give your bathroom a stylish and functional makeover without breaking the bank.
In this article, we'll walk you through the process of transforming a dated or outdated bathroom vanity into a beautiful and modern space. We'll provide step-by-step instructions, tips, and tricks, as well as budget-friendly materials and supplies.
So if you're ready to give your bathroom a makeover, read on!
1. Gather Your Supplies
The first step is to gather all of the supplies you'll need for the project. Here is a list of the basic materials and tools you'll need:

- Vanity: If you're starting with a new vanity, you can skip this step. If you're working with an existing vanity, you'll need to remove the old hardware and any other fixtures.
- Paint: You'll need to choose a paint that is specifically designed for bathroom use. This type of paint is resistant to moisture and mildew, so it's perfect for a humid environment like a bathroom.
- Primer: A primer will help the paint to adhere better to the vanity.
- Sandpaper: You'll need sandpaper to rough up the surface of the vanity before painting.
- Paintbrushes: You'll need a variety of paintbrushes, including a small brush for detail work and a larger brush for applying the paint.
- Tape: You'll need painter's tape to protect the areas of the vanity that you don't want to paint.
- Rags: You'll need rags to wipe up any spills or drips.
- Level: A level will help you to make sure that the vanity is installed straight.
- Drill: You'll need a drill to install the new hardware.
- Screws: You'll need screws to attach the new hardware to the vanity.
2. Prepare the Vanity
The first step is to prepare the vanity for painting. This involves removing any old hardware and fixtures, as well as sanding the surface of the vanity.

To remove the old hardware, you'll need to use a screwdriver to unscrew the screws that are holding it in place. Once the hardware is removed, you can use a rag to wipe down the vanity to remove any dust or debris.
Next, you'll need to sand the surface of the vanity. This will help the paint to adhere better to the surface. You can use a sanding block or sandpaper to sand the vanity. Be sure to sand in the direction of the grain.
Once you've sanded the vanity, you'll need to clean it with a damp cloth to remove any dust or debris.

3. Paint the Vanity
Now it's time to paint the vanity! The first step is to apply a coat of primer. This will help the paint to adhere better to the surface of the vanity. Allow the primer to dry completely before moving on to the next step.
Once the primer is dry, you can start painting the vanity. You'll need to apply two coats of paint, allowing each coat to dry completely before moving on to the next. Be sure to use a paintbrush that is the same size as the grooves in the vanity. This will help to create a smooth finish.

Tip: If you're painting a dark color, you may want to apply a coat of white paint first. This will help to prevent the dark color from bleeding through the primer.
4. Add Hardware
Once the paint is dry, you can add the new hardware to the vanity. Be sure to use screws that are the same size as the holes in the hardware.

To install the hardware, you'll need to first mark the location of the holes on the vanity. Then, you can use a drill to drill the holes. Once the holes are drilled, you can insert the screws and tighten them with a screwdriver.
5. Install the Vanity
Now it's time to install the vanity! To do this, you'll need to measure the space where you want to install the vanity. Then, you can cut the vanity to size.

Once the vanity is cut to size, you can install it in the space. Be sure to use a level to make sure that the vanity is installed straight.
To install the vanity, you'll need to first attach the brackets to the wall. Then, you can slide the vanity into place and attach it to the brackets with screws.
6. Enjoy Your New Vanity!

Now that your new vanity is
Thank you for exploring our website by DIY bathroom vanity makeover on a budget. Your presence fuels our commitment to excellence. Come back for a more enriching experience!

