
DIY adjustable table fire pit
DIY Adjustable Table Fire Pit
Introduction

A fire pit is a great way to enjoy the outdoors, whether you're camping, entertaining guests, or just relaxing on your own property. But if you're limited on space, a traditional fire pit can be a bit of a nuisance. That's where an adjustable table fire pit comes in.
An adjustable table fire pit is a versatile and compact way to enjoy a campfire without taking up too much room. You can adjust the height of the fire pit to suit your needs, and you can even use it as a table when it's not in use.
In this article, we'll show you how to build your own adjustable table fire pit. We'll provide step-by-step instructions and all the materials you need to get started.

Materials
To build your own adjustable table fire pit, you'll need the following materials:
- 2 - 2x4s (8 feet long)
- 2 - 2x6s (8 feet long)
- 2 - 2x8s (8 feet long)
- 1 - 2x10 (8 feet long)
- 1 - 10-inch diameter steel pipe (1/8-inch thick)
- 1 - 10-inch diameter steel plate (1/4-inch thick)
- 1 - 10-inch diameter steel grate
- 1 - 5-gallon bucket
- 1 - 1-gallon can of spray paint
- Wood screws
- Metal screws
- Epoxy
- Sandpaper
- Stain or paint (optional)

Tools
You'll also need the following tools to build your fire pit:
- Saw
- Drill
- Sander
- Measuring tape
- Level
- Pencil
- Safety glasses
- Work gloves

Instructions
-
Cut the wood. Cut the 2x4s, 2x6s, and 2x8s to the following lengths:
- 4 - 2x4s (24 inches long)
- 4 - 2x6s (24 inches long)
- 4 - 2x8s (24 inches long)
- 1 - 2x10 (24 inches long)

-
Assemble the frame. Lay the 2x4s, 2x6s, and 2x8s out in the following pattern:
- 4 - 2x4s (24 inches long)
- 4 - 2x6s (24 inches long)
- 4 - 2x8s (24 inches long)
- 1 - 2x10 (24 inches long)
-
Secure the frame. Use wood screws to secure the frame together.
-
Cut the steel pipe. Cut the steel pipe to the following length:
- 1 - 10-inch diameter steel pipe (1/8-inch thick)
-
Bend the steel pipe. Bend the steel pipe into a U-shape.

-
Secure the steel pipe. Use metal screws to secure the steel pipe to the frame.
-
Cut the steel plate. Cut the steel plate to the following dimensions:
- 10-inch diameter
- 1/4-inch thick


-
Secure the steel plate. Use epoxy to secure the steel plate to the bottom of the fire pit.
-
Add the grate. Place the grate on top of the fire pit.
- Paint or stain the fire pit. (Optional) If you want to, you can paint or stain the fire pit to protect it from the elements.


Tips
- When cutting the wood, make sure to use a sharp saw. This will help to prevent the wood from splintering.
- When drilling the holes, make sure to use a drill bit that is the same size as the screws. This will help to prevent the screws from stripping.
- When sanding the wood, use a fine-grit sandpaper. This will help to create a smooth finish.
- When staining or painting the fire pit, make sure to use a product that is specifically designed for outdoor use. This will help to protect the fire pit from the elements.

Safety

When building a fire pit, it is important to take safety precautions. Here are a

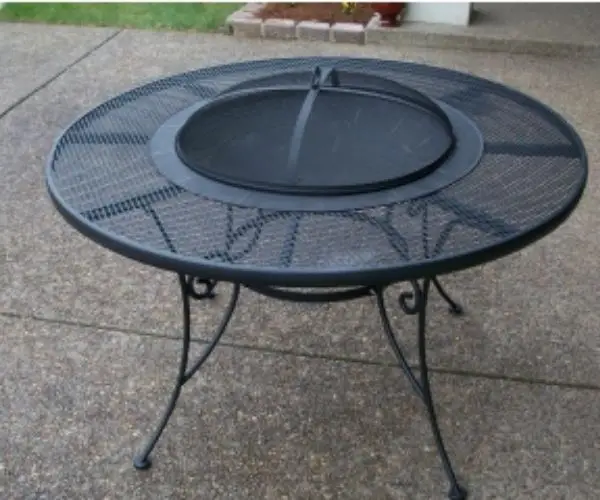
DIY Adjustable Table Fire Pit
Materials
- 24-inch round metal patio table (or similar)
- 18-inch round metal patio table (or similar)
- 24-inch fire pit ring
- 18-inch fire pit ring
- 4 metal L brackets
- 4 nuts and bolts
- 4 washers
- 4 wood screws
- Wood stain or sealant (optional)


Tools
- Drill
- Saw
- Measuring tape
- Level
- Safety glasses
- Gloves

Instructions

- Prepare the tables. If your tables are not already metal, you will need to paint or otherwise finish them to prevent rust.
- Measure and cut the legs. The legs of the larger table should be 24 inches long, and the legs of the smaller table should be 18 inches long.
- Drill holes in the tables. Drill two holes in each leg of the larger table, and one hole in each leg of the smaller table. The holes should be large enough to fit the bolts through.
- Attach the legs to the tables. Insert the bolts through the holes in the legs and tables, and tighten the nuts on the other side.
- Attach the fire pit rings to the tables. Place the fire pit rings on top of the tables, and secure them with the L brackets.
- Add the wood screws to the tables. Drill four holes in the center of each table, and insert four wood screws. This will help to prevent the tables from wobbling.
- Stain or seal the tables. If desired, you can stain or seal the tables to protect them from the elements.
Your DIY adjustable table fire pit is now complete! Enjoy!
Tips
- When choosing a fire pit ring, make sure that it is the correct size for your tables.
- If you are using a wood-burning fire pit, make sure to have a fire extinguisher on hand in case of a fire.
- Be careful not to burn yourself on the fire pit.
- Never leave a fire unattended.
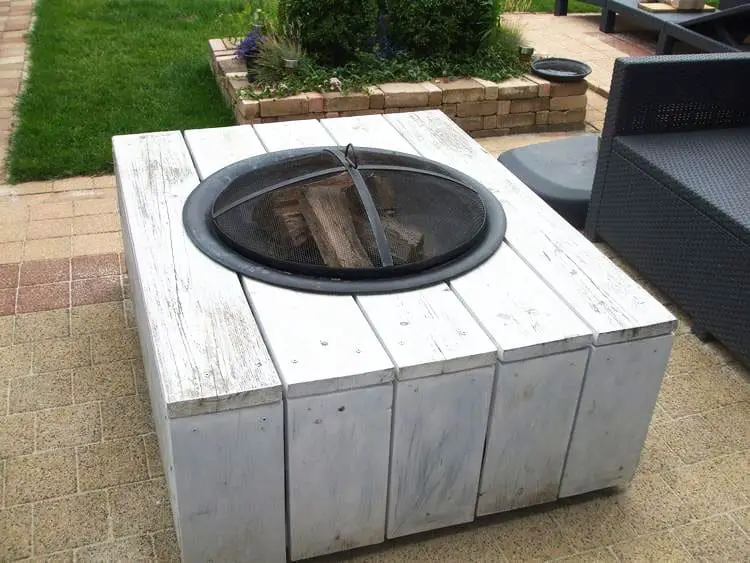
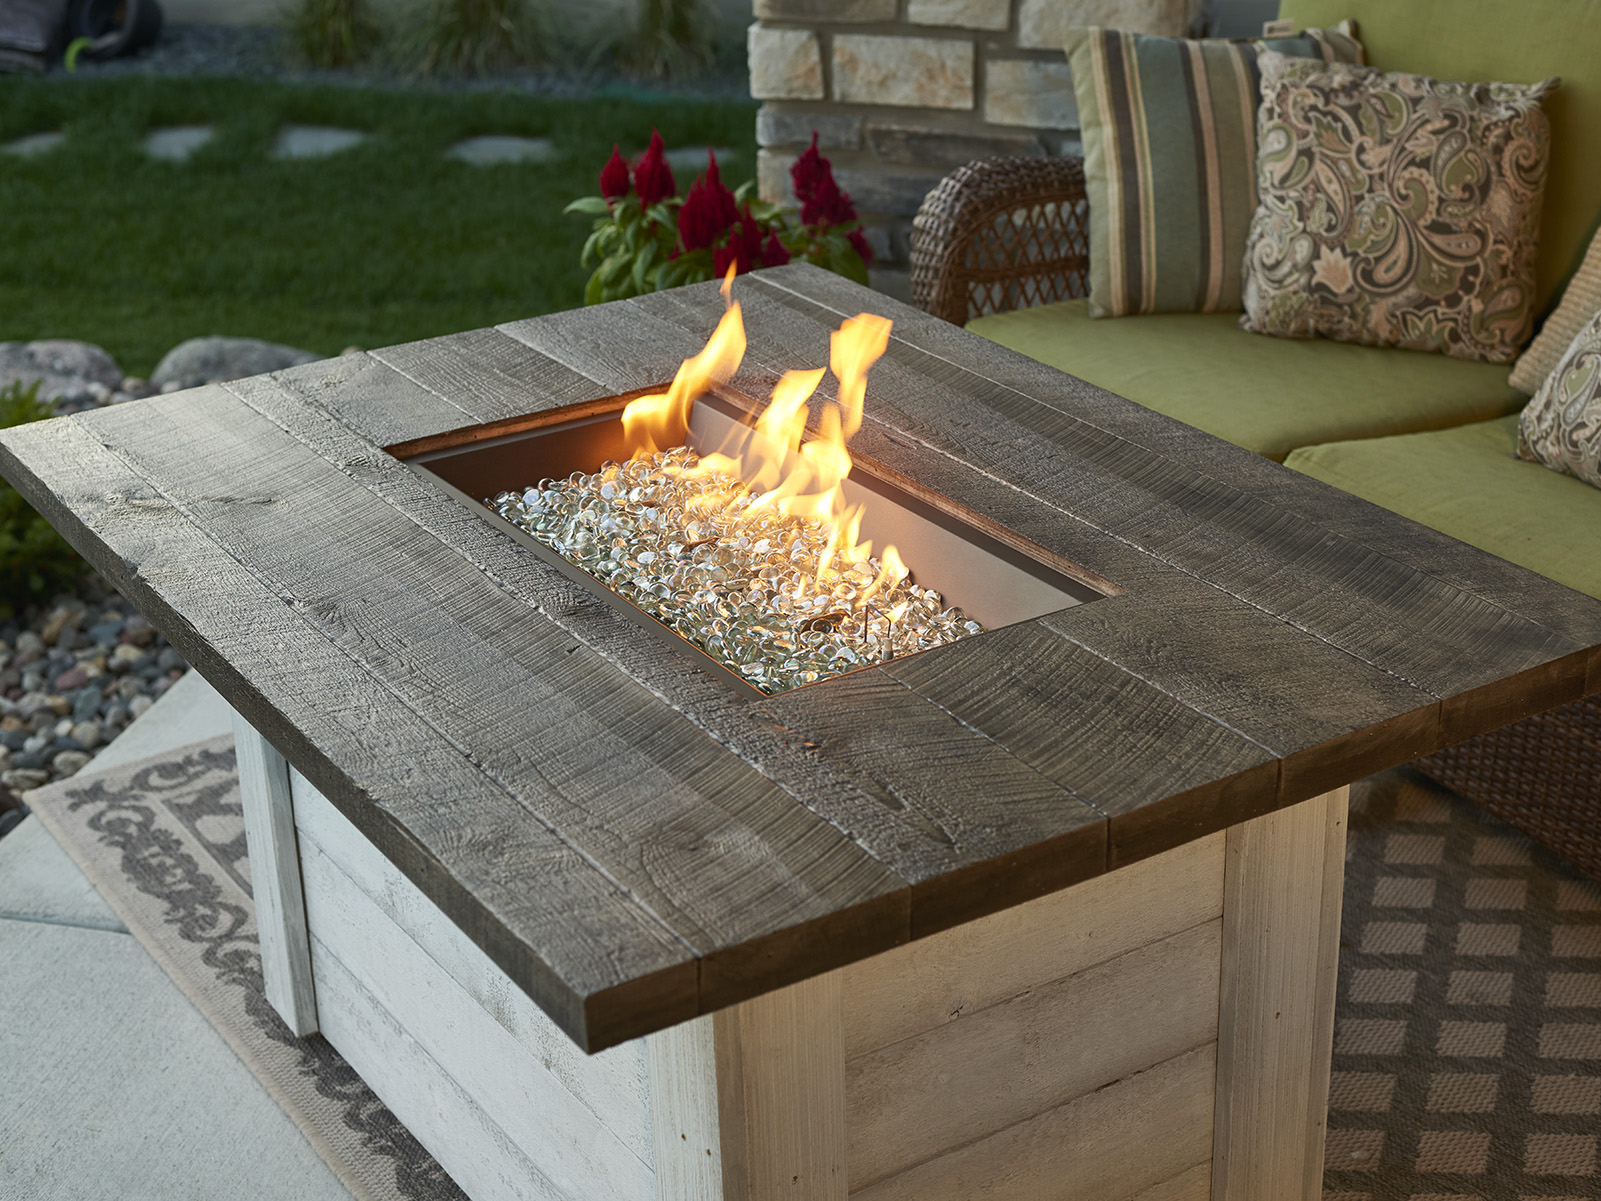
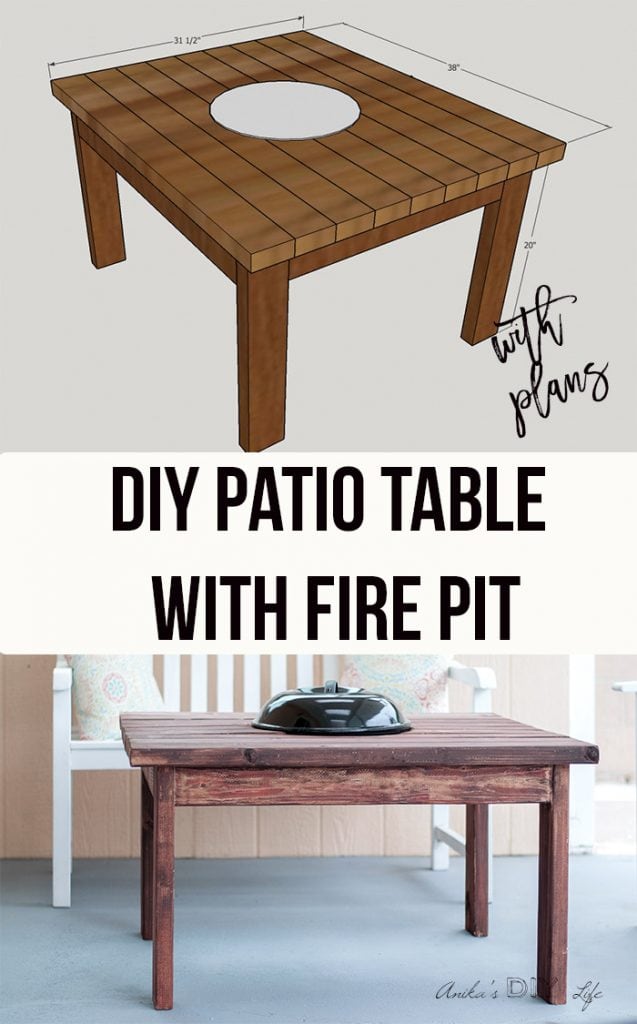
Final product

The finished product should look something like this:
[Image of a DIY adjustable table fire pit].

