
How to build a table fire pit
How to Build a Table Fire Pit

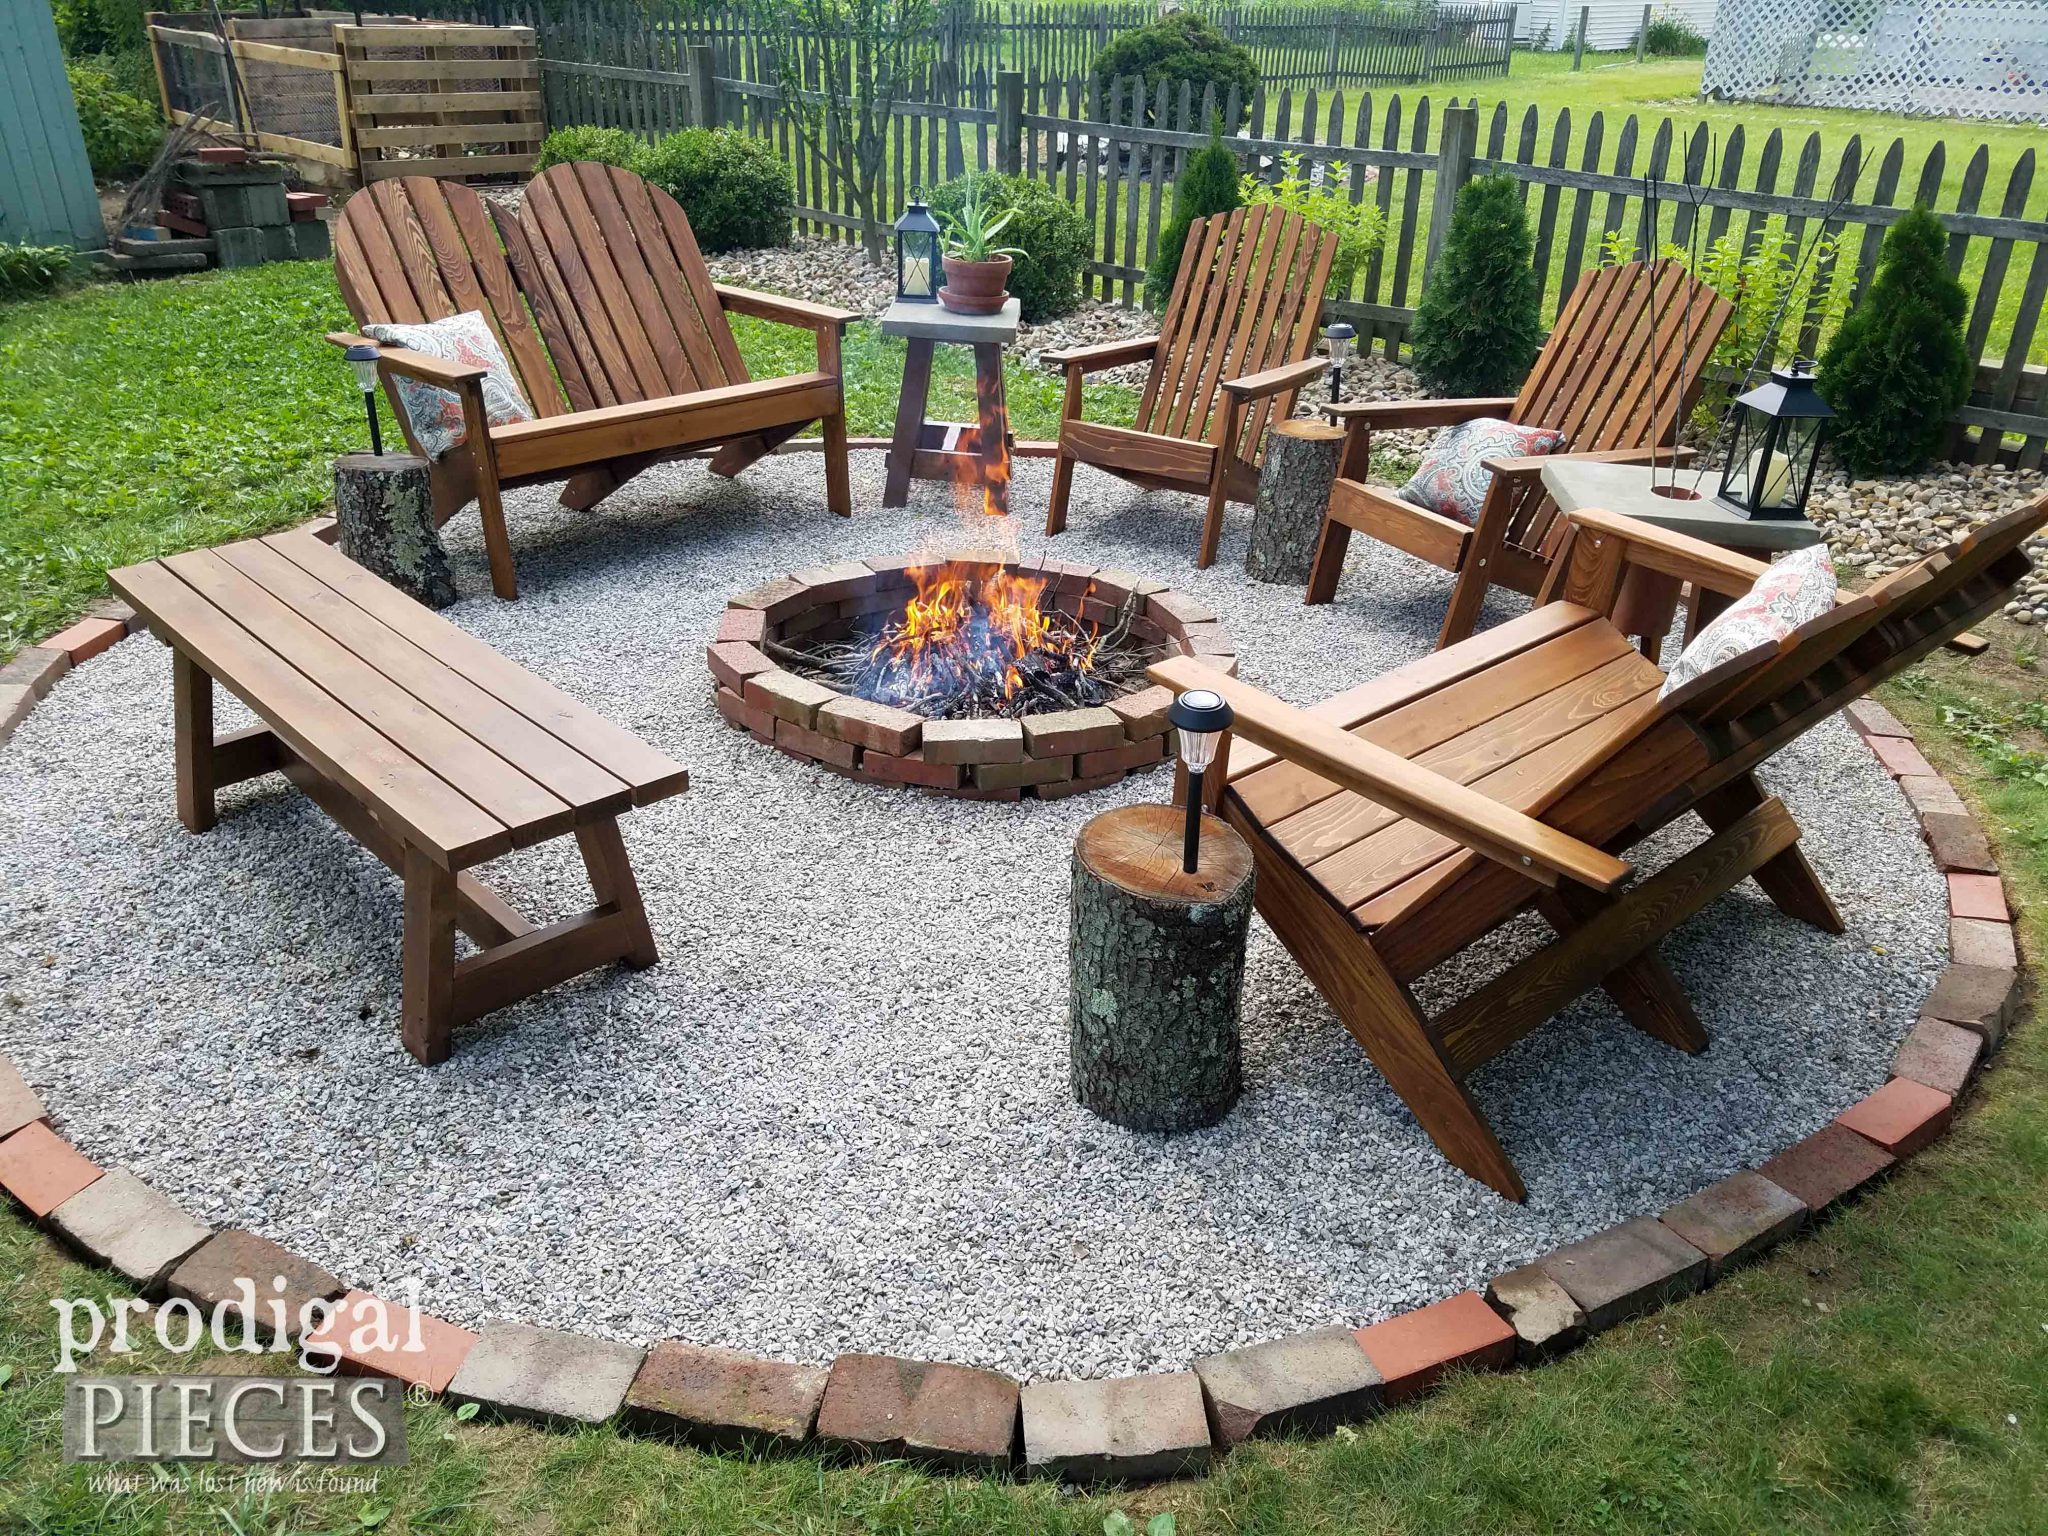
A table fire pit is a great way to enjoy the outdoors while staying warm. It's perfect for entertaining guests, roasting marshmallows, or simply relaxing by the fire.
This guide will show you how to build a table fire pit that is both stylish and functional.
Materials

- 2 - 2x4s (8 feet long)
- 2 - 2x6s (8 feet long)
- 2 - 2x8s (8 feet long)
- 1 - 2x10 (8 feet long)
- 1 - 4x4 (8 feet long)
- 1 - 4x6 (8 feet long)
- 1 - 1/2-inch plywood (24x24 inches)
- 1 - fire pit ring
- 1 - bag of concrete
- 1 - roll of roofing felt
- Wood screws
- Galvanized nails
- Epoxy
- Paint or stain (optional)
Tools
- Saw
- Drill
- Sander
- Measuring tape
- Level
- Pencil
- Safety glasses
- Work gloves

Instructions
- Cut the wood.
Use a saw to cut the following pieces of wood to the following lengths:
:max_bytes(150000):strip_icc()/AdirondackDIYWoodFirepit-593892563df78c537b423510.JPG)
- 2 - 2x4s (24 inches long)
- 2 - 2x6s (24 inches long)
- 2 - 2x8s (24 inches long)
- 1 - 2x10 (24 inches long)
- 1 - 4x4 (24 inches long)
- 1 - 4x6 (24 inches long)
-
1 - 1/2-inch plywood (24x24 inches)
-
Assemble the frame.
Start by assembling the frame of the table fire pit. To do this, attach the 2x4s to the 2x6s using wood screws. The 2x4s should be placed at the top and bottom of the 2x6s, and they should be spaced 24 inches apart.

Next, attach the 2x8s to the 2x6s using wood screws. The 2x8s should be placed in the middle of the 2x6s, and they should be spaced 24 inches apart.
Finally, attach the 4x4 to the front of the frame using wood screws. The 4x4 should be centered on the frame, and it should extend 12 inches past the front of the frame.
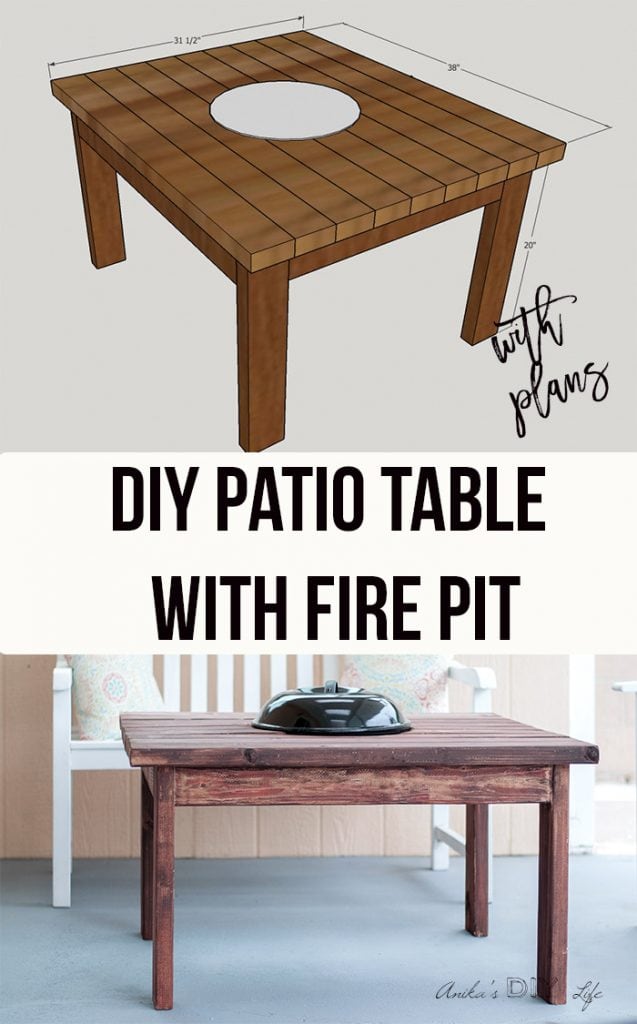
- Attach the plywood to the frame.
Cut a piece of 1/2-inch plywood to the same dimensions as the frame. Then, attach the plywood to the frame using wood screws.
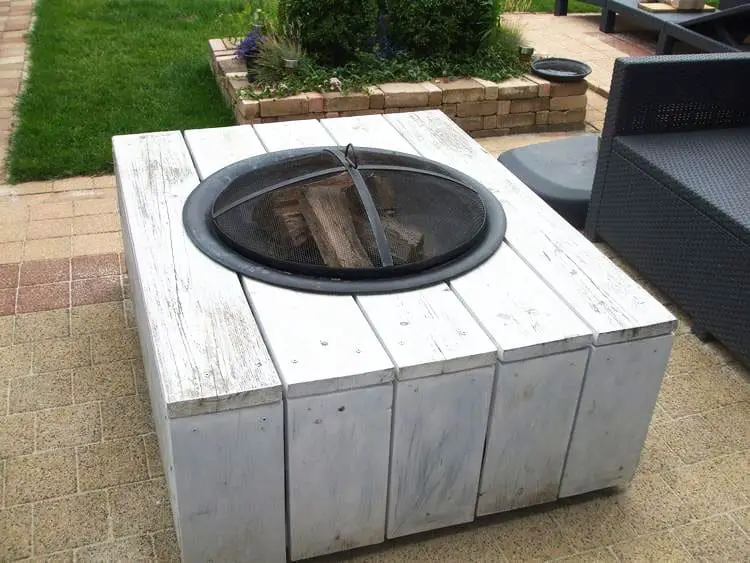
- Install the fire pit ring.
Place the fire pit ring in the center of the plywood. Then, use concrete to secure the fire pit ring to the plywood.

- Install the roofing felt.
Cut a piece of roofing felt to the same dimensions as the plywood. Then, attach the roofing felt to the plywood using galvanized nails.
- Paint or stain the table fire pit.


If desired, you can paint or stain the table fire pit to match your décor.
Tips
- When cutting the wood, make sure to use a sharp saw to get a clean cut.
- When assembling the frame, make sure to use wood screws that are long enough to go through all of the pieces of wood.
- When attaching the plywood to the frame, make sure to use wood screws that are long enough to go through the plywood and into the frame.
- When installing the fire pit ring, make sure to use enough concrete to secure the ring to the plywood.
- When installing the roofing felt, make sure to use enough galvanized nails to secure the felt to the plywood.
- If you are painting or staining the table fire pit, make sure to use a paint or stain that is specifically designed for outdoor use.


Safety

- When building a table fire pit, it is important to take safety precautions.
- Always wear safety glasses and work gloves when working with power tools.
- Make sure the work area is clear of debris before starting.
- Be careful not to burn yourself when working with the fire pit.
- Never leave the fire pit unattended.
Conclusion


A table fire pit is a great way to enjoy the outdoors while staying warm. It's perfect for entertaining guests


How to Build a Table Fire Pit
A table fire pit is a great way to add ambiance and warmth to your outdoor living space. It can be used for entertaining, cooking, or simply relaxing by the fire. With a few simple tools and materials, you can build your own table fire pit in no time.
Materials
- 2x4s (8)
- 2x6s (4)
- Plywood (1 sheet)
- Firebricks (24)
- Mortar
- Sand
- Concrete
- Rebar
- Stakes
- Tarp
- Safety glasses
- Gloves
- Hammer
- Saw
- Level
- Tape measure
- Pencil

Instructions
- Dig the hole. The first step is to dig a hole for the fire pit. The size of the hole will depend on the size of the fire pit you want to build. For a basic fire pit, you will need to dig a hole that is about 4 feet in diameter and 2 feet deep.
- Line the hole with sand. Once you have dug the hole, line it with sand. This will help to prevent the fire from damaging the ground below.
- Build the frame. The next step is to build the frame for the fire pit. To do this, you will need to use 2x4s to create a square or rectangular frame. The frame should be about 4 inches taller than the depth of the hole.
- Attach the plywood. Once you have built the frame, attach the plywood to the top of the frame. The plywood will create the surface of the fire pit.
- Place the firebricks. Now it is time to place the firebricks. The firebricks should be placed in the center of the fire pit, with about 2 inches of space between each brick.
- Pour the mortar. Once you have placed the firebricks, you will need to pour the mortar between the bricks. The mortar will help to hold the bricks together and create a smooth surface for the fire.
- Add the rebar. To help prevent the fire pit from collapsing, you will need to add rebar. The rebar should be placed in the center of the fire pit, with about 2 inches of space between each piece of rebar.
- Pour the concrete. Once you have added the rebar, you will need to pour the concrete. The concrete will help to hold the rebar in place and create a solid foundation for the fire pit.
- Let the concrete cure. The final step is to let the concrete cure. This will take about 24 hours. Once the concrete has cured, you can add your fire pit furniture and enjoy your new fire pit.
Tips
- When choosing a location for your fire pit, make sure it is away from overhanging branches and other combustible materials.
- Be sure to wear safety glasses and gloves when working with firebricks and mortar.
- Use a level to make sure the fire pit is level before you pour the concrete.
- Let the concrete cure completely before using the fire pit.
Safety
Fire pits can be dangerous, so it is important to take precautions to stay safe. Here are a few safety tips:
- Never leave a fire unattended.
- Make sure the fire is completely out before you leave it.
- Do not add flammable materials to the fire.
- Be careful not to spill hot coals.
- Keep children and pets away from the fire pit.

By following these tips, you can enjoy your fire pit safely.
