DIY Birthday Decor: Insta-Worthy & Easy!
DIY Birthday Decor: Insta-Worthy & Easy!
Birthdays are special. They mark another year of life, growth, and unforgettable memories. And what better way to celebrate than with a party that reflects your personality and style? While hiring a professional decorator can be tempting, creating DIY birthday decor allows you to personalize your celebration, save money, and unleash your creativity. This guide will walk you through crafting stunning, Instagram-worthy decorations, all from the comfort of your own home, and without breaking the bank. We'll cover various themes, materials, and techniques to inspire you, regardless of your skill level.
Planning Your Insta-Worthy Birthday Bash: A Step-by-Step Guide
Before diving into the crafting frenzy, effective planning is key to a stress-free and visually appealing celebration. Let's break down the process:
1. Choosing a Theme: The Foundation of Your Decor
The first step is defining your birthday theme. This will guide your color palette, style, and overall aesthetic. Popular choices include:
- Boho Chic: Think earthy tones, macrame, dream catchers, and plenty of greenery.
- Rustic Elegance: Incorporating natural elements like wood, burlap, and flowers, with a touch of sophistication.
- Glamorous Hollywood: Sparkling details, metallic accents, feather boas, and a touch of old-Hollywood glamour.
- Tropical Paradise: Bright colors, lush foliage, pineapples, flamingos, and a vibrant, fun atmosphere.
- Minimalist Modern: Clean lines, neutral colors, geometric shapes, and a focus on simplicity.
- Vintage Retro: Think specific decades (50s, 70s, 80s) with corresponding colors, patterns, and props.
Once you’ve selected your theme, create a mood board. This can be a physical board or a digital Pinterest board, collecting images that represent your vision. This will serve as your guide throughout the decorating process.
2. Defining Your Color Palette: Creating Visual Harmony
Your color palette should complement your theme. Sticking to 2-3 main colors, along with accent colors, will create a cohesive and visually appealing look. Use your mood board as a reference to ensure consistency. Consider using a color wheel to explore harmonious color combinations.
3. Gathering Your Supplies: The DIY Toolkit
Once your theme and color palette are set, gather your necessary materials. This will vary depending on your chosen theme and projects, but some common supplies include:

- Balloons: A birthday staple! Experiment with different sizes, colors, and textures. Consider balloon arches, balloon garlands, or simply cluster balloons in various heights.
- Streamers and Ribbons: These add pops of color and movement. Drape them across walls, ceilings, or use them to create backdrops.
- Paper Lanterns: Available in a variety of colors and sizes, these provide soft, ambient lighting.
- Fabric and Textiles: Use fabrics like burlap, lace, or linen to create table runners, banners, or backdrops.
- Flowers: Fresh or artificial flowers add a touch of elegance and vibrancy. Choose flowers that complement your theme and color scheme.
- Candles: Create a warm and inviting atmosphere with candles of varying heights and styles. Consider scented candles to enhance the ambiance.
- DIY Decorations: This is where your creativity shines! Consider crafting personalized banners, photo booth props, or themed centerpieces.
Remember to check your local craft store for sales and discounts on bulk supplies.
Easy and Impressive DIY Birthday Decor Projects: Unleash Your Creativity

Now for the fun part – let's explore some easy and impressive DIY projects to bring your vision to life:
1. The Majestic Balloon Garland: A Statement Piece
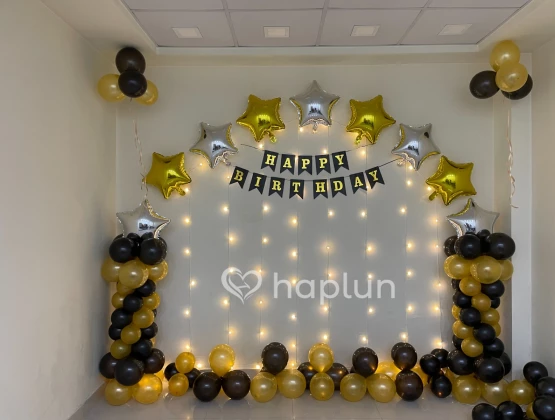
Balloon garlands are a showstopper, instantly elevating the party atmosphere. Here's how to create one:

- Materials: Balloons in various sizes and colors (matching your theme), balloon strip, balloon pump, floral wire or fishing line.
- Process: Inflate balloons to different sizes for a more organic look. Thread balloons onto the balloon strip, alternating sizes and colors. Use floral wire or fishing line to shape and secure the garland. Attach to a wall or backdrop.
2. Personalized Banner: A Touch of Personalization
A personalized banner adds a unique touch and serves as a fantastic photo opportunity.

- Materials: Cardstock or fabric, scissors, string or ribbon, letter stencils (optional), markers or paint.
- Process: Cut out triangles or other shapes from your chosen material. Use stencils or freehand to write the birthday person's name or a celebratory message. String the shapes together to create your banner.
3. Enchanted Paper Lanterns: Adding Soft Lighting
Paper lanterns create a magical atmosphere, especially when combined with fairy lights.

- Materials: Paper lanterns (various sizes and colors), fairy lights, string or ribbon.
- Process: Simply string the fairy lights inside the paper lanterns for a soft, warm glow. Hang them from the ceiling or drape them across walls.
4. Floral Centerpieces: Nature's Elegance
Floral centerpieces add a touch of elegance and sophistication to your table setting.

- Materials: Vases (various heights and shapes), fresh or artificial flowers, greenery, ribbon or twine.
- Process: Arrange flowers and greenery in your vases, creating a visually appealing and balanced arrangement. Add ribbon or twine for an extra touch.
5. DIY Photo Booth Props: Fun and Memorable
A photo booth is a great way to capture fun memories. Create your own props for a personalized touch:

- Materials: Cardstock, wooden dowels, glue, markers, glitter, and other embellishments.
- Process: Cut out fun shapes (mustaches, hats, glasses) from cardstock. Attach them to wooden dowels with glue. Add embellishments for extra flair.
6. Themed Backdrop: Setting the Scene
A themed backdrop sets the tone for your party and provides a stunning background for photos.

- Materials: Fabric (depending on your theme), string or ribbon, clips or pins, fairy lights (optional).
- Process: Drape the fabric over a wall or backdrop stand. Use string or ribbon to create folds or patterns. Add fairy lights for extra ambiance.
Beyond the Basics: Advanced DIY Decor Ideas
For the more experienced crafters, consider these advanced projects:
- Macrame Wall Hanging: A bohemian touch, perfect for a boho-chic theme.
- Custom-Painted Tablecloth: Add a unique design to a plain tablecloth using fabric paint.
- DIY Confetti Balloons: Fill clear balloons with colorful confetti for a festive touch.
- Geometric Paper Garland: Create a modern and sophisticated garland using geometric shapes.
- Personalized Cake Topper: Create a unique cake topper that reflects the birthday person’s personality.
Tips for Success: Creating an Unforgettable Celebration
- Start Early: Don't leave your DIY projects to the last minute. Start planning and gathering supplies well in advance.
- Embrace Imperfection: DIY projects don't have to be perfect. Embrace the imperfections and unique character of handmade decorations.
- Utilize Pinterest: Pinterest is a treasure trove of DIY inspiration. Search for ideas related to your theme and color palette.
- Personalize It: The most important aspect of DIY decor is personalization. Add elements that reflect the birthday person's personality and interests.
- Have Fun!: Most importantly, enjoy the process! DIY decorating should be a fun and creative experience.

By following these steps and unleashing your creativity, you can create a stunning and memorable birthday celebration that is both Instagram-worthy and uniquely yours. So grab your supplies, put on some music, and let the crafting begin! Remember to share your creations with us – we'd love to see your DIY birthday decor masterpieces!
DIY Birthday Bliss: Aesthetic Decor on a Budget
Birthdays are a time for celebration, joy, and creating unforgettable memories. While professional party planners can offer stunning decorations, the true magic often lies in the personal touch. This is where DIY birthday decor steps in, allowing you to craft a beautiful and unique celebration without breaking the bank. This comprehensive guide will walk you through creating an aesthetically pleasing and budget-friendly birthday party, focusing on DIY projects that are both achievable and visually impactful.
I. Planning Your Aesthetic: Defining Your Vibe
Before diving into crafting, you need a clear vision. What aesthetic are you aiming for? Do you envision a rustic bohemian gathering, a chic minimalist party, a vibrant tropical fiesta, or a whimsical fairytale celebration? The chosen aesthetic will dictate your colour palette, materials, and overall design direction.
Consider these key aspects when planning:
-
Colour Palette: Choose 2-3 primary colours and 1-2 accent colours. This will ensure visual harmony and prevent a chaotic look. Use colour wheels and online resources to find complementary and analogous colour schemes.
-
Theme: A theme can provide a cohesive structure. Think about the birthday person's interests – travel, nature, movies, books, etc. – and translate them into décor elements.
-
Style: Research different aesthetic styles (Bohemian, Minimalist, Rustic, Glamour, Vintage, etc.) to find one that resonates with you and the birthday person's personality. Pinterest and Instagram are fantastic sources of inspiration.
-
Budget: Set a realistic budget before you start. This will help you prioritize projects and make informed decisions about materials. Remember, DIY doesn't always mean cheap; it means cost-effective.
II. DIY Decor Projects: Creating the Magic on a Shoestring
Now that you have a clear vision, let's explore some DIY projects that can transform your space into a birthday haven:
A. Backdrops and Banners: Setting the Stage
A visually captivating backdrop is crucial for setting the tone of your party. Here are a few affordable and impactful options:
-
Balloon Garland: This classic is surprisingly easy to DIY. You'll need balloons in your chosen colours, a balloon pump (highly recommended!), balloon adhesive strips or dots, and a fishing line or string. Create a gradient effect by using different shades of the same colour, or mix and match for a more vibrant look. Experiment with adding greenery or ribbons for extra texture.
-
Fabric Backdrop: Use a large piece of fabric (muslin, linen, or even an old sheet) as a backdrop. Drape it elegantly, or add fairy lights or paper flowers for added flair. The fabric can be dyed or painted to match your chosen aesthetic.
-
Paper Banner: Create a personalized banner using colourful cardstock or scrapbook paper. Cut out shapes (circles, triangles, hearts) or use letter stencils to create a personalized message. String them together with twine or ribbon.
-
Floral Backdrop: If you're celebrating in a garden, utilize existing greenery. Supplement with inexpensive flowers from your local market or create paper flowers for a unique touch.
B. Table Decor: Elevate the Dining Experience
The dining table is the heart of the celebration. Make it memorable with these DIY projects:
-
DIY Table Runner: Use fabric scraps, burlap, or even repurposed materials like maps or sheet music to create a unique table runner. You can sew it, glue it, or simply arrange the material strategically.
-
Personalized Place Cards: Use small pieces of cardstock or wood slices to create personalized place cards. You can hand-write names, use calligraphy, or add small illustrations.
-
Mason Jar Centerpieces: Mason jars are versatile and inexpensive. Fill them with flowers, candles, or even colourful candies for charming centerpieces.
-
DIY Napkin Rings: Create napkin rings from twine, ribbon, or even dried flowers for a rustic touch.
C. Lighting: Setting the Mood
Lighting can significantly impact the atmosphere. Here are budget-friendly ideas:

-
Fairy Lights: Fairy lights are magical and versatile. Drape them across walls, furniture, or use them to illuminate your backdrop.
-
Candlelight: Candles create a warm and inviting ambiance. Use a variety of candle sizes and holders to add visual interest. Be mindful of safety precautions and never leave candles unattended.
-
DIY Lanterns: Create lanterns from mason jars, paper bags, or even tin cans. Decorate them with paint, stencils, or cut-outs.

D. Other DIY Accents: Adding Personal Touches
To truly personalize your party, consider these additional DIY accents:
- Photo Booth: Create a fun photo booth area using a backdrop and props like hats, glasses, and funny signs.

-
DIY Confetti: Make your own confetti from colourful paper scraps or using a paper punch.
-
Personalized Cake Topper: Create a custom cake topper using cardstock, wood, or even polymer clay.
-
Gift Bags: Instead of purchasing expensive gift bags, use simple brown paper bags and personalize them with stamps, paint, or stickers.

III. Sourcing Materials: Finding Affordable Treasures
The key to a budget-friendly DIY project is sourcing materials creatively. Here are some tips:
- Repurpose and Recycle: Don't underestimate the power of repurposing existing items. Old jars, fabric scraps, and cardboard boxes can be transformed into stunning decorations.

-
Thrift Stores and Flea Markets: These are treasure troves of affordable and unique materials. You can find vintage fabrics, glassware, and other decorative items at incredibly low prices.
-
Dollar Stores: Dollar stores are surprisingly good sources for basic craft supplies like paper, ribbon, and balloons.
-
Nature's Bounty: Incorporate natural elements like leaves, twigs, and flowers to add a touch of organic beauty to your décor.

IV. Putting it All Together: Bringing Your Vision to Life
Once you've gathered your materials and created your DIY decorations, it's time to bring your vision to life. Here are some tips for a successful execution:
- Plan Your Layout: Before you start decorating, sketch out a plan of how you want to arrange your decorations. This will help ensure a cohesive and visually pleasing result.

-
Start Early: Don't wait until the last minute to start your DIY projects. Allow yourself ample time to complete each project without feeling rushed.
-
Embrace Imperfection: DIY is about creativity and personal expression. Don't strive for perfection; embrace imperfections and celebrate your unique style.
-
Have Fun! Remember that the most important aspect of a birthday party is celebrating with loved ones. Enjoy the process of creating your DIY decorations and cherish the memories you make.

V. Beyond the Decorations: Creating a Memorable Experience
While aesthetic decorations are crucial for setting the mood, remember that the true heart of a birthday celebration lies in the memories created. Consider these elements to elevate your party beyond just the visual aspects:
- Personalized Touches: Incorporate elements that reflect the birthday person's personality and interests. This could be a curated playlist, a slideshow of photos, or a collection of their favorite things.
-
Interactive Activities: Plan some fun activities to keep your guests engaged. This could be a game, a craft session, or a collaborative project.
-
Delicious Food: Don't underestimate the importance of delicious food. Choose dishes that align with your chosen aesthetic and the preferences of your guests.
-
Meaningful Moments: Create opportunities for meaningful interactions among your guests. Encourage storytelling, sharing memories, and expressing appreciation.

By combining thoughtful planning, creative DIY projects, and a focus on creating a memorable experience, you can throw a stunning birthday celebration that is both aesthetically pleasing and budget-friendly. Embrace the joy of DIY, and let your creativity shine! Happy decorating, and Happy Birthday!

