
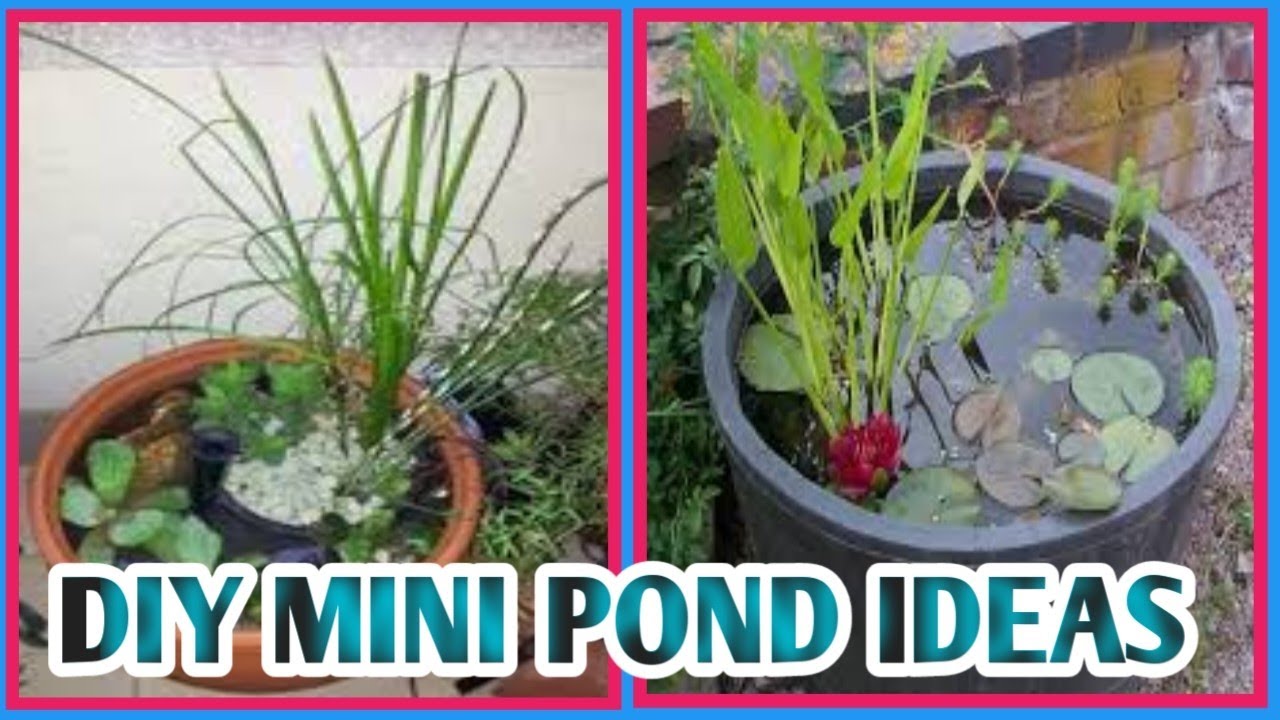
DIY Mini Pond Pots: Tiny Gardens, Big Impact!
DIY Mini Pond Pots: Tiny Gardens, Big Impact!
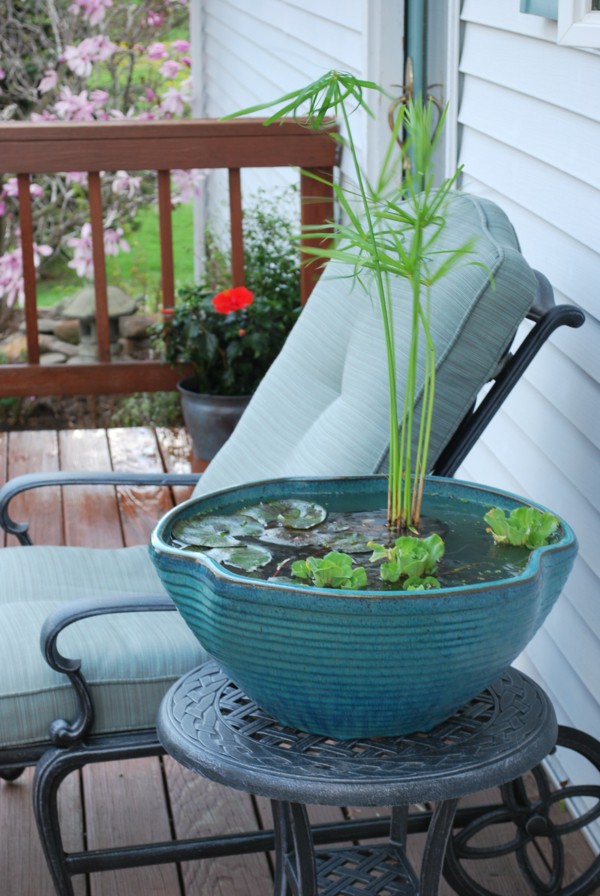
Creating a tranquil oasis, no matter the size of your outdoor space, is a dream shared by many. While a full-scale pond might be impractical for some, the charm and serenity of aquatic life can be perfectly captured in miniature with DIY mini pond pots. These enchanting little ecosystems are not only aesthetically pleasing but also surprisingly easy to create, offering a rewarding project for gardeners of all skill levels. This comprehensive guide will walk you through the entire process, from choosing the right containers to selecting the perfect plants and ensuring the long-term health of your miniature aquatic world.
Choosing Your Vessel: The Foundation of Your Mini Pond
The first step in building your DIY mini pond pot is selecting the perfect container. The ideal vessel should be:
-
Waterproof: This is paramount. Choose a material that won't leak, such as glazed ceramic, plastic, or even a repurposed, properly sealed metal container. Avoid porous materials like terracotta, unless you plan to thoroughly seal them with a waterproof sealant designed for outdoor use. Remember to test for leaks before planting!
-
Sufficient Size: While "mini" implies small, your pot needs adequate space for your chosen plants and potentially small aquatic life. Aim for at least 12 inches in diameter and 12 inches deep for a healthy ecosystem. Smaller pots can work, but require more careful planning and maintenance.
-
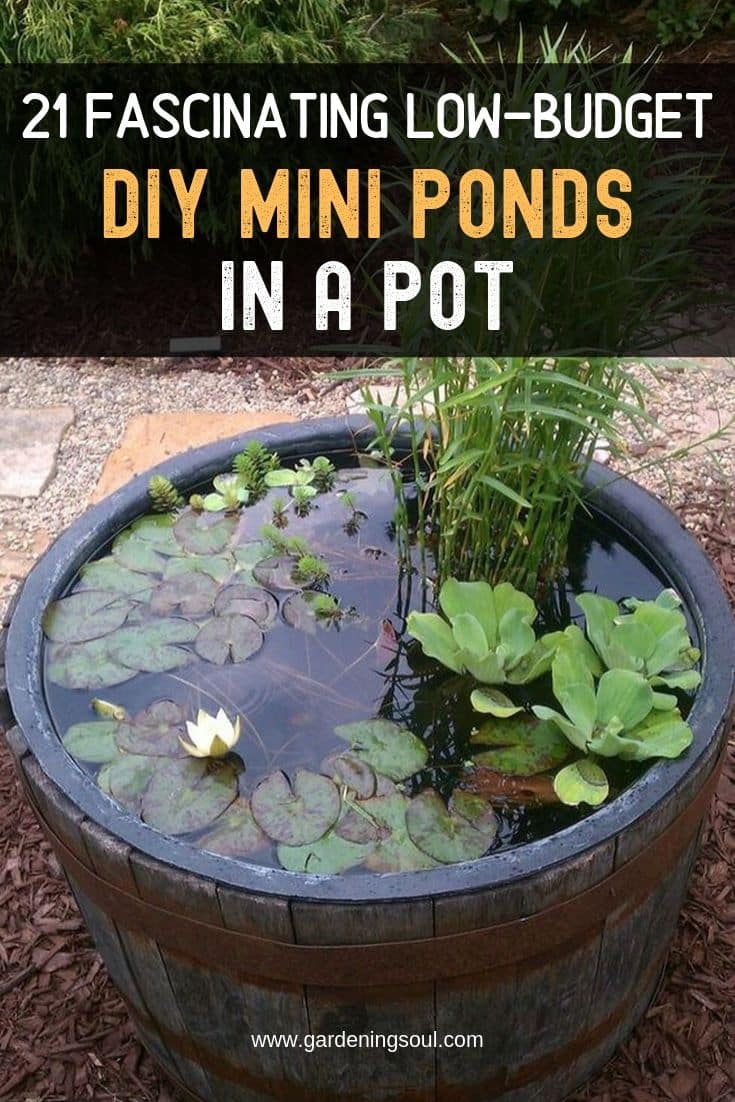
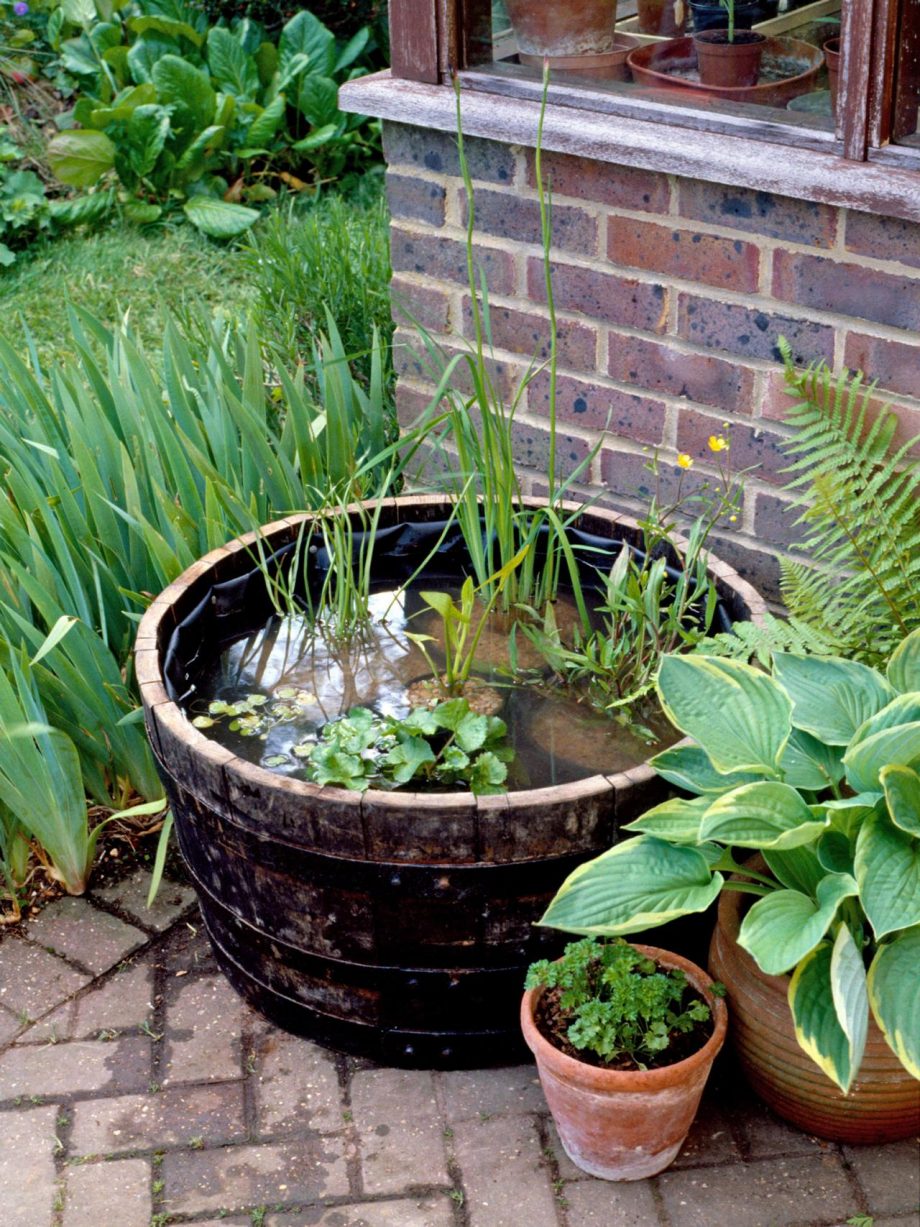
Aesthetically Pleasing: Your mini pond will be a focal point, so choose a container that complements your existing garden décor. Consider the shape, color, and texture of the pot to ensure it fits seamlessly into your outdoor space. Unusual containers, such as old sinks or repurposed buckets, can add unique character.

- Drainage (Considered but not essential): While a traditional pond doesn't have drainage, a mini pond pot can benefit from a small drainage hole. This aids in preventing overwatering and potential root rot, especially if you live in an area with high rainfall. If you opt for drainage, use a layer of gravel at the bottom to ensure proper water flow.
Layering for Success: Creating the Aquatic Environment
Creating the right environment within your chosen container is crucial for the long-term health of your mini pond. This involves careful layering of materials to mimic a natural pond ecosystem:

-
Drainage Layer (Optional): If using a pot with drainage, begin with a layer of gravel or broken pottery shards at the bottom. This ensures water drains freely while providing structural support.
-
Waterproof Liner (If Needed): For porous containers, a waterproof liner is essential. Pond liner, commonly used in larger ponds, can be cut to fit your container perfectly. Ensure there are no gaps or holes in the liner, sealing any imperfections with aquarium sealant.
-
Substratum Layer: Next, add a layer of aquatic soil or pond substrate. This provides nutrients for your aquatic plants. Avoid using regular garden soil, as it can cloud the water and introduce unwanted substances. A depth of 2-3 inches is usually sufficient.
-
Planting Layer: Carefully plant your chosen aquatic plants. The placement will depend on their specific needs, but generally, taller plants should be placed towards the back or sides, while smaller plants can be placed in the front. Use gentle pressure to plant the roots securely in the substrate.
-
Top Layer: The final layer is the water itself. Slowly fill the container with water, allowing the substrate to settle. Allow the water to sit for a few days before adding any aquatic life. This allows the chlorine to dissipate if using tap water.
Choosing the Right Plants: The Heart of Your Mini Pond

The selection of plants is crucial for the success of your DIY mini pond pot. Consider these factors:
-
Size: Choose plants that are appropriately sized for your container. Overgrown plants will quickly overwhelm the space.
-
Light Requirements: Match the plants to the amount of sunlight your chosen location receives. Some plants thrive in full sun, while others prefer shade.

-
Water Depth: Different aquatic plants require different water depths. Choose plants suitable for the depth of your mini pond.
-
Oxygenation: Include oxygenating plants to help maintain a healthy water balance. These plants, such as Elodea or Hornwort, release oxygen into the water and prevent stagnation.
Popular choices for mini pond pots include:

- Water Lilies (dwarf varieties): These add beautiful blooms and shade to the surface.
- Marginal Plants: These plants thrive at the edges of the water, such as Watercress, Pickerelweed, or Iris.
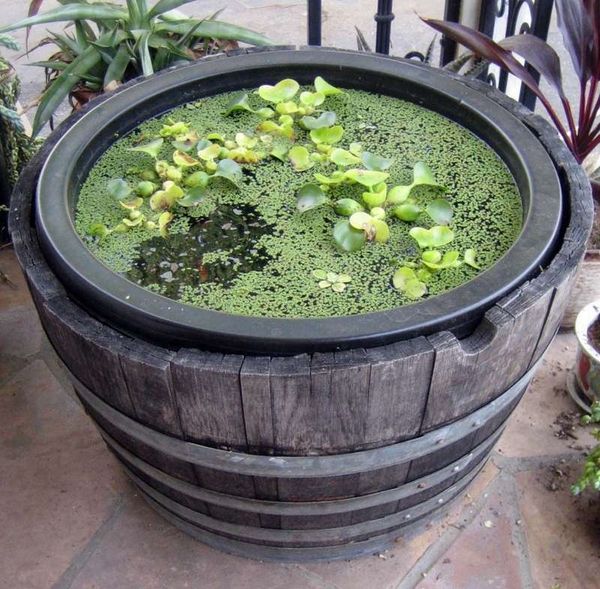
- Floating Plants: These plants float on the surface, such as Duckweed or Water Hyacinth (be mindful of potential overgrowth).
- Oxygenating Plants: Elodea, Hornwort, and Anacharis are excellent choices.
Adding Aquatic Life (Optional): Enhancing Your Ecosystem
Once your plants are established (after about 2-3 weeks), you can consider adding aquatic life. This adds another layer of interest and movement to your mini pond. However, it's crucial to choose species appropriate for the size of your container and carefully research their requirements.
Popular choices include:
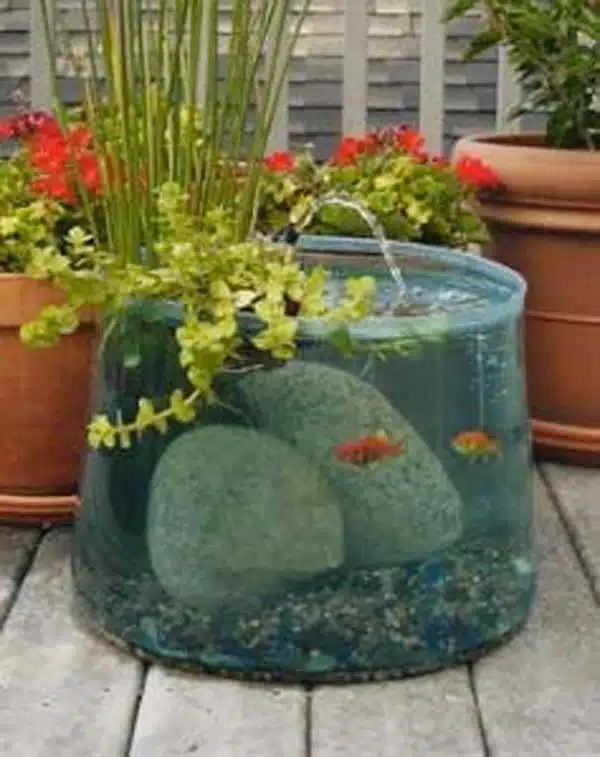
- Small fish: Tiny species like Mosquito Fish (Gambusia affinis) can help control mosquito larvae. However, research the specific needs of any fish before introducing them. Overcrowding is a significant problem in mini ponds.
- Amphibians: Small frogs or newts could add a unique charm, but only if the container is large enough and the species is appropriate for your climate.
Maintenance: Ensuring Your Mini Pond Thrives
While mini pond pots require less maintenance than larger ponds, regular care is essential to prevent problems like algae blooms and stagnant water. Here’s a maintenance schedule:
- Regular Water Level Checks: Top up the water as needed, especially during dry spells.
- Algae Control: Algae can be controlled by ensuring adequate sunlight, proper plant density, and occasionally using a small amount of aquarium-safe algaecide.
- Plant Trimming: Regularly trim overgrown plants to prevent them from overwhelming the space.
- Water Changes: Partial water changes (about 25%) every few months will help maintain water quality.
- Cleaning: Remove any dead leaves or debris from the pond to prevent decomposition and maintain water clarity.
- Winter Protection (Depending on Climate): In colder climates, you may need to take steps to protect your mini pond from freezing temperatures, such as moving it to a sheltered location or covering it with insulation.
Beyond the Basics: Creative Enhancements

Your DIY mini pond pot is a canvas for your creativity. Consider these additions to personalize your miniature oasis:
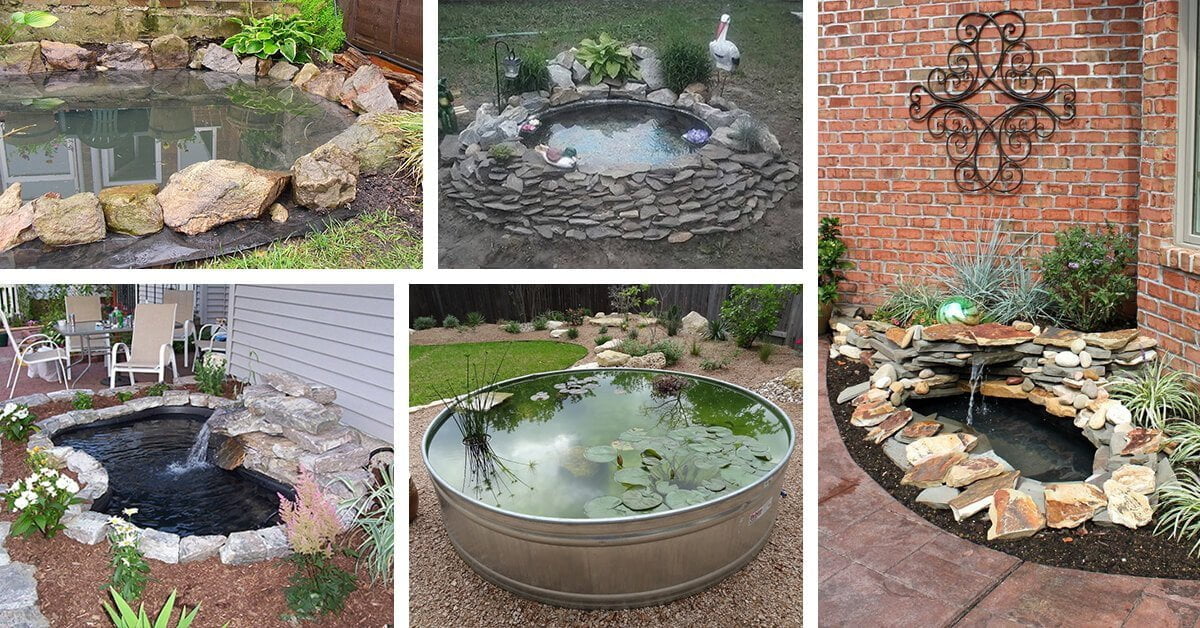
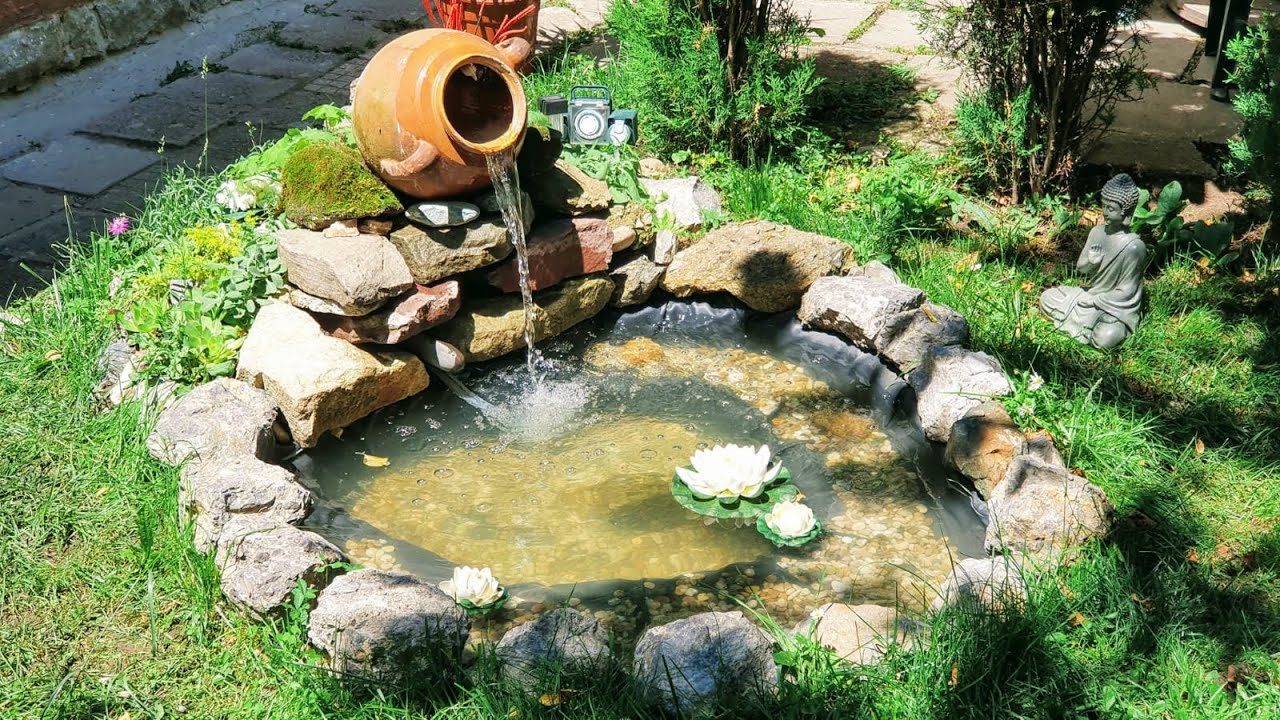
- Decorative Stones and Gravel: Add aesthetically pleasing stones and gravel around the edges of the pond.
- Small Water Features: A miniature waterfall or fountain can add a unique touch, but ensure the pump is appropriately sized for your container.
- Lighting: Submersible LED lights can create a magical ambiance, especially at night.
Conclusion: A Little Oasis, A Big Reward
Creating a DIY mini pond pot is a rewarding project that brings the beauty and tranquility of nature to your doorstep. By following these guidelines and letting your creativity guide you, you can cultivate a thriving, miniature ecosystem that enhances your outdoor space and brings joy for years to come. Remember that patience and attention to detail are key to success. So, get started on your own miniature aquatic adventure – the impact might surprise you!
DIY Mini Pond Pots: Tiny Oasis!
Creating a tranquil haven in your garden, even with limited space, is entirely achievable with the charm of DIY mini pond pots. These miniature ecosystems offer a delightful blend of aesthetics and nature's serenity, all within the confines of a container. Whether you're a seasoned gardener or a complete novice, this comprehensive guide will equip you with the knowledge and inspiration to build your own miniature aquatic paradise.
Planning Your Mini Pond Paradise: Choosing the Right Pot and Location
Before diving into the construction process, careful planning is paramount. The success of your mini pond hinges on selecting the appropriate pot and a suitable location.
Selecting the Perfect Pot: Material Matters
The choice of pot material significantly influences the longevity and functionality of your mini pond. Consider these popular options:
-
Terracotta Pots: These classic pots are porous, allowing for natural evaporation and preventing waterlogging. Their earthen tones add a rustic charm to any setting. However, their porosity also means they'll require more frequent watering.
-
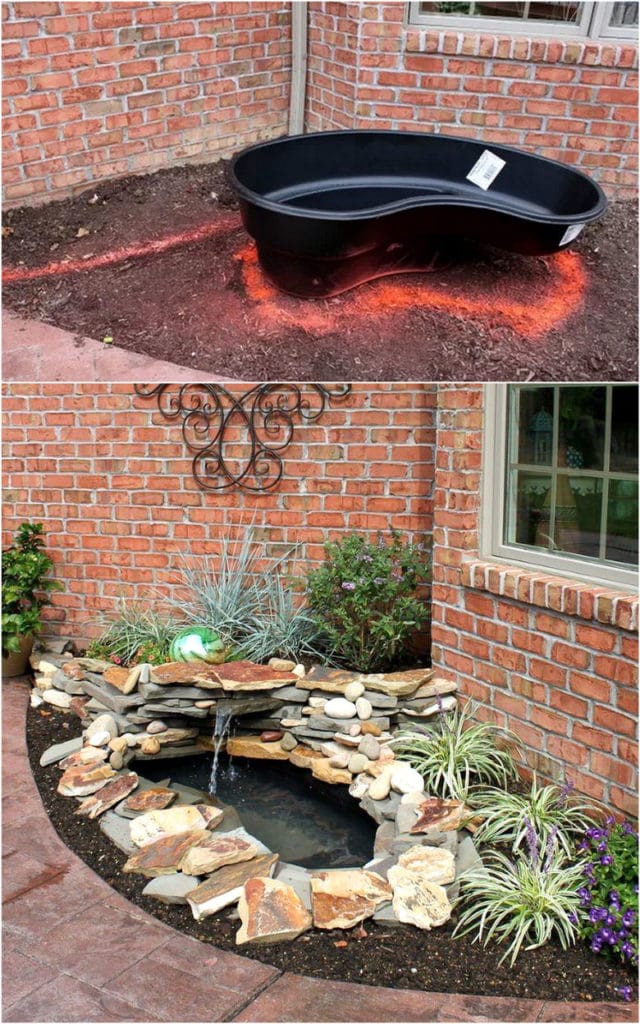
Plastic Pots: Plastic offers durability and affordability. They are non-porous, requiring careful attention to water levels to avoid overwatering. Black plastic pots are particularly beneficial as they absorb and retain heat, creating a warmer environment for aquatic life.
-
Glazed Ceramic Pots: These aesthetically pleasing pots are non-porous, offering a sleek and modern look. However, the lack of porosity necessitates careful monitoring of water levels to prevent stagnation.
-
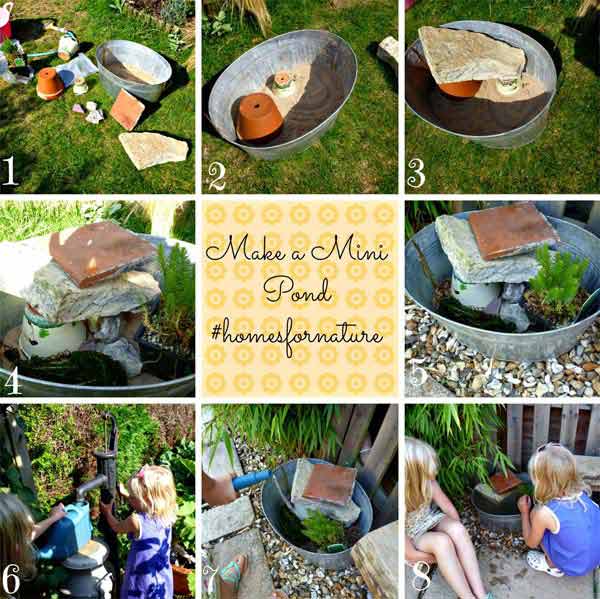
Metal Pots (Zinc, Galvanized Steel): While visually striking, these require careful consideration. Ensure the metal is treated to prevent corrosion and leaching of harmful substances into the water. This option might need additional waterproofing measures.
Regardless of your material choice, the pot's size and shape will impact your pond's capacity and aesthetic appeal. A larger pot allows for a more diverse aquatic ecosystem, while a smaller pot is easier to manage. The shape can influence the visual appeal and the design possibilities within the pond.
Finding the Ideal Location: Sun, Shade, and Accessibility
The location of your mini pond pot is crucial for the health of your aquatic plants and any inhabitants. Consider these factors:
-
Sunlight: Most aquatic plants require at least four to six hours of sunlight daily. Choose a spot that receives ample sunlight, but avoid direct, scorching afternoon sun, which can overheat the water.
-
Shade: Some plants thrive in partial shade, particularly during the hottest parts of the day. Consider the specific plants you intend to include when selecting a location.
-
Accessibility: Choose a location that allows for easy access for maintenance tasks such as cleaning, topping up water, and adding or removing plants.
Assembling Your Mini Pond: Layers and Materials
Building your mini pond is a layered process. Each layer contributes to the overall health and function of the ecosystem.
Layer 1: The Base Layer – Drainage and Protection
The base layer is essential for preventing waterlogging and protecting the pot from potential damage. You can use several materials:
-
Gravel: A layer of small gravel at the bottom provides drainage and prevents the soil from clogging the drainage holes (if your pot has them).
-
Landscape Fabric: Placing landscape fabric on top of the gravel prevents soil from mixing with the gravel and creating a muddy mess.
Layer 2: The Soil Layer – A Foundation for Growth
The soil layer supports the growth of your aquatic plants. Use a specialized aquatic plant soil that is specifically designed for underwater growth. Avoid using regular garden soil as it can become compacted and anaerobic, harming plant roots. The depth of this layer will depend on the plants you choose.
Layer 3: The Planting Layer – Choosing Your Aquatic Companions
The selection of plants is crucial for the visual appeal and health of your mini pond. Choose a mix of oxygenating plants (like hornwort or Anacharis) and decorative plants (like water lilies or parrot's feather). Oxygenating plants are vital for maintaining water quality, while decorative plants add visual interest.
When planting, gently place the plants into their designated areas within the soil layer. Avoid overcrowding, ensuring each plant has enough space to grow.
Layer 4: The Water Layer – The Heart of Your Oasis
Once your plants are in place, carefully fill the pot with water. Use rainwater or dechlorinated tap water. Chlorine and other chemicals in tap water can be harmful to aquatic life. Allow the water to settle for a few days before adding any fish or other creatures.

Adding Aquatic Life (Optional)
If you wish to add aquatic life to your mini pond, carefully select species that are appropriate for the size of your container and the water temperature. Overstocking can lead to poor water quality and stress for your aquatic inhabitants. Research thoroughly before adding any fish or other creatures. Small, hardy fish like mosquito fish are often suitable for mini ponds.
Maintaining Your Mini Pond Oasis

Regular maintenance is vital to keep your mini pond thriving. This includes:
-
Water Level Maintenance: Check the water level regularly and top it up as needed due to evaporation.
-
Water Changes: Partial water changes (replacing a portion of the water) every few weeks will help to maintain water quality and remove accumulated debris.
-
Algae Control: Algae is a common occurrence in ponds. Regular cleaning and maintaining a balanced ecosystem will help to keep algae under control.
-
Plant Trimming: Trim back overgrown plants as needed to prevent overcrowding and maintain the aesthetic appeal of your pond.
-
Cleaning: Remove any dead leaves or debris that accumulate in the pond.
Creative Variations and Enhancements
Once you've mastered the basics, consider these creative variations:
- Themed Mini Ponds: Create a specific theme for your mini pond, such as a Zen garden, a tropical paradise, or a woodland scene.
-
Adding Decorative Elements: Incorporate rocks, pebbles, small figurines, or even miniature bridges to enhance the visual appeal of your pond.
-
Multiple Mini Ponds: Create a collection of mini ponds with varying themes and plant selections.
-
Container Selection: Experiment with different container types, including old teacups, repurposed buckets, or even hollowed-out logs.

- Lighting: Add subtle lighting to your mini pond to create a magical ambiance, particularly in the evening.
Troubleshooting Common Problems
- Cloudy Water: Cloudy water often indicates excessive algae growth or decomposition of organic matter. Address the underlying cause by performing a partial water change, removing excess debris, and ensuring proper plant balance.
-
Dead Plants: Dead plants often signify inadequate sunlight, nutrient deficiencies, or overwatering. Adjust the location, amend the soil, or adjust your watering schedule.
-
Fish Disease: If your fish display signs of disease, quarantine them immediately and treat them accordingly.
-
Algae Blooms: Excessive algae growth can be caused by excessive nutrients in the water. Regular cleaning and maintaining a balanced ecosystem can help mitigate algae blooms.
By following these guidelines and exercising patience, you can create a beautiful and thriving DIY mini pond pot, bringing a touch of natural tranquility to your home or garden. Remember to adapt the instructions to your specific needs and creativity, embracing the joy of experimenting with different plant combinations and decorative elements to achieve your unique mini oasis. Remember to always research the specific needs of any plants or animals you choose to include in your miniature ecosystem for optimal success. The process of creating a mini pond is as rewarding as enjoying its beauty, providing a calming space and a connection to the natural world, even in the smallest of settings.


