
DIY Potting Bench: Grow Your Skills!
DIY Potting Bench: Grow Your Skills!
Building your own potting bench is more than just a weekend project; it's a journey into DIY mastery, a testament to your resourcefulness, and a significant upgrade to your gardening experience. This comprehensive guide will walk you through every step, from planning and design to construction and finishing, equipping you with the knowledge to craft a beautiful and functional potting bench tailored to your needs and style. We'll delve into different design options, material choices, and essential tools, ensuring even novice DIYers can confidently tackle this rewarding endeavor.
Part 1: Planning and Design – Laying the Foundation for Success
Before you even pick up a saw, meticulous planning is crucial for a successful DIY potting bench project. This phase determines the final product's functionality, aesthetics, and overall success. Let's break down the key considerations:

1. Defining Your Needs and Style:
- Size and Space: Measure your available space carefully. Consider the size of your pots, tools, and other gardening essentials. A small, compact bench might suit a balcony garden, while a larger, more elaborate structure is ideal for a spacious backyard. Think about potential ergonomics; will the height be comfortable for prolonged use?
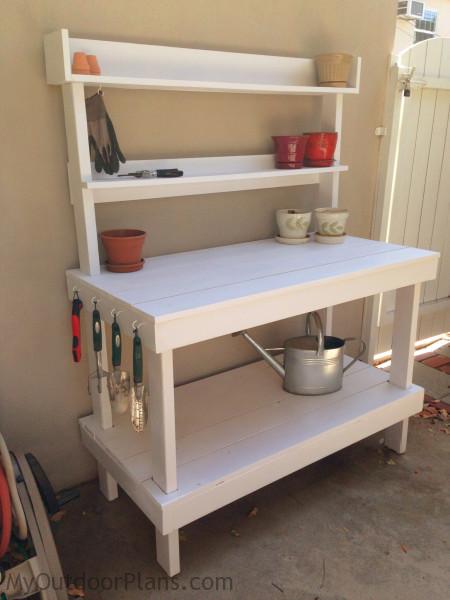
- Functionality: What features are essential for you? Do you need ample storage for potting soil, seeds, and fertilizers? Would integrated shelves or drawers be beneficial? Consider incorporating features like a built-in sink or hose hook for added convenience.
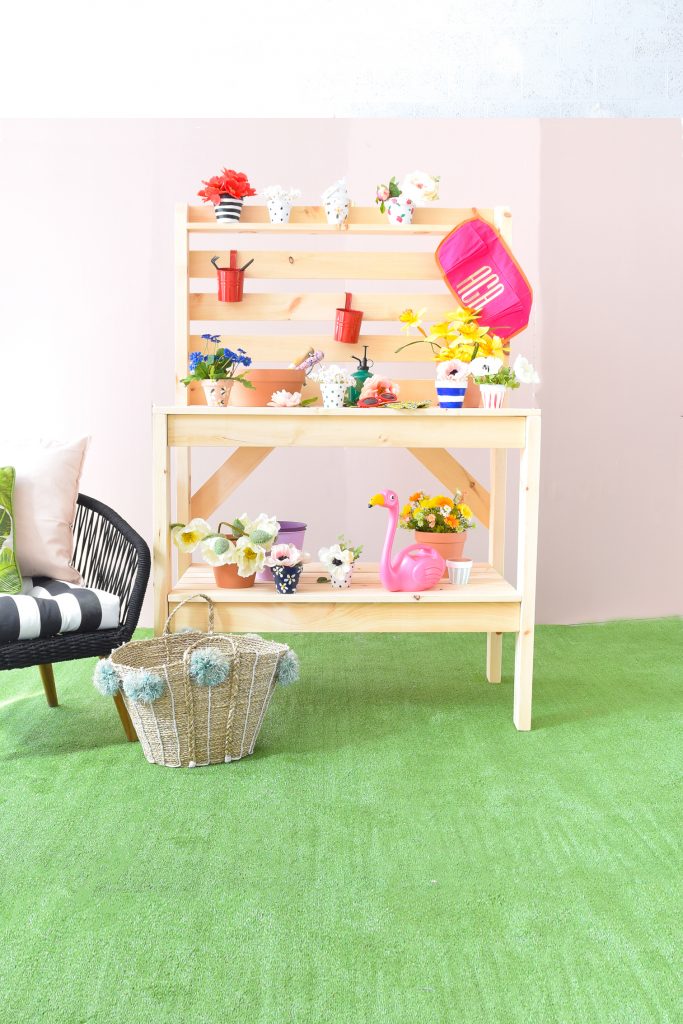
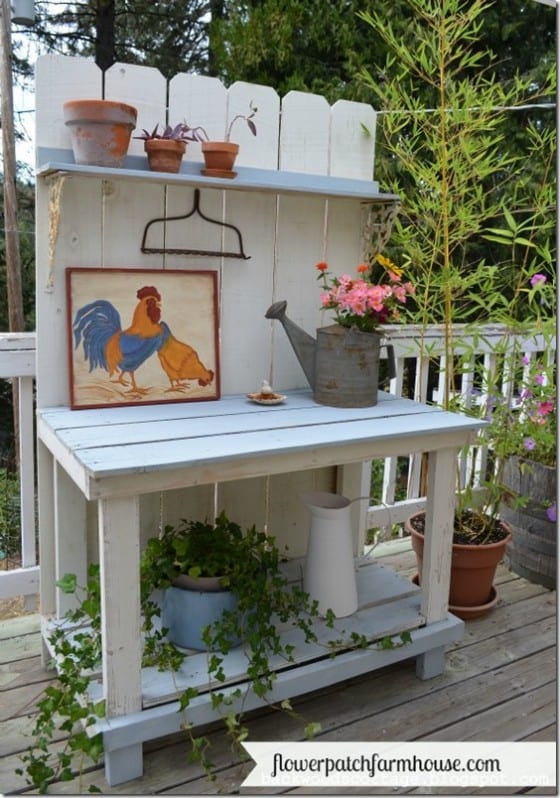
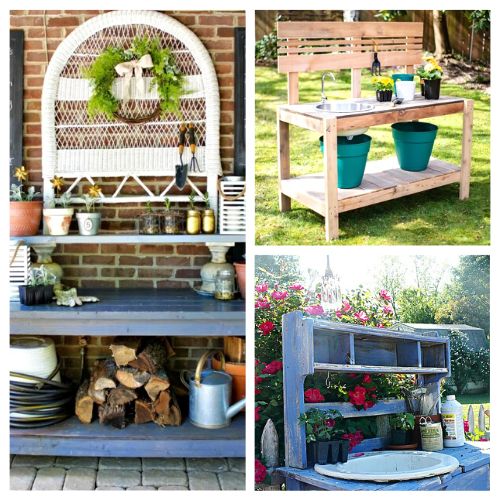
- Style and Aesthetics: Choose a design that complements your existing garden and outdoor decor. Research various styles – from rustic farmhouse designs to sleek modern aesthetics – to find the perfect fit for your personal preference. Consider the overall visual appeal and how the bench will integrate with its surroundings.
2. Choosing the Right Materials:
The choice of materials significantly impacts the durability, aesthetics, and overall cost of your potting bench. Here are some popular options:
- Wood: Cedar, redwood, and pressure-treated lumber are popular choices due to their durability and resistance to rot and insects. They offer a natural, rustic look that complements many garden styles. However, wood requires regular maintenance, including staining or sealing, to prevent weathering.
- Metal: Metal, such as galvanized steel or aluminum, offers exceptional durability and requires minimal maintenance. Metal benches are resistant to rot and insects but can be more challenging to work with for beginners. They also tend to be heavier and might require specialized tools for assembly.
- Concrete: Concrete offers unmatched durability and strength, but it's a more complex material to work with and requires specialized tools and skills. Concrete benches are exceptionally heavy and may not be suitable for all locations.
- Composite Materials: Composite materials, such as recycled plastic lumber, offer a blend of durability and low maintenance. They are resistant to rot, insects, and weathering, making them a practical and environmentally friendly option.
3. Drawing Up Plans:
Once you've finalized your design and material choices, it's time to create detailed plans. This can involve sketching your design by hand or using CAD software for a more precise representation. Your plans should include:
- Detailed dimensions: Accurate measurements for all components, including the legs, frame, shelves, and any other features.
- Cut lists: A comprehensive list of all the lumber or metal pieces needed, specifying their dimensions and quantity.
- Assembly instructions: A step-by-step guide outlining the assembly process, including the order of operations and any special techniques required.
Part 2: Gathering Tools and Materials – Equipping Your Workshop

With your plans finalized, the next step is to gather the necessary tools and materials. The specific tools required will depend on the design and materials you've chosen, but here's a comprehensive list of essentials:
- Measuring tools: Tape measure, level, square
- Cutting tools: Circular saw, hand saw (for smaller cuts), jigsaw (for curved cuts)
- Drilling and fastening tools: Drill, drill bits, screws, nails, hammer
- Sanding tools: Sandpaper, orbital sander (optional)
- Finishing tools: Paintbrushes, rollers, stain, sealant
- Safety gear: Safety glasses, work gloves, hearing protection
In addition to the tools, you'll need to acquire all the materials listed in your cut list. Remember to purchase extra material to account for potential errors or waste. Consider pre-treating wood with a wood preservative to enhance its durability and longevity.
Part 3: Construction – Bringing Your Vision to Life
This section provides a general guideline for constructing a wooden potting bench. The exact steps may vary depending on your specific design.
1. Building the Frame:

Begin by constructing the main frame of your potting bench. This typically involves cutting and assembling the legs and horizontal supports. Ensure all joints are square and secure using appropriate fasteners. Use wood glue in conjunction with screws for added strength and stability.
2. Adding Shelves and Storage:
Once the frame is complete, add any shelves or drawers. Ensure they are securely attached and level. Consider using dovetail joints or mortise and tenon joints for added strength and aesthetic appeal. For drawers, use drawer slides for smooth operation.

3. Finishing Touches:
Once the structure is complete, sand all surfaces smooth to remove any splinters or imperfections. Apply a protective finish, such as paint, stain, or sealant, to protect the wood from weathering and insects. Consider adding decorative elements, such as knobs or handles, to enhance the aesthetic appeal.
Part 4: Customization and Enhancements – Adding Personal Touches
The beauty of a DIY potting bench is the ability to customize it to your specific needs and preferences. Here are some ideas for enhancements:
- Built-in Sink: Incorporate a small sink for easy cleaning of tools and pots.
- Hose Hook: Install a hook to conveniently store your garden hose.
- Integrated Lighting: Add LED lights for enhanced visibility during evening gardening sessions.
- Rolling Cart: Add a rolling cart for easy mobility of tools and supplies.
- Herb Garden: Build in a small herb garden directly onto the bench top.
- Vertical Storage: Add vertical storage for seed packets and small tools.
Part 5: Troubleshooting and Maintenance – Ensuring Longevity

Even with careful planning and construction, issues might arise. Here's how to address common problems:
- Loose Joints: Tighten loose screws or use wood glue to reinforce the joint.
- Warped Wood: If the wood warps, try to straighten it using clamps and let it dry.
- Weather Damage: Regularly inspect your bench for signs of weathering and apply a fresh coat of sealant as needed.
- Insect Infestation: Treat any insect infestation promptly with appropriate insecticides.
Regular maintenance is crucial for the longevity of your potting bench. Regularly inspect it for any signs of damage or wear and address any issues promptly. A little preventative maintenance can go a long way in ensuring your potting bench remains a functional and aesthetically pleasing addition to your garden for years to come.

This detailed guide empowers you to embark on your DIY potting bench adventure with confidence. Remember, the process is as rewarding as the end result. Embrace the learning experience, and enjoy the satisfaction of creating something beautiful and functional with your own two hands. Happy gardening!
DIY Potting Bench: Build Your Garden Oasis!
Transform your gardening experience from chaotic clutter to organized efficiency with a custom-built potting bench. This detailed guide will walk you through the process of creating your own DIY potting bench, a true garden oasis tailored to your specific needs and style. Forget flimsy store-bought models – let's build something sturdy, beautiful, and perfectly suited to your gardening passion.
Planning Your Perfect Potting Bench
Before diving into the construction, meticulous planning is crucial. Consider these key factors:
-
Size and Dimensions: Measure your available space carefully. Will the bench be against a wall, freestanding, or part of a larger garden structure? Consider the dimensions needed to comfortably work, store tools, and accommodate your largest pots. A standard bench might be around 4 feet long and 2 feet deep, but adjust as needed for your space and gardening scale.
-
Materials: The choice of materials significantly impacts the bench's durability, aesthetics, and cost. Popular choices include:
-
Pressure-Treated Lumber: Affordable, readily available, and naturally resistant to rot and insects. However, it might contain chemicals, so research options and choose responsibly sourced lumber if you're concerned about environmental impact.
-
Cedar or Redwood: Naturally rot-resistant and beautiful, offering a premium, naturally aromatic experience. They're more expensive than pressure-treated lumber but offer lasting beauty and longevity.
-
Reclaimed Wood: An eco-friendly and charming choice. Finding reclaimed wood might require some searching, but the character and unique aesthetic it offers are well worth the effort. Ensure the wood is properly treated to prevent rot and insect infestation.
-
Metal: Durable and weather-resistant, metal (such as steel or galvanized iron) can create a modern and sleek potting bench. Consider using powder-coated metal for extra protection against rust.
-
-
Design & Features: Think about the features that will make your potting bench most functional:
-
Shelving: Multiple shelves provide ample storage for pots, soil, tools, and seeds. Consider open shelving for easy access or closed cabinets for a neater look.
-
Drawers: Ideal for storing small tools, seeds, and gardening gloves.
-
Work Surface: Ensure the work surface is spacious enough for your potting needs, considering the size of your pots and the tools you'll use. A smooth, level surface is essential.
-
Built-in Hooks or Rails: Perfect for hanging tools and keeping them within easy reach.
-
-
Budget: Determine a realistic budget before starting your project. Factor in the cost of materials, tools, and any additional hardware you might need.
Essential Tools & Materials
Once you’ve finalized your design, gather the necessary tools and materials:
-
Measuring Tape & Level: Essential for accurate measurements and ensuring a level work surface.
-
Saw (Circular Saw or Hand Saw): For cutting lumber to size.
-
Drill & Drill Bits: For creating pilot holes and assembling the bench.
-
Screws & Nails: Choose exterior-grade screws and galvanized nails for weather resistance.
-
Sandpaper: For smoothing rough edges and ensuring a professional finish.
-
Wood Glue: To reinforce joints and enhance the bench's stability.
-
Safety Glasses & Gloves: Crucial for protecting your eyes and hands during the construction process.
-
Your Chosen Lumber: Based on the dimensions and design you've planned.
-
Hardware for Shelves & Drawers (if applicable): Consider pre-made drawer slides or shelf brackets for ease of installation.
Step-by-Step Construction Guide: A Simple Potting Bench
This guide outlines the construction of a basic, yet functional, potting bench. Adapt the steps and design to incorporate the features you planned.
Step 1: Cut the Lumber: Based on your design, accurately cut the lumber to the required lengths for the legs, frame, shelves, and work surface. Always measure twice and cut once!
Step 2: Assemble the Frame: Construct the main frame of the bench by joining the legs and horizontal supports. Use wood glue and screws to create strong, secure joints. Pre-drill pilot holes to prevent the wood from splitting.
Step 3: Attach the Work Surface: Secure the work surface onto the frame using wood glue and screws. Ensure the surface is level and securely fastened.
Step 4: Add Shelves (Optional): If you're incorporating shelves, carefully attach them to the frame using shelf brackets or by creating supports within the frame structure. Ensure they are level and stable.
Step 5: Install Drawers (Optional): If incorporating drawers, follow the manufacturer's instructions for installing the drawer slides and assembling the drawers. Ensure they slide smoothly and are securely fastened.
Step 6: Add Finishing Touches: Sand all surfaces smooth to remove any splinters or rough edges. Apply a weather-resistant sealant or paint to protect the wood from the elements and enhance its appearance. Consider adding hooks or rails for hanging tools.
Advanced Potting Bench Designs: Unleash Your Creativity
Once you've mastered the basics, explore more elaborate designs:
-
Built-in Compost Bin: Incorporate a composting bin into the design, utilizing readily available composting bin kits or building your own from weather-resistant materials.
-
Rolling Potting Bench: Add casters to the legs for mobility, allowing you to move the bench easily around your garden.
-
Integrated Water Feature: For a truly luxurious garden oasis, consider adding a small water feature such as a built-in sink or a small fountain.
- Greenhouse Attachment: Combine your potting bench with a small greenhouse structure for seed starting and plant protection.
Choosing the Right Finish: Protecting Your Investment
Protecting your DIY potting bench from the elements is crucial for its longevity. Consider these finishing options:
-
Exterior-Grade Paint: Provides a durable and attractive finish, available in a wide range of colors. Choose a paint specifically designed for outdoor use.
-
Wood Stain: Enhances the natural beauty of the wood while providing protection against moisture and UV damage. Select a stain that matches your style and the type of wood used.
-
Wood Sealer: Offers protection against moisture and decay without altering the wood's natural appearance.
Maintaining Your Potting Bench: A Long-Lasting Garden Companion
Regular maintenance will ensure your potting bench remains a functional and beautiful addition to your garden for years to come.
- Clean Regularly: Wipe down the surface after each use to remove dirt and debris.
-
Inspect for Damage: Regularly check for any signs of damage, such as loose screws, cracks, or rot. Address any issues promptly to prevent further damage.
-
Re-seal or Repaint as Needed: Depending on the type of finish used, you may need to re-seal or repaint the bench every few years to maintain its protection against the elements.
-
Protect from Extreme Weather: If possible, cover the bench during severe weather conditions to prevent damage from rain, snow, or strong winds.
Building your own DIY potting bench is a rewarding experience that transforms your gardening space into a personalized garden oasis. With careful planning, attention to detail, and a little creativity, you can create a functional and beautiful addition to your garden that will enhance your gardening enjoyment for years to come. So grab your tools, and let's get building!


