
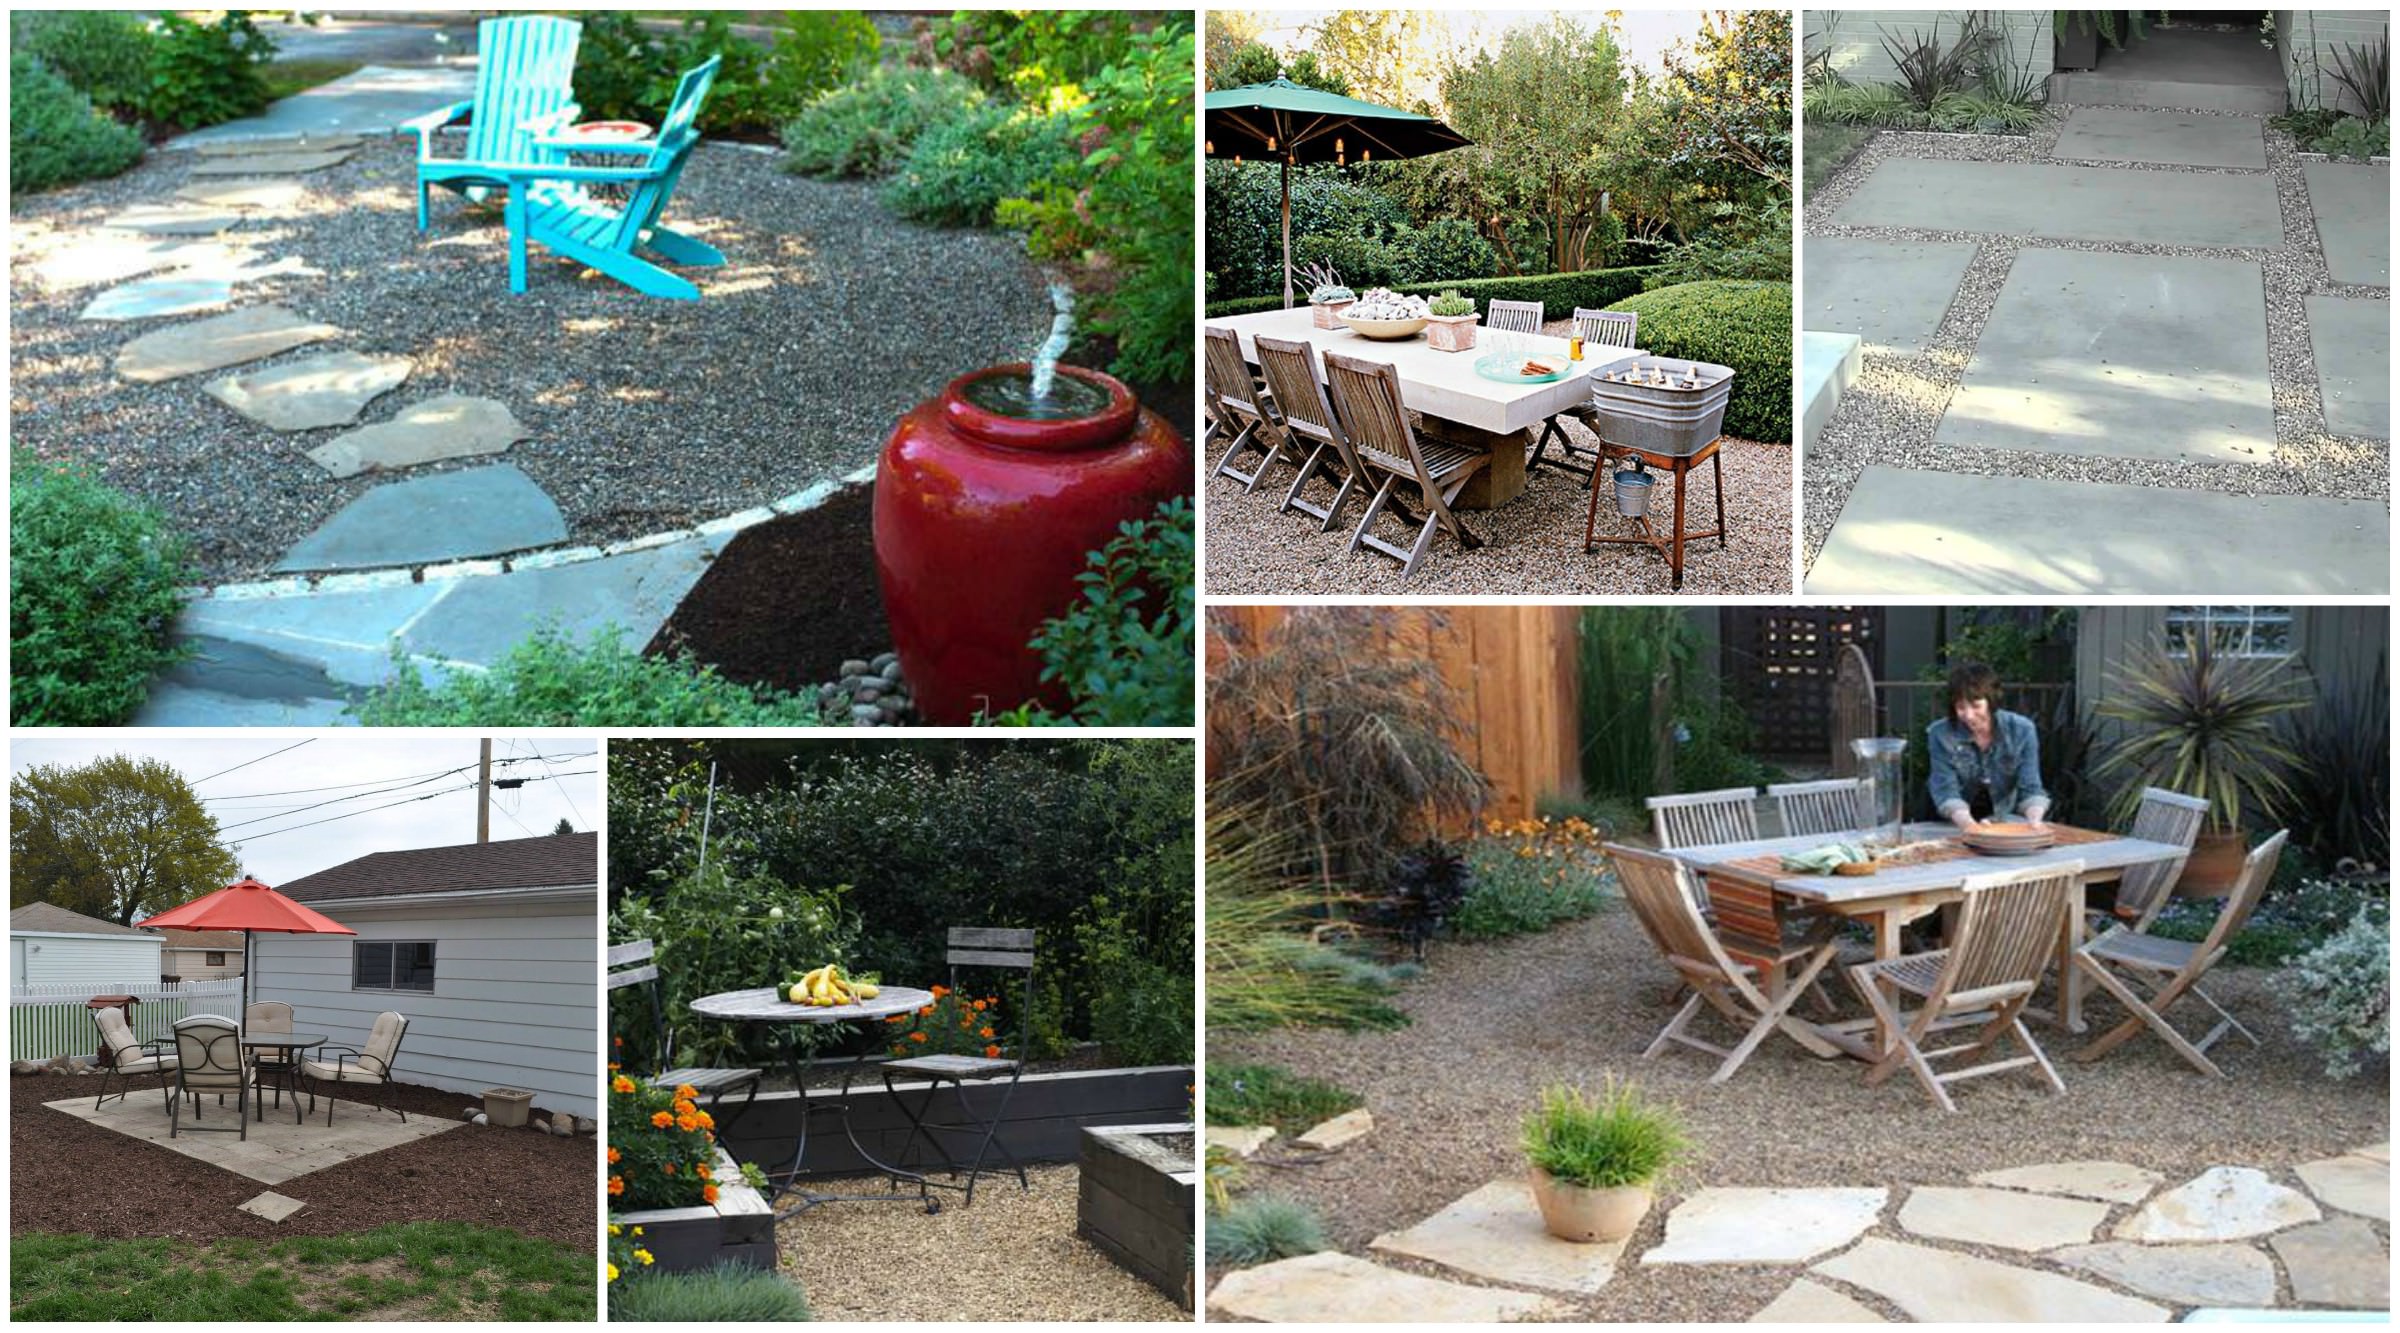
Gravel Patio: Cheap & Chic!
Gravel Patio: Cheap & Chic!
Creating a beautiful and functional outdoor space doesn't have to break the bank. A gravel patio offers a surprisingly versatile and affordable alternative to traditional paving, allowing you to achieve a stylish and inviting backyard retreat without emptying your wallet. This comprehensive guide will explore the numerous benefits of a gravel patio, delve into the planning and installation process, and provide you with creative ideas to personalize your space and maximize its potential.
The Allure of Gravel: Why Choose a Gravel Patio?
Before diving into the specifics, let's highlight why a gravel patio is such a compelling choice for budget-conscious homeowners:
-
Cost-Effectiveness: Gravel is significantly cheaper than paving stones, concrete, or decking. This makes it an ideal option for those working with a limited budget, allowing you to allocate more resources to other landscaping features or home improvements.
-
Ease of Installation: Unlike more complex paving projects, installing a gravel patio is relatively straightforward. You can often manage the majority of the work yourself, reducing labor costs.
-
Drainage & Permeability: Gravel is highly permeable, meaning water drains quickly through it. This prevents waterlogging, reduces the risk of erosion, and helps maintain a healthy lawn. This is particularly beneficial in areas with heavy rainfall.
-
Versatility & Aesthetics: Gravel comes in a vast array of colors, sizes, and textures, offering immense versatility in design. From sleek, modern aesthetics to rustic, charming landscapes, you can tailor your gravel patio to perfectly complement your home's style.
-
Low Maintenance: Once installed, a gravel patio requires minimal upkeep. Occasional weeding and re-raking are usually sufficient to keep it looking its best.
-
Eco-Friendly Option: Gravel is a natural material, making it a more environmentally friendly choice compared to manufactured paving materials.
Planning Your Gravel Patio: A Step-by-Step Guide
:max_bytes(150000):strip_icc()/findinglovely-9084c7a28ba74e9b929bf00a305c7867.jpg)
Creating a stunning gravel patio involves careful planning and execution. Here's a step-by-step guide to ensure a successful project:
1. Design & Measurement:
- Determine the size and shape: Consider the available space and how you intend to use the patio. Sketch out your desired layout, ensuring it complements the existing landscape and the architecture of your home.
- Choose your gravel: Research different types of gravel, considering color, size, and texture. Larger stones might be more visually appealing but can be less comfortable to walk on. Pea gravel is a popular choice for its smooth texture and even distribution.
- Consider edging: Edging materials help to contain the gravel and define the patio's boundaries. Options include timber, brick, metal edging, or even large stones. Choosing your edging material early will influence your overall design and budget.
:max_bytes(150000):strip_icc()/cottageandseaig-1804ef22b32e4925ba01b302f86fa4a8.jpg)
2. Site Preparation:
- Clear the area: Remove any existing vegetation, debris, and topsoil from the designated area. The ground should be level for optimal drainage and stability.
- Level the ground: Use a rake and leveler to create a flat, even base. Slight slopes can be beneficial for drainage, but significant unevenness will compromise the patio’s aesthetic appeal and potentially cause problems with stability.
- Weed control: Apply a landscape fabric to prevent weeds from growing through the gravel. This is crucial for long-term maintenance and will save you considerable time and effort in the future.
3. Gravel Installation:
:max_bytes(150000):strip_icc()/mearsigseating-af6b82597cbd4ccdbe4429f7de546202.jpg)
- Lay the landscape fabric: Overlap the fabric edges slightly to prevent weed growth. Ensure it's taut and smooth to avoid bunching.
- Add a base layer (optional): For added stability and to prevent settling, you can add a layer of compacted gravel or crushed stone underneath the decorative gravel. This is particularly recommended for high-traffic areas.
- Spread the gravel: Gradually spread your chosen gravel over the landscape fabric, working in even layers. Aim for a depth of at least 2-3 inches for optimal comfort and stability.
- Compact the gravel (optional): For a more stable patio, you can use a tamper to compact the gravel, especially if you've chosen a coarser material.
4. Edging Installation:
- Install the edging: Follow the manufacturer’s instructions for installing your chosen edging material. Ensure it's firmly secured to the ground and creates a neat boundary for the gravel.
:max_bytes(150000):strip_icc()/uppercanadapatio-5c390de4741540b2a87868b662e50aa6.jpg)
5. Finishing Touches:
- Rake the gravel: Once the gravel is in place, use a rake to smooth the surface and create an even finish.
- Consider adding features: Enhance your patio with additional features such as outdoor lighting, potted plants, or a fire pit to create a welcoming atmosphere.
Creative Gravel Patio Ideas: Unleash Your Inner Designer

The beauty of a gravel patio lies in its adaptability. Here are some creative ideas to inspire your design:
1. Geometric Patterns: Create visually striking patterns using different colors or sizes of gravel. Consider using stencils to create geometric designs or simple lines to divide the space.
2. Mixed Gravel Textures: Combine different gravel sizes and textures for added visual interest. For instance, mix larger stones with finer gravel for a unique look.

3. Color Coordination: Choose gravel colors that complement your home's exterior and the surrounding landscape. Consider warm earth tones for a rustic feel or cooler shades for a more modern aesthetic.
4. Integrated Planting: Incorporate strategically placed plants and flowers within the gravel to add pops of color and texture. Choose drought-tolerant plants that thrive in well-drained environments.
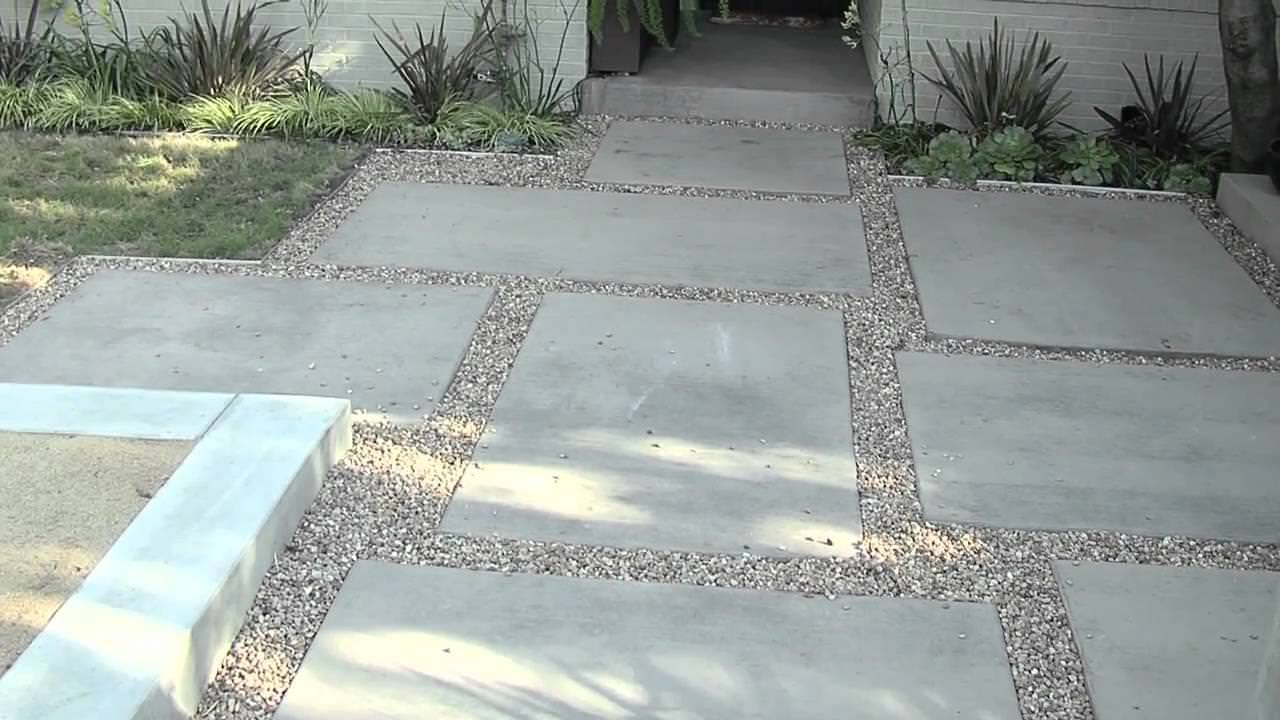
5. Pathways and Stepping Stones: Create pathways leading from your patio to other areas of your garden using stepping stones or larger flagstones interspersed within the gravel.

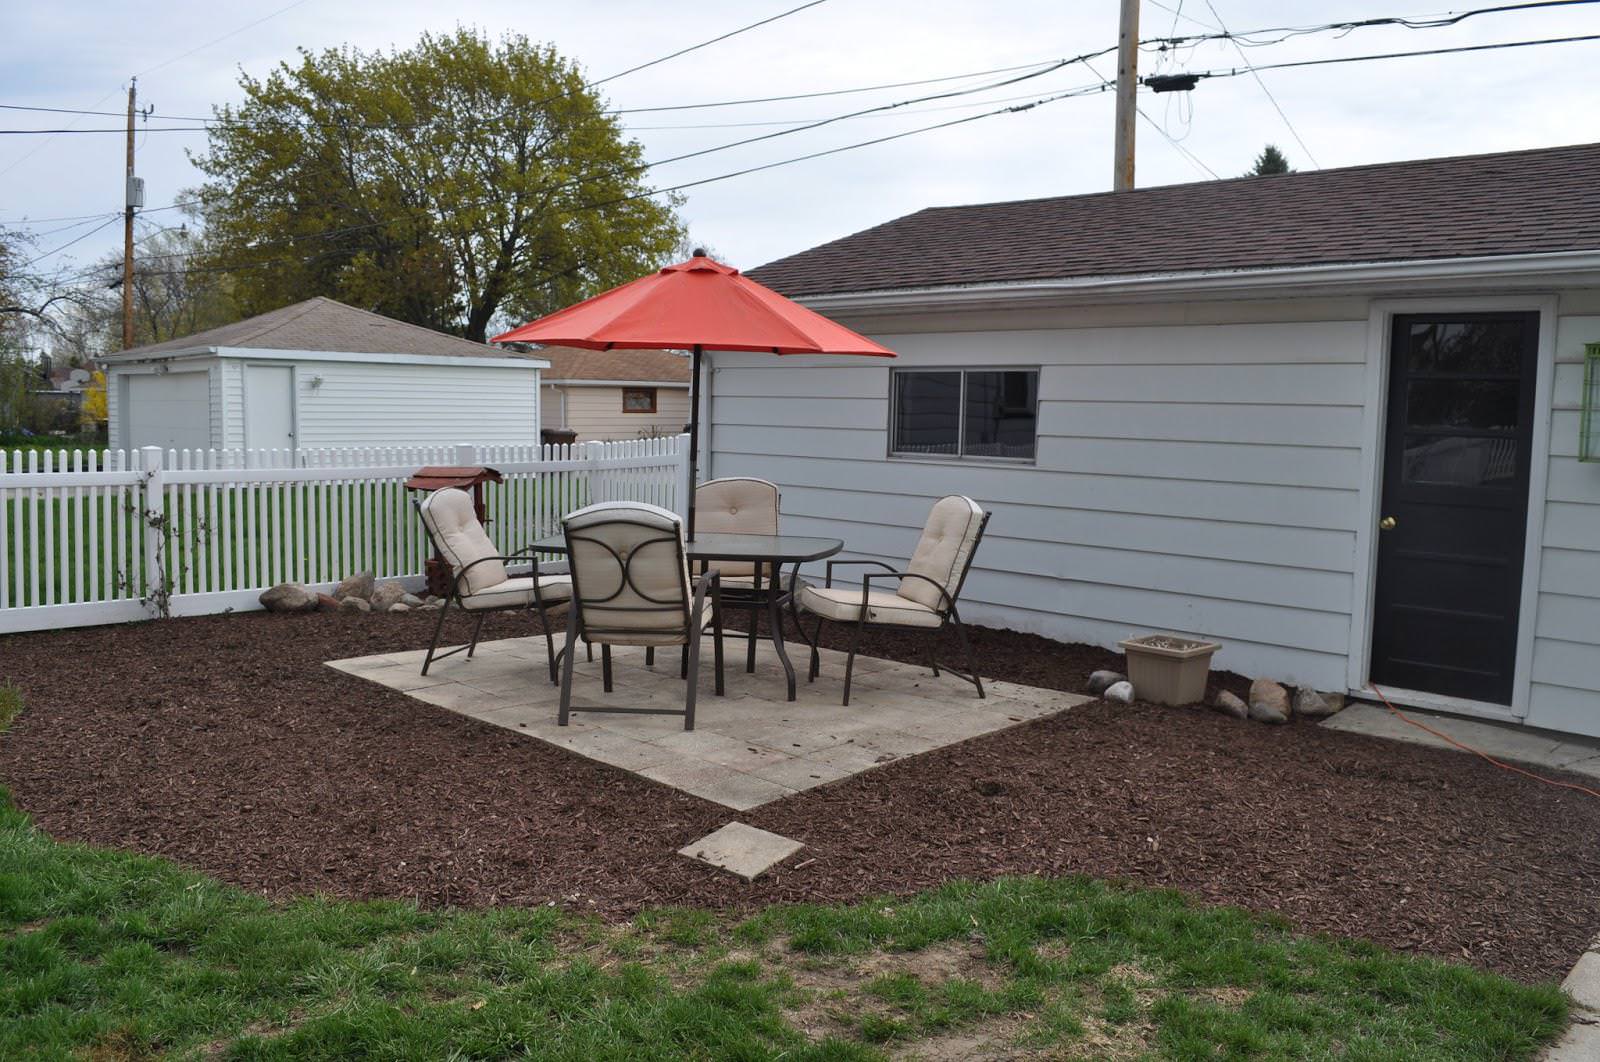
6. Outdoor Furniture: Choose outdoor furniture that complements the style of your gravel patio. Consider using weather-resistant materials like wicker, metal, or teak.
7. Lighting: Enhance the ambiance of your patio with outdoor lighting. String lights, pathway lights, or solar-powered lanterns can create a warm and inviting atmosphere.
8. Water Features: A small water feature, such as a birdbath or a simple fountain, can add a calming element to your gravel patio.
Maintaining Your Gravel Patio: Keeping it Beautiful
Maintaining a gravel patio requires minimal effort. Regular upkeep will keep it looking its best and prevent problems from arising. Here are some essential maintenance tips:
- Regular weeding: Regularly remove any weeds that emerge through the landscape fabric. A quick weeding session every few weeks will prevent weeds from becoming established.
- Top up the gravel: Over time, some gravel might be lost due to foot traffic or wind. Top up the gravel periodically to maintain the desired depth and appearance.
- Raking: Periodically rake the gravel to redistribute it evenly and prevent the formation of ruts or depressions.
- Clean up debris: Remove leaves, twigs, and other debris that accumulate on the patio, particularly during autumn.
Beyond the Basics: Adding Personality and Functionality
A gravel patio is a blank canvas for creativity. Consider these additional ideas to personalize your space:
- Outdoor Kitchen: If space permits, incorporate an outdoor kitchen area with a grill, sink, and countertop. The gravel surface provides a durable and easy-to-clean base for this setup.
- Fire Pit Area: Create a cozy seating area around a fire pit for evening gatherings and social events.
- Pergola or Shade Structure: Add a pergola or other shade structure to provide respite from the sun during hot weather.
- Outdoor Games Area: Designate a portion of your gravel patio for outdoor games like cornhole or bocce ball.
By following these tips and utilizing your imagination, you can create a cheap and chic gravel patio that's both beautiful and functional. Remember, the most important aspect is creating a space you love and enjoy spending time in. The affordability of gravel allows for experimentation and the freedom to transform your outdoor area into a personalized haven. So, get creative, get planning, and enjoy the process of creating your stunning, budget-friendly gravel patio!
Gravel Patio Paradise: Budget-Friendly Bliss!
Transforming your outdoor space into a relaxing and inviting retreat doesn't require a fortune. A gravel patio, with its inherent charm and affordability, offers a fantastic alternative to expensive paving stones or decking. This guide will walk you through the process of creating your own gravel patio paradise, focusing on maximizing budget-friendliness without compromising on style and functionality.
I. Planning Your Gravel Patio Paradise: A Step-by-Step Guide
Before diving into the exciting world of gravel purchasing and landscaping, meticulous planning is crucial. This phase will save you time, money, and potential headaches down the line.
A. Defining Your Vision and Space:
-
Determine the size and shape: Consider the available space and your desired usage. Will it be a small, intimate seating area, or a larger entertaining space? Sketch out several options to visualize the possibilities. A simple rectangular or square shape is the easiest to execute, while curves and irregular shapes add a more organic, natural feel.
-
Choose a location: Select a spot that receives adequate sunlight for enjoyment but avoids excessive shade, which can lead to moisture buildup and weed growth. Consider proximity to your home, access to water sources for cleaning, and existing landscaping features.
-
Assess the ground: The existing ground conditions significantly influence the project's complexity and cost. Level ground simplifies the process, while sloping ground requires extra work (and materials) for leveling. Inspect for any underground utilities, like gas lines or electrical cables, before you begin digging. Contact your local utility companies to mark their locations for safety.
-
Define your style: Browse online resources like Pinterest and Houzz for inspiration. Do you prefer a minimalist, modern aesthetic or a rustic, natural look? This will guide your material choices and overall design.
B. Budgeting and Material Selection:
-
Set a realistic budget: Factor in all costs, including gravel, edging materials, landscaping fabric, tools, and any additional features like lighting or seating. Create a detailed spreadsheet to track expenses and prevent overspending.
-
Choose your gravel type: This is arguably the most important decision. Consider the size, color, and texture of the gravel. Larger gravel (1-2 inches) provides better drainage but may be more expensive and less comfortable to walk on barefoot. Smaller gravel is more comfortable but can require more frequent maintenance. Choose a color that complements your existing landscaping and house.
-
Select edging materials: Edging prevents the gravel from spreading and adds a polished look. Common options include wood, metal, plastic, and natural stones. Consider the style, durability, and cost of each material. Plastic edging is budget-friendly and readily available, while natural stone provides a more upscale aesthetic but is more expensive.
-
Purchase landscaping fabric (optional but recommended): This acts as a weed barrier, preventing unwanted vegetation from sprouting through the gravel. While adding to the initial cost, it significantly reduces long-term maintenance.
II. Building Your Gravel Patio: A Practical Guide
A. Preparing the Ground:
-
Clear the area: Remove existing vegetation, debris, and topsoil to a depth of approximately 4-6 inches. This will create a level base for your gravel.
-
Level the ground: Use a rake and leveler to achieve a smooth, even surface. For uneven ground, you may need to add topsoil or compacted fill to create a stable base. Consider using a spirit level to check for accuracy.
-
Compact the soil: This is crucial for preventing settling and ensuring the stability of your patio. Use a hand tamper or a plate compactor to compact the soil thoroughly.
B. Installing the Edging:
-
Mark the perimeter: Use string and stakes to define the shape and size of your patio. Ensure the perimeter is straight and evenly spaced.
-
Install the edging: Dig a trench along the marked perimeter to the depth specified by the manufacturer's instructions. Insert the edging material and secure it firmly. Use stakes or landscape pins to hold the edging in place.
- Backfill the trench: Once the edging is securely in place, carefully backfill the trench with soil and compact it to prevent shifting.
C. Laying the Landscaping Fabric (Optional):
- Cut and lay the fabric: Measure and cut the landscaping fabric to cover the entire area of your patio. Overlap the edges slightly to prevent gaps.

- Secure the fabric: Use landscape pins or staples to secure the fabric to the ground. Ensure it's taut and lies flat.
D. Adding the Gravel:
- Determine the gravel depth: The recommended depth varies depending on the size of the gravel and desired look, typically ranging from 2-4 inches.
-
Spread the gravel evenly: Begin by pouring the gravel into the center of the patio and gradually spreading it outwards using a rake. Work in small sections to achieve an even distribution.
-
Level the gravel: Use a rake and leveler to achieve a smooth, even surface.
III. Maintaining Your Gravel Patio Paradise:
Maintaining a gravel patio is relatively low-maintenance, but some regular attention will keep it looking its best.
A. Weed Control:
Even with landscaping fabric, some weeds may still emerge. Regular weeding will prevent them from taking over. Hand-pulling is effective for small weeds, while a weed torch can be used for larger infestations.
B. Gravel Top-Ups:
Over time, some gravel may be lost due to wind or foot traffic. Regularly inspect your patio and add more gravel as needed.
C. Cleaning:
Regular sweeping will keep the patio clean and free of debris. A leaf blower can be helpful for removing larger amounts of leaves and debris. For tougher stains, use a stiff broom and water.
IV. Adding Extra Touches:
To truly create your gravel patio paradise, consider adding these extra touches:
- Outdoor lighting: String lights or solar-powered path lights can add ambiance and make the space more enjoyable in the evenings.
- Outdoor seating: Comfortable chairs, a hammock, or a small outdoor sofa will transform your patio into a relaxing retreat.
- Plants and flowers: Add pots of flowers or strategically placed shrubs to enhance the aesthetics and bring some life to the space.
- Water feature: A small fountain or birdbath can add a soothing sound and visual interest.
V. Budget-Friendly Tips and Tricks:
- Source materials locally: This can save on transportation costs. Check local landscaping supply yards for deals and bulk discounts.
- DIY the project: This will save significantly on labor costs. If you're not comfortable with DIY, consider hiring a friend or family member for assistance instead of a professional landscaping company.
- Utilize reclaimed materials: Use recycled materials wherever possible, such as repurposed wood for edging or salvaged stone.
- Stagger your purchases: Purchase materials gradually, as your budget allows, rather than buying everything at once.

Creating a gravel patio paradise on a budget is entirely achievable with careful planning, resourcefulness, and a little elbow grease. By following the steps outlined in this guide, you can transform your outdoor space into a beautiful, functional, and affordable retreat that you’ll enjoy for years to come. Remember to adapt these ideas to your specific needs and preferences, and most importantly, have fun creating your dream outdoor oasis!


