
Gravel Patio Paradise: Budget-Friendly!
Gravel Patio Paradise: Budget-Friendly!
Transforming your outdoor space into a relaxing and stylish retreat doesn't require a king's ransom. A gravel patio, with its inherent charm and versatility, offers a remarkably budget-friendly solution to upgrading your backyard, patio, or even front yard. This comprehensive guide explores everything you need to know to design, build, and maintain your own gravel paradise without breaking the bank.
Part 1: Planning Your Gravel Patio Paradise
Before you dive into the exciting world of gravel selection and landscaping, meticulous planning is key. A well-thought-out plan minimizes wasted materials, ensures a visually appealing outcome, and keeps your project within budget.
1. Defining Your Vision and Scope
Begin by asking yourself these crucial questions:
- What's the purpose of your patio? Will it be a space for relaxing, entertaining, dining, or a combination? The intended use dictates the size, shape, and features needed.
- Where will it be located? Consider sunlight exposure, proximity to your house, existing landscaping, and drainage patterns. A south-facing patio will receive maximum sun, ideal for basking, but might need shade solutions. Poor drainage could lead to muddy messes.
- What's your budget? Setting a realistic budget is vital. Factor in the cost of gravel, edging, landscaping fabric, tools, and any additional features like seating or lighting. Be sure to account for potential overruns.
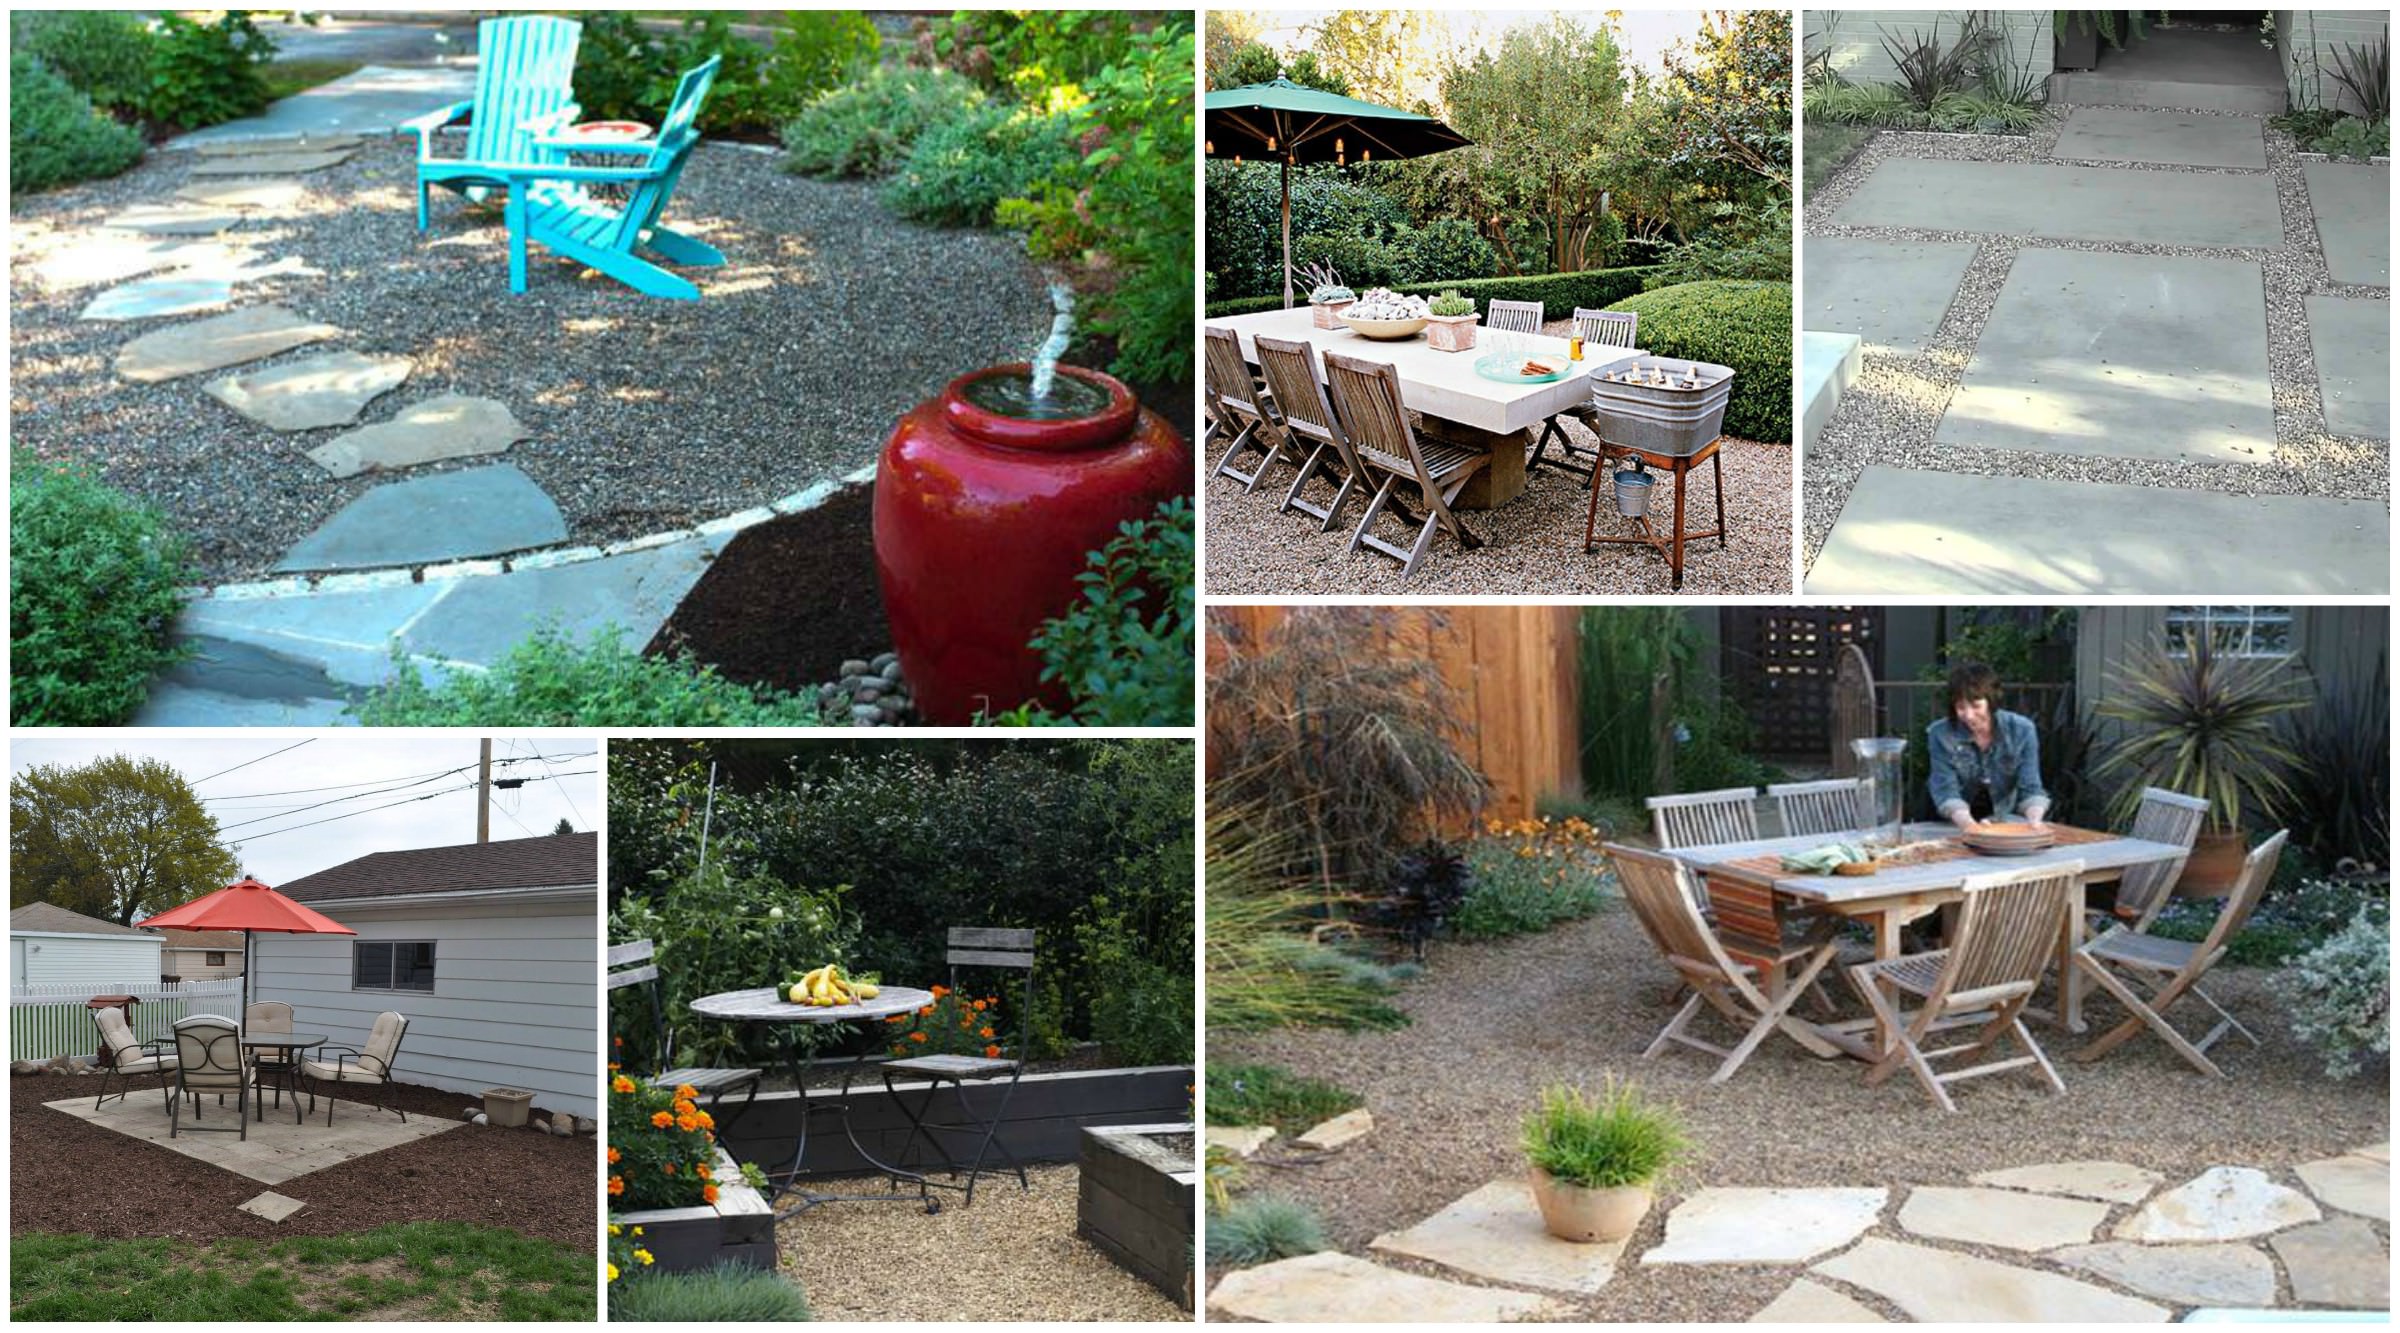
- What's your desired style? Do you envision a rustic, modern, formal, or whimsical patio? Your style choice influences material selection and design elements. Explore Pinterest and other design platforms for inspiration.
- What's the size and shape? Measure the intended area carefully. Consider the scale of your house and garden to ensure a harmonious fit. Simple rectangular or square patios are usually the most cost-effective.
2. Choosing the Right Gravel
The heart of your gravel patio lies in the gravel itself. Selecting the right type greatly impacts both the aesthetic and the functionality. Key considerations include:
-
Type of Gravel: A wide variety of gravel types exist, each with its own unique texture, color, and drainage properties. Popular choices include:
- Pea Gravel: Small, round stones offering excellent drainage and a smooth, even surface.
- River Rock: Naturally tumbled stones with a varied size and shape, creating a more rustic appearance.
- Crushed Stone: Angular, sharper stones that provide a more rugged look and are often more cost-effective.
- Decomposed Granite: A fine-grained blend of granite and sand offering a smooth, firm surface ideal for walkways.
-
Color and Size: The color should complement your home's exterior and surrounding landscaping. Consider the size of the stones; smaller stones create a smoother surface, while larger ones can offer a more dramatic look.
-
Source and Cost: Shop around for the best prices. Local landscaping suppliers often offer competitive pricing. Bulk purchases can significantly reduce costs. Also consider transportation costs, which can be substantial for large gravel orders.
:max_bytes(150000):strip_icc()/findinglovely-9084c7a28ba74e9b929bf00a305c7867.jpg)
3. Essential Materials and Tools
Besides gravel, you'll need several other essential materials and tools to complete your project. These include:
- Landscaping Fabric: This helps prevent weeds from growing through the gravel and ensures a stable base.
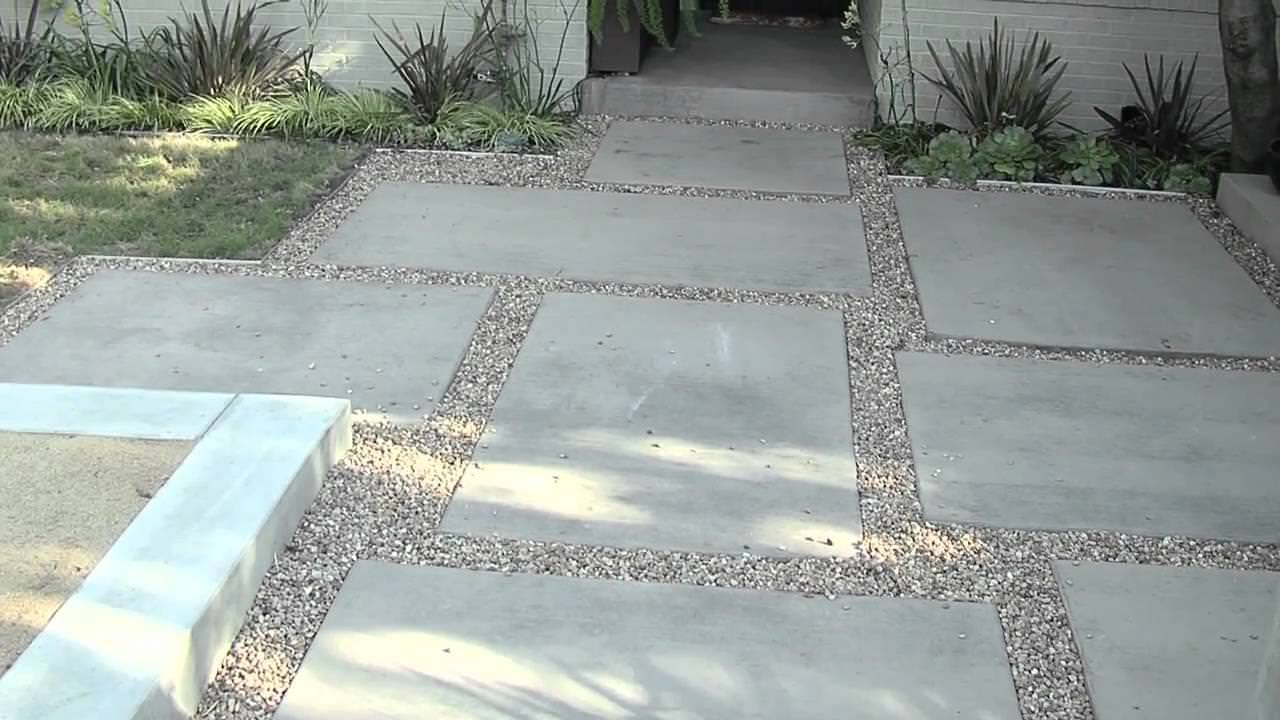
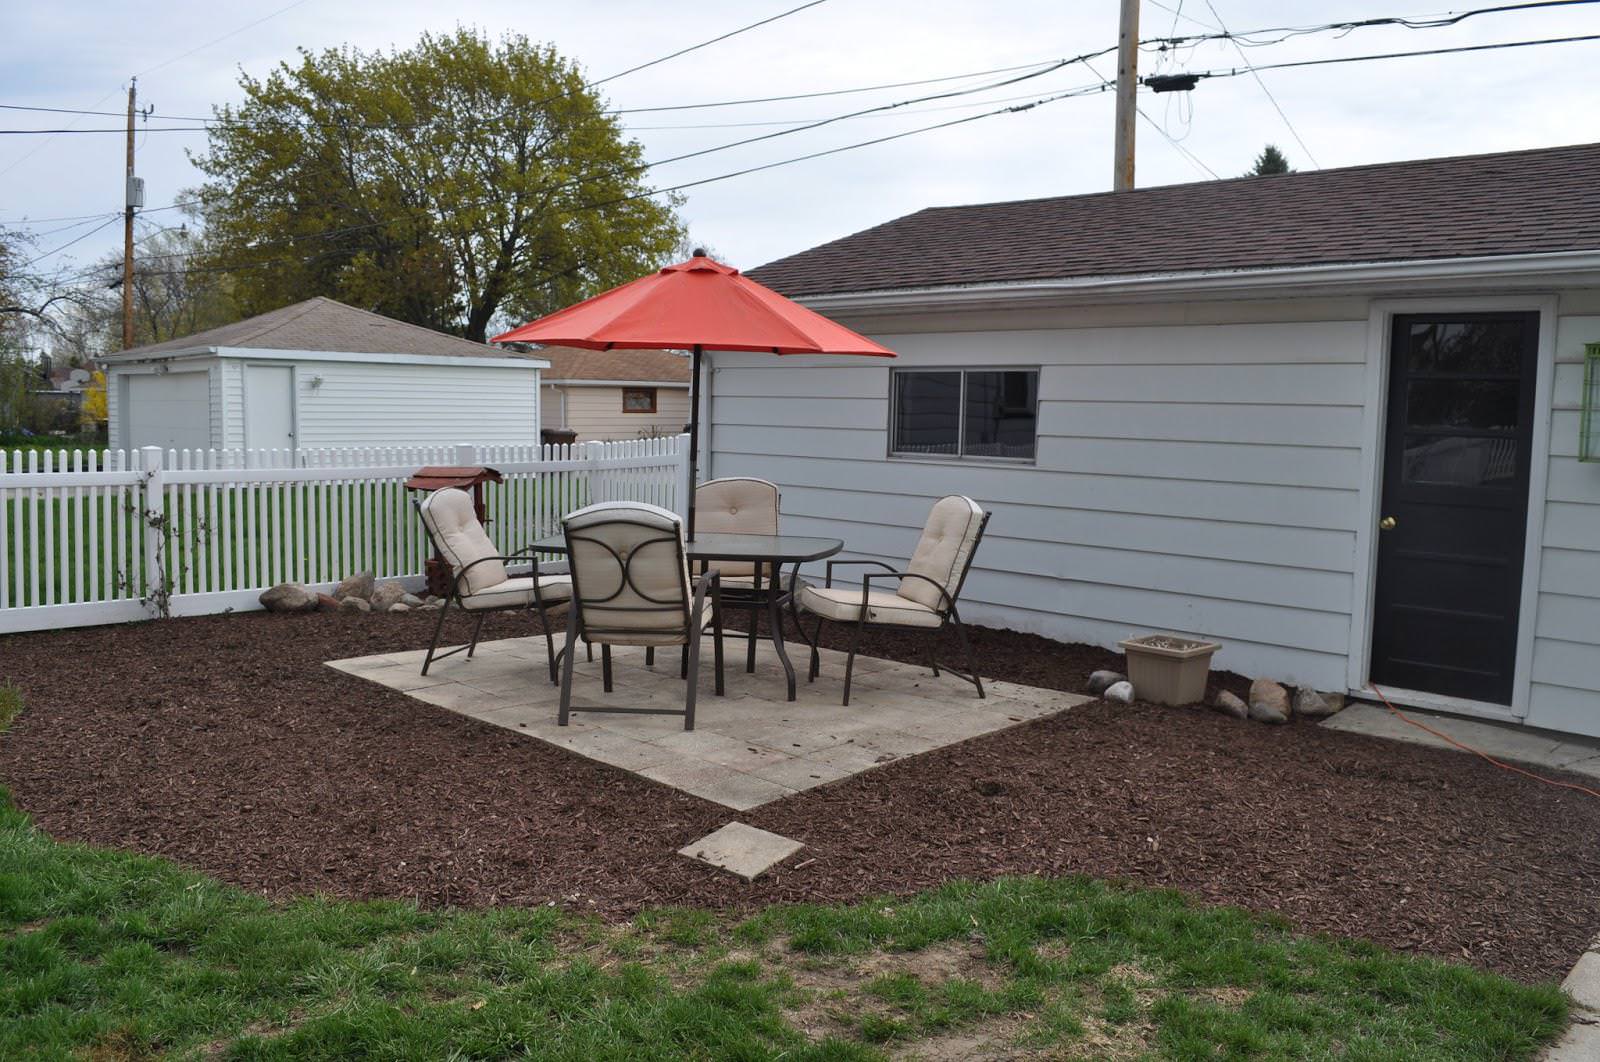
- Edging: This defines the perimeter of your patio and keeps the gravel contained. Options include plastic edging, metal edging, or natural stone edging. Choose an option that complements your chosen gravel and overall style.
- Leveling Sand or Base Material: Provides a stable and even base for your gravel. Compacted gravel can also work as a base.
- Shovel, Rake, and Wheelbarrow: Essential for moving and spreading materials.
- Measuring Tape and String: For accurate measurements and layout.
- Compactor (optional but recommended): Ensures a firm, level base to prevent settling.
:max_bytes(150000):strip_icc()/cottageandseaig-1804ef22b32e4925ba01b302f86fa4a8.jpg)
Part 2: Building Your Budget-Friendly Gravel Patio
With your plan finalized and materials gathered, it's time to build your gravel paradise. Follow these steps for a successful and affordable construction:
1. Site Preparation and Excavation
:max_bytes(150000):strip_icc()/mearsigseating-af6b82597cbd4ccdbe4429f7de546202.jpg)
- Clear the area: Remove existing vegetation, debris, and any obstacles.
- Mark the perimeter: Use string and stakes to mark the outline of your patio.
- Excavate: Remove the topsoil to a depth of approximately 4-6 inches. The depth depends on your chosen base material and gravel depth.
2. Base Preparation
- Level the ground: Use a rake and level to create a smooth, even surface.
- Add base material: Spread a layer of leveling sand or compacted gravel, ensuring it's evenly distributed and compacted firmly. This is crucial for preventing settling and creating a stable base for your gravel.
- Install landscaping fabric: Overlap the fabric slightly and secure it in place. This will prevent weed growth and keep the gravel clean.
:max_bytes(150000):strip_icc()/uppercanadapatio-5c390de4741540b2a87868b662e50aa6.jpg)
3. Gravel Installation
- Spread the gravel: Gradually spread the gravel over the landscaping fabric, working in layers for a uniform thickness. Aim for a depth of 2-4 inches, depending on your preference.
- Level the gravel: Use a rake to evenly distribute the gravel and create a smooth, level surface.
- Compact the gravel (optional): Using a compactor will create a firmer, more stable surface and prevent settling.
4. Edging and Finishing Touches

- Install edging: Carefully place the edging around the perimeter of your patio, ensuring it's securely in place. This will keep the gravel contained and provide a neat, finished look.
- Clean up: Remove any excess gravel and debris from the surrounding area.
Part 3: Maintaining Your Gravel Patio Paradise
Maintaining your gravel patio is relatively straightforward, but regular upkeep is vital for preserving its beauty and functionality.

1. Weed Control
Regularly remove any weeds that sprout through the landscaping fabric. A thorough weeding at the beginning of each growing season will prevent weed infestations.
2. Gravel Top-Up

Over time, some gravel may be lost due to wind, rain, or foot traffic. Periodically add more gravel to maintain the desired depth and appearance. Consider using a finer gravel for filling in smaller gaps.
3. Edging Repair
Check the edging regularly for any damage or displacement. Repair or replace any damaged sections promptly to prevent gravel from spreading.
4. Occasional Cleaning
A quick sweep or blow with a leaf blower is all that is generally needed to maintain a clean and attractive patio. For more stubborn stains or debris, a garden hose can be effective.
Part 4: Adding Personality and Function
Your gravel patio shouldn't just be a functional space; it should reflect your personality and lifestyle. Consider these additions to enhance your outdoor oasis:
- Outdoor Lighting: Strategic lighting adds ambiance and safety. Solar-powered lights are an eco-friendly and budget-friendly option.
- Seating: Comfortable seating, such as Adirondack chairs, benches, or outdoor cushions, transforms your patio into a relaxing retreat.
- Plants and Flowers: Add pops of color and texture with strategically placed potted plants or low-growing groundcover.
- Outdoor Rugs: Define different areas of your patio and add warmth and style. Choose weather-resistant rugs specifically designed for outdoor use.
- Fire Pit or Chiminea: Extend the usability of your patio into cooler evenings with a cozy fire pit or chiminea.
Conclusion: Your Dream Patio Awaits
Creating a stunning and functional gravel patio on a budget is entirely achievable with careful planning, diligent execution, and a touch of creativity. By following these steps, you can transform your outdoor space into a beautiful and relaxing retreat, a true gravel patio paradise, without emptying your wallet. Remember to enjoy the process and celebrate the accomplishment of creating your own personal outdoor sanctuary.
Gravel Patio Bliss: Budget-Friendly Designs
Creating a beautiful and functional outdoor space doesn't have to break the bank. A gravel patio offers a surprisingly versatile and affordable alternative to more expensive paving options like concrete or brick. This guide will explore numerous budget-friendly gravel patio ideas, covering everything from design inspiration and material selection to installation techniques and cost-saving tips. Get ready to transform your backyard into a relaxing haven without exceeding your budget!
I. Designing Your Dream Gravel Patio on a Budget
Before diving into the specifics of materials and installation, let's lay the groundwork for your design. A well-planned design is crucial for maximizing your budget and ensuring a satisfying outcome.
A. Defining Your Space and Purpose
Begin by carefully considering the size and location of your future gravel patio. How much space do you realistically have? What's the purpose of this patio? Will it be primarily for relaxation, dining, entertaining, or a combination thereof? Answering these questions will shape your design decisions, influencing everything from the patio shape and size to the choice of furniture and accessories.
A smaller, intimate patio might suit a quiet reading nook, while a larger space might be ideal for hosting barbecues and gatherings. Consider the existing landscape features – are there mature trees that could provide shade? Is there a natural slope that needs to be addressed? These factors will influence the overall design and the complexity of the installation.
B. Choosing the Right Gravel Type
The type of gravel you select plays a significant role in both the aesthetic appeal and the overall cost. Different gravel types vary dramatically in price, size, color, and durability.
-
Pea gravel: A classic choice, pea gravel is small, round, and readily available, making it a very budget-friendly option. Its smooth texture is comfortable underfoot, making it suitable for patios where you'll be spending considerable time.
-
River rock: Slightly larger and more irregular than pea gravel, river rock offers a more natural and textured look. It can be more expensive depending on the source and color, but the aesthetic value often justifies the higher cost.
-
Crushed stone: This angular gravel is typically cheaper than other options, but can be less comfortable underfoot. It's a good choice for high-traffic areas where durability is prioritized over comfort.
-
Colored gravel: While natural gravels offer a variety of colors, you can also find dyed gravels in a wide range of hues. This can add a pop of color to your patio but may be slightly more expensive. However, the aesthetic enhancement can be worth the extra cost.
Consider the surrounding landscape when choosing a gravel color. Harmonizing with existing features creates a cohesive and visually appealing design.
C. Creating a Border
A well-defined border is essential for containing the gravel and giving your patio a polished look. Budget-friendly border options include:
-
Landscape timbers: Relatively inexpensive and readily available, landscape timbers provide a rustic and natural border. They're easy to install and can be arranged in various configurations.
-
Bricks or pavers: While more expensive than timbers, repurposed or salvaged bricks can offer a cost-effective alternative. This adds a touch of elegance and can complement the gravel nicely.
-
Edging stones: These come in various shapes, sizes, and materials, offering a more refined look. However, they can be more expensive than timbers or repurposed bricks.
-
Metal edging: A less common but durable option, metal edging is available in different styles and finishes. While initially more expensive, its longevity can be a worthwhile investment.
D. Adding Visual Interest
Don't underestimate the power of accessories to enhance your gravel patio's aesthetic appeal. Budget-friendly ways to add visual interest include:
-
Potted plants: Strategic placement of potted plants adds color, texture, and life to the space. Choose plants that thrive in your climate and require minimal maintenance.
-
Outdoor lighting: String lights, solar lanterns, or pathway lights create a magical ambiance, especially in the evening.
-
Outdoor rugs: An outdoor rug defines the seating area and adds warmth and comfort.
-
Outdoor furniture: Choose durable, weather-resistant furniture that complements your patio's style. Consider repurposing or upcycling existing furniture instead of buying new.
II. Installation: A Step-by-Step Guide
Once you have your design finalized, it's time to get your hands dirty! The installation process for a gravel patio is relatively straightforward, even for DIY enthusiasts.
A. Preparing the Ground
Proper ground preparation is crucial for a successful gravel patio.
-
Clear the area: Remove any existing vegetation, debris, and rocks.
-
Level the ground: Use a rake and leveler to create a smooth, even surface. This is critical for preventing uneven settling of the gravel.
-
Compact the soil: A well-compacted base prevents settling and weed growth. Use a garden roller or tamper to compact the soil thoroughly.
B. Creating a Base (Optional but Recommended)
While not strictly necessary, a base layer provides better drainage and weed control, increasing the longevity of your patio.
- Weed barrier: Lay a landscape fabric over the compacted soil. This prevents weeds from growing through the gravel.
- Base material: Add a layer of compacted gravel, crushed stone, or other suitable base material. This provides a stable foundation for the decorative gravel. A depth of 2-4 inches is usually sufficient.
C. Adding the Decorative Gravel
- Spread the gravel: Evenly spread your chosen gravel over the base layer. Aim for a depth of 2-4 inches, depending on your preference and the size of the gravel.
-
Level the gravel: Use a rake or leveler to ensure a smooth, even surface.
-
Install the border: Install your chosen border around the perimeter of the patio, burying it slightly into the gravel.
D. Finishing Touches
-
Add plants and accessories: Place your potted plants, outdoor lighting, and other decorative elements.
-
Sweep the gravel: Give the patio a final sweep to remove any stray leaves or debris.
III. Cost-Saving Strategies
Creating a beautiful gravel patio on a budget requires careful planning and resourcefulness. Here are some additional tips to keep costs down:
-
DIY installation: Save on labor costs by installing the patio yourself.
-
Source materials locally: Buying materials from local suppliers can save on transportation costs.
-
Use repurposed materials: Repurpose old bricks, pavers, or timbers for the border.
-
Buy in bulk: Purchasing gravel in bulk typically results in lower per-unit costs.
-
Shop around for deals: Compare prices from different suppliers to find the best deals.
-
Prioritize essential elements: Focus on the essential elements of the design and add accessories gradually.
-
Consider seasonal sales: Many landscaping materials are sold at discounted prices during the off-season.
IV. Maintenance Tips
While gravel patios are relatively low-maintenance, some regular upkeep is needed to ensure their longevity and beauty.
-
Weed control: Regularly remove weeds that manage to sprout through the gravel.
-
Topdressing: Every few years, add a layer of fresh gravel to replenish the existing layer and maintain the desired depth.
-
Cleaning: Sweep the patio regularly to remove leaves, debris, and dirt.
-
Border maintenance: Repair or replace damaged border elements as needed.
V. Conclusion
A gravel patio provides a stunning and affordable way to enhance your outdoor living space. By carefully planning your design, selecting the right materials, and employing cost-saving strategies, you can create a beautiful and functional patio that fits your budget and personal style. Remember that the key to success lies in meticulous planning and attention to detail. With a bit of effort and creativity, you can transform your backyard into a gravel patio paradise – a place for relaxation, entertainment, and lasting memories. So, get started today and enjoy your new outdoor oasis!


