
Indian Sandstone Patio: Steps to Stunning
Indian Sandstone Patio: Steps to Stunning
Creating an outdoor space that's both beautiful and functional is a dream for many homeowners. A patio, especially one crafted from Indian sandstone, offers a perfect blend of aesthetics and durability. This versatile material, renowned for its rich colours and natural variations, can transform your backyard into a haven for relaxation and entertainment. But achieving a truly stunning Indian sandstone patio goes beyond simply laying the stones. This comprehensive guide will walk you through every step, from initial planning and design to installation and ongoing maintenance, ensuring your patio becomes the heart of your home.
I. Planning and Design: The Foundation of a Stunning Patio
Before a single stone is laid, meticulous planning is crucial. This stage determines the success of your project, ensuring a beautiful and functional patio that meets your needs and complements your home's style.
A. Defining Your Needs and Style:
Ask yourself crucial questions:
-
What will you primarily use your patio for? Relaxing with a book? Hosting barbeques? Creating a play area for children? The intended use dictates the size, shape, and features of your patio. A large, expansive patio is ideal for entertaining, while a smaller, intimate space might suit quiet contemplation.
-
What is your budget? Indian sandstone comes in various grades and finishes, impacting the overall cost. Factor in not just the material cost but also labour, preparation work, and any additional features like lighting or landscaping.
-
What style are you aiming for? From modern minimalist designs to rustic charm, the style of your patio should complement your home's architecture and overall landscaping. Consider the colour and texture of your home's exterior, existing pathways, and surrounding greenery. Do you prefer a sleek, contemporary look or a more traditional, textured feel? The choice of sandstone colour – from warm beige and golden hues to cooler greys and browns – significantly impacts the overall aesthetic.
-
What is the size and shape of your available space? Accurate measurements are essential. Consider any existing features like trees, flowerbeds, or utility access points that might influence the patio's layout. Sketching a preliminary design, even a rough one, helps visualize the final outcome.
B. Choosing the Right Indian Sandstone:
Indian sandstone is known for its variety. Understanding the different types is vital:
-
Colour: Explore the vast range of colours available, from subtle creams and yellows to rich reds, browns, and greys. Consider how the colour will complement your home and landscaping. Consider the impact of sunlight – lighter colours might reflect heat better.
-
Texture: Sandstone can have varying textures, from smooth and polished to riven (naturally cleft) and tumbled. Riven sandstone offers a rustic, natural look, while tumbled sandstone has a softer, more aged appearance. The texture influences both the aesthetic and the slip resistance.
-
Thickness: The thickness of the sandstone paving slabs affects their durability and longevity. Thicker slabs are generally more durable and suitable for high-traffic areas.
-
Finish: Sandstone can have various finishes, including honed (smooth), flamed (textured), and brushed. Each finish offers a unique look and feel.
-
Supplier: Choose a reputable supplier who can provide high-quality sandstone and offer advice on selection and installation.
C. Obtaining Necessary Permissions and Approvals:
Depending on your location, you may need planning permission or building regulations approval before commencing work. Check with your local council or building control department to determine what's required. This step, while often overlooked, can prevent costly delays and potential legal issues.
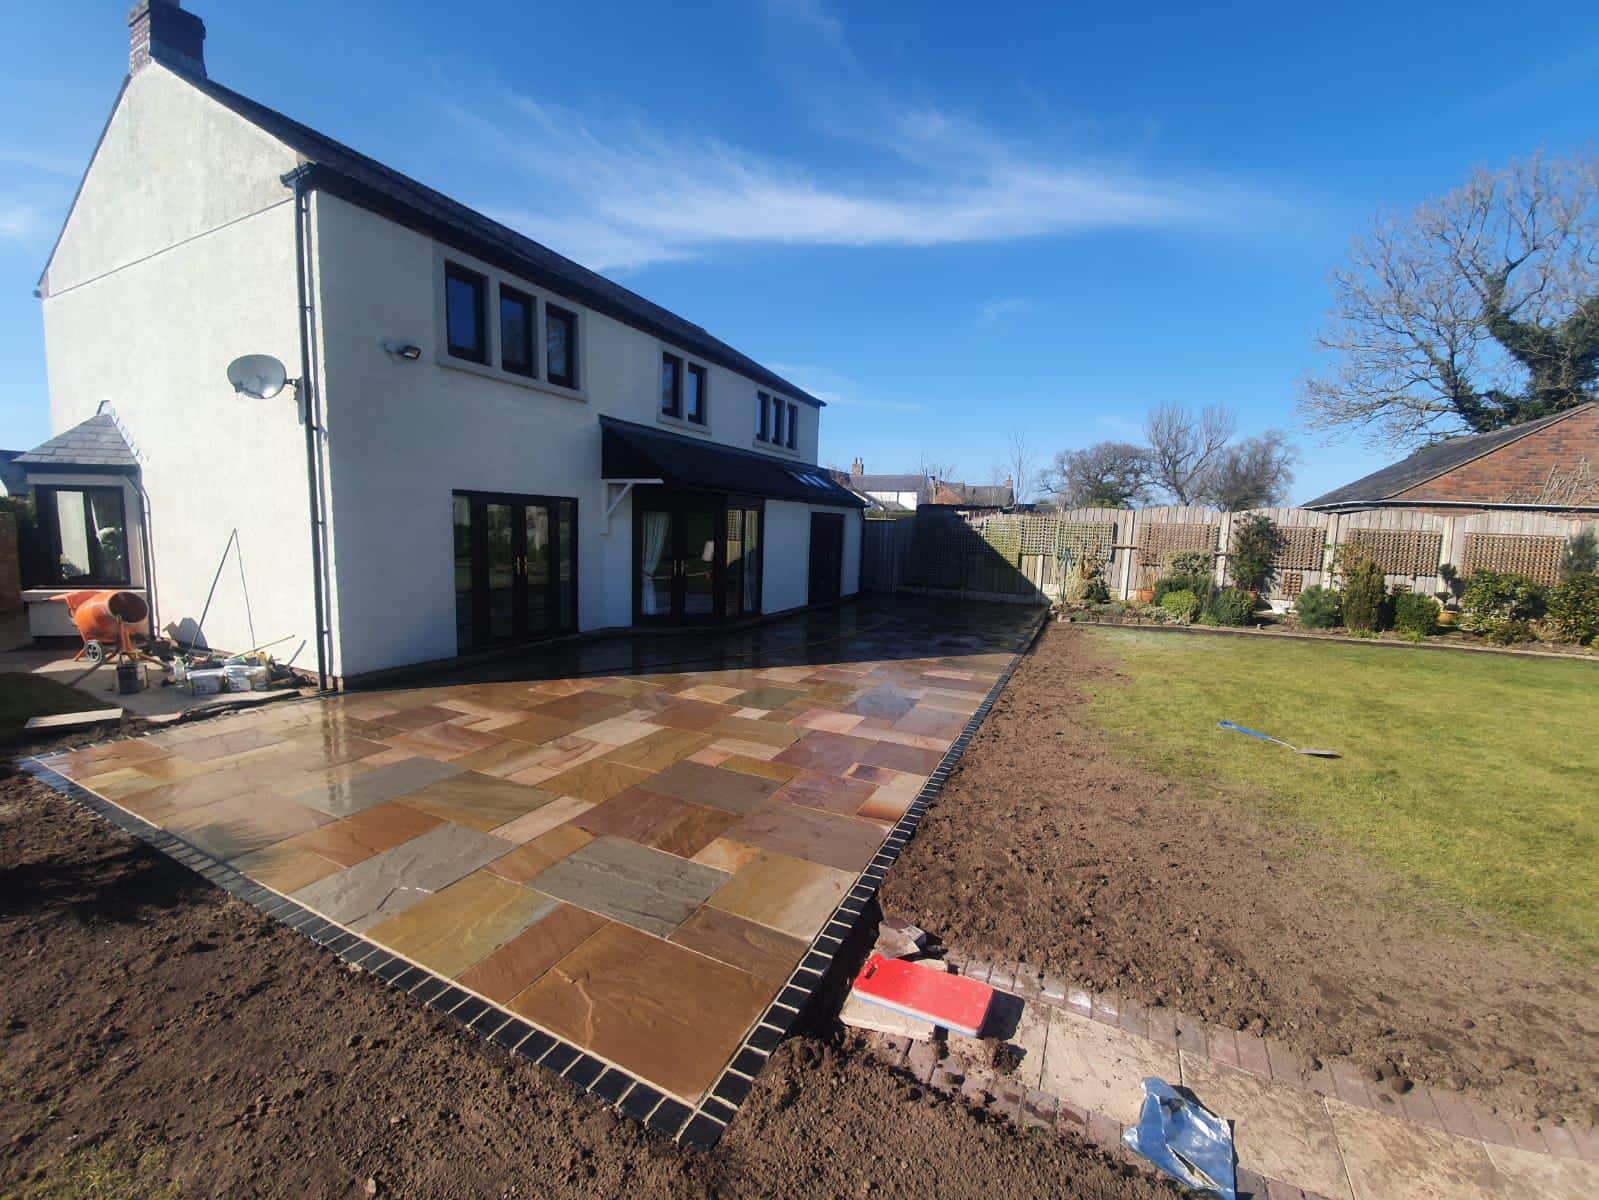
II. Preparing the Ground: Laying a Solid Foundation
A well-prepared base is critical for a long-lasting and stable patio. Neglecting this stage can lead to uneven settling, cracking, and ultimately, a ruined patio.
A. Site Preparation: Clearing and Levelling:
-
Clear the area: Remove any vegetation, debris, and existing paving. Ensure the area is completely clear and level.
-
Excavate: Dig down to the required depth, typically around 150-200mm, depending on the thickness of your sandstone paving and the base materials you'll be using.
-
Compaction: Compacting the ground is essential to prevent settling. Use a plate compactor to achieve a firm, stable base. This is crucial, particularly if your soil is prone to settling.
B. Creating the Base: Layers for Stability:
The base comprises several layers:
-
Sub-base: This layer typically consists of compacted hardcore (crushed stone). This provides drainage and stability. Its thickness depends on the soil conditions and the intended load.
-
Wastage Material: This layer can be MOT Type 1 and ensures a level, stable foundation. This is compacted thoroughly with a vibrating plate.
-
Mortar Bed: This layer provides further support and levelling. It's a mix of cement, sand, and water, applied evenly across the compacted hardcore. Ensure the mortar bed is level using a spirit level.
-
Sand Bedding: A thin layer of sharp sand is laid over the mortar bed. This provides a level surface for the sandstone paving and allows for minor adjustments during installation. The sand layer is essential for ensuring the paving lays flat.
C. Drainage Considerations:

Effective drainage is paramount to prevent waterlogging and frost damage. Ensure the base has a slight slope to allow water to drain away from the patio area. Consider incorporating drainage channels or gravel borders to facilitate water runoff.
III. Installing the Indian Sandstone: Achieving a Professional Finish
With the base prepared, the installation process requires precision and attention to detail.
A. Laying the Sandstone: Accuracy and Precision:
-
Dry Laying: Before applying mortar, dry lay the sandstone slabs to plan the layout and ensure an aesthetically pleasing arrangement. This allows you to adjust the positioning of the slabs to optimize the pattern and minimize cuts. It's a crucial step in achieving an even and visually appealing result.
-
Mortar Application: Apply mortar to the back of each slab, ensuring even coverage. Avoid using too much mortar, as this can cause problems with levelling and drainage.

-
Placement: Carefully place each slab onto the sand bed, gently tapping it into position to ensure a level surface. Use a rubber mallet to avoid damaging the sandstone.
-
Spacing: Maintain consistent spacing between the slabs using spacers. This ensures uniformity and allows for expansion and contraction.
-
Cutting: You might need to cut some slabs to fit around edges and obstacles. Use a wet saw with a diamond blade for a clean, precise cut.

B. Choosing the Right Mortar:
Use a suitable mortar mix designed for exterior paving. The mortar should be strong enough to hold the sandstone slabs securely in place while allowing for some flexibility to accommodate movement.
C. Dealing with Edges and Borders:

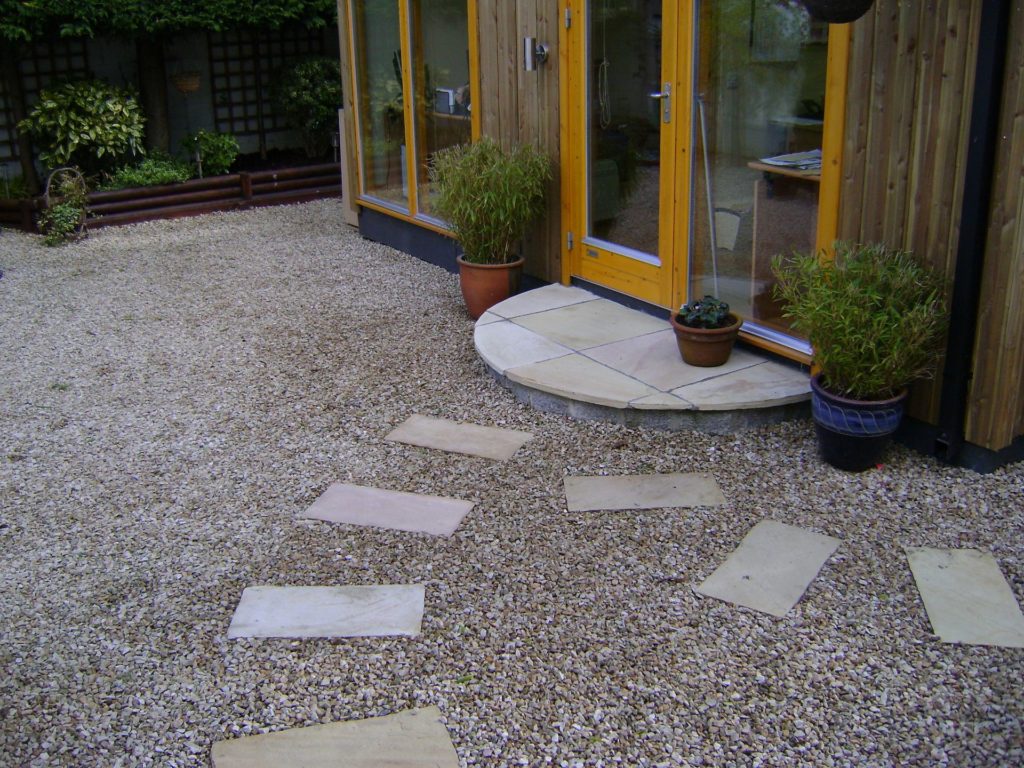
The edges of the patio should be neatly finished. This might involve using edging stones or creating a sloped border to prevent erosion. Consider adding a finishing touch, such as a decorative border or coping stones, to enhance the overall aesthetic.
IV. Finishing Touches and Maintenance: Preserving Your Investment
Once the sandstone is laid, several finishing touches can elevate your patio.

A. Pointing: Creating a Seamless Finish:
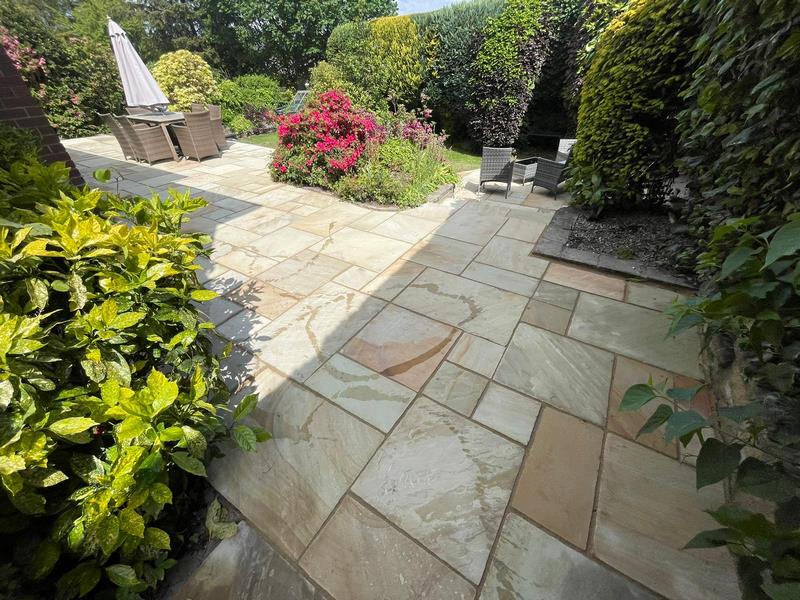
Pointing, or grouting, fills the gaps between the sandstone slabs, creating a clean and professional finish. Choose a pointing mortar that matches the colour of the sandstone and applies it carefully to create a neat and even joint. Careful pointing significantly impacts the overall aesthetic and longevity.
B. Sealing: Protecting Your Investment:

Sealing your Indian sandstone patio protects it from staining, weathering, and damage. Apply a suitable sealant according to the manufacturer's instructions. This helps maintain the colour and texture of the sandstone for years to come. Re-sealing periodically is recommended, typically every 2-3 years.
C. Ongoing Maintenance: Keeping Your Patio Beautiful:
Regular cleaning is crucial to maintain the beauty of your Indian sandstone patio. Sweep away debris regularly and use a suitable cleaner to remove stains and dirt. Avoid using harsh chemicals or abrasive cleaners that could damage the sandstone. Addressing minor issues promptly, such as loose slabs or damaged pointing, prevents larger problems from developing.

V. Adding Extra Features: Enhancing Your Outdoor Oasis
To truly transform your outdoor space, consider incorporating extra features:
- Lighting: Strategic lighting can create a warm and inviting atmosphere. Consider installing pathway lighting, spotlights, or string lights to highlight the beauty of your patio at night.
-
Plants and Landscaping: Adding plants and landscaping features softens the hard lines of the patio and creates a more natural feel. Choose plants that complement the colour and style of your sandstone.
-
Outdoor Furniture: Select comfortable and durable outdoor furniture that complements the style of your patio. Consider adding cushions and throws to enhance the comfort and inviting aesthetic.
-
Water Features: Adding a small water feature, such as a fountain or pond, can add tranquility and visual interest.
Creating a stunning Indian sandstone patio is a rewarding project that adds significant value to your home. By following these steps, paying attention to detail, and carefully selecting your materials, you can create an outdoor space that will be enjoyed for years to come. Remember, the key is thorough planning, careful execution, and ongoing maintenance. Your beautiful and functional patio will become the heart of your home – a space for relaxation, entertainment, and unforgettable memories.
Indian Sandstone Patio: Steps to Stunning!
Creating an outdoor space that's both beautiful and functional is a dream for many homeowners. A patio is often the heart of that dream, offering a place to relax, entertain, and enjoy the beauty of your garden. And when that patio is crafted from the rich, warm tones of Indian sandstone, the potential for stunning results is truly amplified. This comprehensive guide will take you through every step of the process, from initial planning and design to the final touches that elevate your patio from good to breathtaking.
Part 1: Planning and Design – Laying the Foundation for Success
Before you even think about laying a single stone, meticulous planning is crucial. This phase sets the stage for a successful project and prevents costly mistakes down the line.
1. Defining Your Vision and Purpose:
What will your patio be used for? Is it a tranquil space for solitary reflection, a lively area for entertaining guests, or a combination of both? Consider the size, shape, and overall aesthetic you envision. Do you prefer a modern, minimalist design, or something more traditional and ornate? Sketching out your ideas on paper – or using online design tools – can be incredibly helpful at this stage.
2. Choosing the Right Location:
The location of your patio significantly impacts its usability and overall appeal. Consider these factors:
- Sunlight: How much sun exposure do you desire? A south-facing patio will receive maximum sunlight, ideal for soaking up the warmth, while a north-facing patio offers more shade.
- Privacy: Do you need screening from neighbors or the street? Consider the placement of trees, shrubs, or fences.
- Accessibility: Ensure the patio is easily accessible from your home, minimizing steps and obstacles.
- Views: Position your patio to take advantage of attractive views, such as a garden, a pond, or a woodland area.
3. Measuring and Surveying:
Accurate measurements are paramount. Use a measuring tape to determine the exact dimensions of your proposed patio area. Take note of any existing features, such as trees, flowerbeds, or underground utilities, that might impact the design and layout. If you're unsure about any aspect of the survey, consult a professional landscaper.
4. Selecting the Perfect Indian Sandstone:
Indian sandstone comes in a vast array of colors, textures, and finishes, offering endless design possibilities. Consider these factors when making your selection:
- Color: From warm honey tones to cool greys, the color of your sandstone will significantly impact the overall look and feel of your patio. Choose a color that complements your home's exterior and surrounding landscape.
- Texture: Sandstone can range from smooth and polished to riven and tumbled, each providing a unique aesthetic. Consider the texture's impact on slip resistance, especially if you have children or elderly individuals using the patio.
- Finish: Different finishes influence the appearance and durability of the sandstone. A honed finish provides a smooth, polished look, while a flamed finish creates a more textured surface.
- Thickness: Thicker slabs are more durable and less prone to cracking, particularly in areas with heavy foot traffic.
Obtain samples of different types of Indian sandstone to compare their colors and textures in your actual garden setting under various lighting conditions. This will significantly aid in your final decision.
5. Designing the Layout:
Once you've chosen your sandstone, it's time to finalize the layout. Consider these elements:
- Shape: Rectangular, square, circular, or free-form – the shape of your patio should complement the overall design of your garden and home.
- Size: The size of your patio should be proportionate to the size of your garden and the intended use. Avoid making it too small or too large.
- Steps: If you're incorporating steps, ensure they are adequately spaced, with appropriate risers and treads for safety and comfort. The material and style of the steps should complement the patio itself.
- Patterns: Consider different paving patterns to add visual interest. Running bond, herringbone, and basketweave are popular choices.
Part 2: Preparation and Installation – Building Your Dream Patio
This phase requires careful execution to ensure a long-lasting and beautiful patio.
1. Ground Preparation:
This is arguably the most crucial step. Poor ground preparation can lead to settling, cracking, and uneven surfaces. The process involves:
- Excavation: Dig out the area to the required depth, accounting for the thickness of the base layers and the sandstone paving.
- Compaction: Thoroughly compact the base using a vibrating plate compactor to create a stable foundation. This prevents shifting and settling over time.
- Weed Control: Remove any weeds or vegetation from the area to prevent future growth. Consider applying a weed-suppressing membrane.
- Drainage: Ensure adequate drainage to prevent waterlogging. This might involve creating a slight slope or incorporating a drainage system.
2. Base Construction:
The base layer supports the sandstone and distributes the weight evenly. Typically, a base consists of:
- MOT Type 1: A layer of Type 1 sub-base material provides a strong, stable foundation. This needs to be compacted thoroughly.
- Sharp Sand: A layer of sharp sand provides a level surface for the paving stones. This should be screeded to ensure a perfectly even base.
- Mortar or Paving Sand: Depending on the chosen installation method, you'll use either mortar or paving sand to bed the sandstone slabs. Mortar provides a stronger, more permanent bond.
3. Laying the Indian Sandstone:
This requires precision and patience. Whether you're using mortar or paving sand, ensure each stone is level and properly aligned. Use a rubber mallet to gently tap the stones into place. For complex patterns, it's highly recommended to dry-lay the stones first to visualize the final layout before applying mortar or sand.
4. Incorporating Steps:
If your design includes steps, it's crucial to ensure their safety and stability. Use appropriate risers and treads, and consider the following:
- Materials: Choose a material that matches or complements your patio. Indian sandstone steps are a natural and elegant choice.
- Construction: Ensure that the steps are securely fixed and level. Use mortar to bond the steps together and to the surrounding patio.
- Handrails: For steps that are higher than a few risers, handrails are essential for safety.
5. Finishing Touches:
Once the sandstone is laid, it's time for the finishing touches:
- Grouting (if necessary): If using mortar, carefully grout the joints to prevent weeds and provide a clean finish.
- Sealing: Sealing the sandstone protects it from staining and weathering, extending its lifespan. Choose a sealant appropriate for your sandstone type.
- Edging: Add edging to define the boundaries of your patio and prevent the stones from shifting.
- Landscaping: Complete the look by adding plants, lighting, and other landscaping features.
Part 3: Maintenance and Care – Keeping Your Patio Stunning
A beautifully crafted Indian sandstone patio requires ongoing maintenance to preserve its beauty and longevity.
1. Regular Cleaning:
Regular sweeping or brushing will remove dirt, leaves, and other debris. For more stubborn stains, use a mild detergent and a soft brush. Avoid harsh chemicals that could damage the sandstone.
2. Weed Control:
Regularly check for weeds growing between the stones and remove them promptly. Apply weed killer carefully, ensuring it doesn't come into contact with the sandstone itself.
3. Resealing:
Resealing your patio every few years will protect it from staining and weathering, maintaining its vibrant appearance. Follow the manufacturer's instructions for the specific sealant you're using.
4. Repairing Damage:
Minor cracks or chips can often be repaired with a suitable epoxy resin. For more extensive damage, it's best to consult a professional stonemason.
5. Winter Protection:
In colder climates, take steps to protect your patio during winter. Remove any snow or ice promptly to prevent damage from frost.
Conclusion: Your Dream Patio Awaits
Creating a stunning Indian sandstone patio with steps is a rewarding project that transforms your outdoor space. By following these steps, paying attention to detail, and investing the necessary time and effort, you can create a beautiful and functional patio that you'll enjoy for years to come. Remember to consult professionals for any aspects of the project that you feel uncertain about. With careful planning and execution, your dream of a breathtaking patio becomes a reality.

