
Pea Gravel Patio: Budget-Friendly Beauty
Pea Gravel Patio: Budget-Friendly Beauty
Creating an outdoor oasis doesn't require a king's ransom. A pea gravel patio offers a stunning, versatile, and surprisingly affordable alternative to more expensive paving options like pavers or concrete. This guide will delve deep into the design, construction, and maintenance of a beautiful pea gravel patio, showcasing its affordability and charm while addressing potential challenges.
The Allure of Pea Gravel
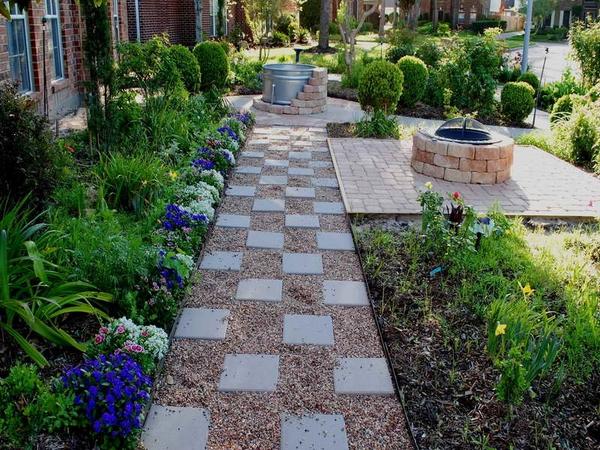
Pea gravel, with its small, rounded stones, offers a unique aesthetic appeal. Its natural variation in color and texture creates a visually interesting surface, unlike the uniformity of many other paving materials. This natural, slightly rustic look complements a wide range of landscaping styles, from minimalist modern to charming cottage gardens. But its appeal extends beyond aesthetics. Pea gravel offers several practical advantages:
- Affordability: This is arguably the biggest draw. Pea gravel is significantly cheaper than most other paving options, making it accessible to a wider range of homeowners.
- Drainage: Pea gravel is highly permeable, allowing water to drain readily. This is crucial for preventing waterlogging and the formation of mud, especially in areas with high rainfall. This makes it an ideal choice for regions prone to flooding or areas with poor drainage.
- Easy Installation: Unlike complex paving projects, installing a pea gravel patio is relatively straightforward, making it a feasible DIY project.
- Versatility: Pea gravel complements various design styles and can be easily incorporated into existing landscapes. It can be used for entire patios or strategically placed as accents.
- Maintenance: While it requires some maintenance, it is generally easier to maintain than other patio materials.
Planning Your Pea Gravel Patio

Before you start digging, careful planning is key to a successful and beautiful pea gravel patio. This involves several crucial steps:
1. Site Selection and Design:
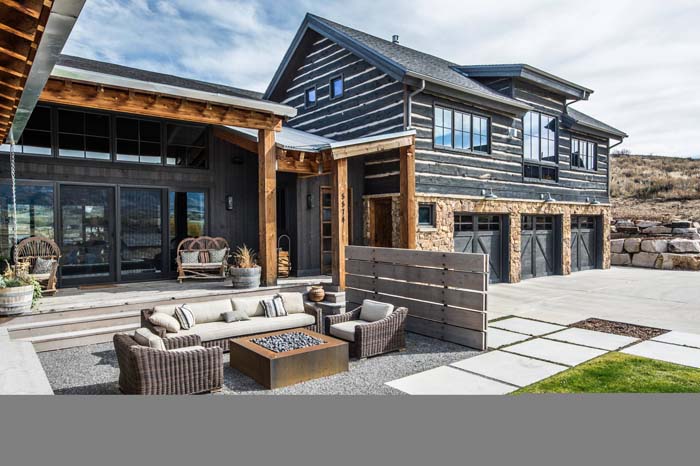
Consider the location carefully. Choose a spot that receives adequate sunlight for enjoyable use but avoids excessive sun exposure that can make the gravel too hot to walk on barefoot. Assess the surrounding landscape to determine how the patio will integrate with existing features. Sketch your desired patio shape and size, considering its functionality and how it will flow with the rest of your outdoor space. Consider adding patio furniture, a fire pit, or planting beds to enhance the overall design.
2. Materials Estimation:
Accurately estimating the required amount of pea gravel is vital to avoid costly over- or under-ordering. Measure the area of your planned patio in square feet. To determine the quantity of pea gravel, you'll need to consider the desired depth. A depth of 2-4 inches is usually sufficient for a comfortable and stable surface. Factor in an additional 10-15% to account for settling and waste. Consult your local landscaping supply store for assistance with calculating the necessary quantity. You'll also need:
- Landscape fabric: This prevents weeds from growing through the gravel.
- Edging: This can be made from various materials like wood, metal, or plastic, to define the patio's perimeter and prevent gravel from spreading.
- Tools: Shovel, rake, measuring tape, wheelbarrow, tamper (for compacting the gravel).
3. Budget Considerations:
While pea gravel is inherently budget-friendly, creating a comprehensive budget is still important. Include costs for all materials, tools (if you don't already own them), and potentially labor if you choose to hire help for the installation. Consider the cost of edging, landscape fabric, and any additional features you plan to add, such as outdoor lighting or furniture.
Installation: A Step-by-Step Guide
Installing a pea gravel patio is a manageable DIY project, but careful execution is key. Here's a detailed step-by-step guide:
1. Site Preparation:
Clear the chosen area of any existing vegetation, rocks, or debris. Remove any sod or topsoil to a depth of approximately 4-6 inches. Level the ground thoroughly using a rake and shovel, ensuring a relatively flat and even surface. This step is crucial for preventing uneven settling and creating a stable patio.

2. Landscape Fabric Installation:
Lay down landscape fabric over the prepared area. This fabric acts as a weed barrier, preventing unwanted plant growth and maintaining the integrity of your patio. Overlap the edges of the fabric slightly to prevent weeds from creeping in. Secure the edges with landscape staples or pins.
3. Edging Installation:

Install the edging around the perimeter of your patio. This will contain the pea gravel and create a neat, finished look. Ensure the edging is firmly secured in the ground.
4. Pea Gravel Placement:
Spread the pea gravel evenly over the landscape fabric, working in layers. Start with a layer of approximately 2-3 inches, then use a rake to level the surface. For a more compacted and stable surface, you can lightly tamp the gravel down using a tamper. Add another layer if needed to achieve your desired depth.
5. Finishing Touches:
Once the gravel is in place and leveled, step back and assess the overall appearance. Make any necessary adjustments, such as adding more gravel to uneven areas or removing excess gravel.
Maintenance and Upkeep
While pea gravel patios are low-maintenance, regular upkeep will ensure their beauty and longevity.
- Weed Control: Periodically inspect for weeds growing through the landscape fabric. Remove them promptly to prevent them from becoming established.
- Gravel Replenishment: Over time, some pea gravel will be lost due to wind, rain, or foot traffic. Replenish the gravel as needed to maintain the desired depth and appearance.
- Cleaning: Sweep or blow the gravel regularly to remove leaves, debris, and other contaminants. For more thorough cleaning, you can use a garden hose to gently rinse the gravel, ensuring proper drainage afterward.
- Edging Repair: Inspect the edging periodically and repair any damage promptly to prevent gravel from spilling out.
Enhancing Your Pea Gravel Patio

Once your beautiful pea gravel patio is installed, consider adding features to enhance its appeal and functionality:
- Outdoor Lighting: Strategic lighting can transform the patio into a magical space, extending its usability into the evening hours.
- Planting: Incorporate plants and flowers around the patio perimeter to create a cohesive and visually appealing landscape.
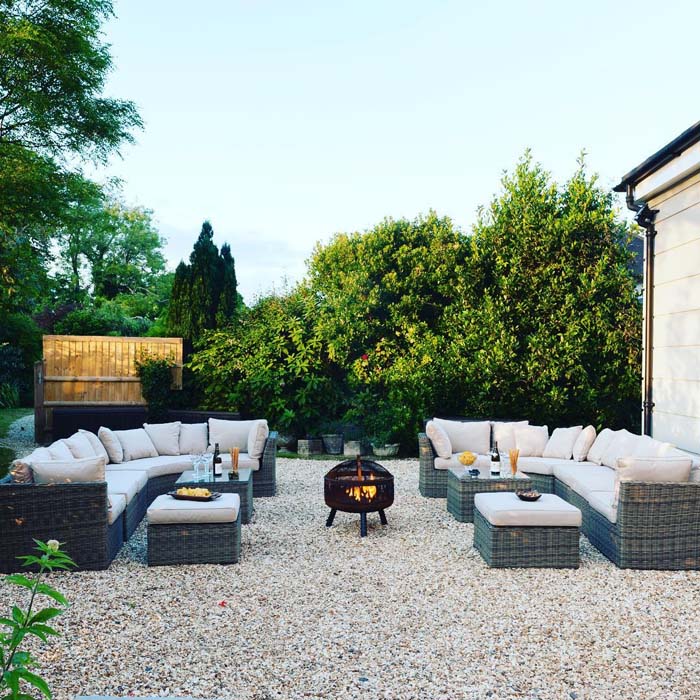
- Outdoor Furniture: Choose furniture that complements the rustic charm of the pea gravel patio. Consider materials like wicker, wood, or metal.
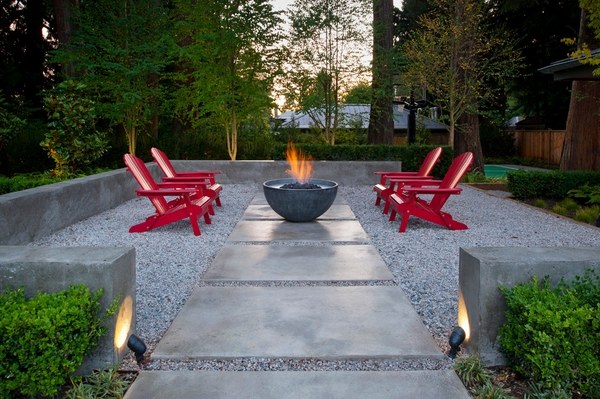
- Fire Pit: A fire pit can create a cozy and inviting atmosphere, making your patio a perfect place for gatherings.
- Water Feature: A small fountain or water feature can add a soothing element to your outdoor space.
Pea Gravel: A Cost-Effective and Stylish Choice

A pea gravel patio offers a compelling blend of affordability, beauty, and practicality. With careful planning, diligent installation, and regular maintenance, you can create a stunning and functional outdoor space without breaking the bank. Embrace the natural charm of pea gravel and transform your backyard into a haven of relaxation and enjoyment. The relatively low cost and ease of installation make it a perfect project for DIY enthusiasts, allowing you to personalize your outdoor space with a unique and beautiful patio that reflects your individual style. So, embrace the budget-friendly beauty of pea gravel and start planning your own outdoor oasis today!
Budget Patio Bliss: Pea Gravel Ideas!
Transforming your outdoor space into a relaxing and inviting patio doesn't require a king's ransom. With a little creativity and planning, you can achieve budget patio bliss using the readily available and versatile material: pea gravel. This affordable and aesthetically pleasing option opens a world of possibilities for creating a stunning patio without breaking the bank. This comprehensive guide will explore diverse pea gravel patio ideas, offering practical tips, cost-saving strategies, and inspirational design concepts to help you build your dream patio on a budget.
Understanding the Allure of Pea Gravel
Pea gravel, also known as small gravel, is a type of aggregate stone characterized by its small, rounded, and smooth pebbles. Its size typically ranges from 1/4 inch to 3/8 inch in diameter, making it ideal for various landscaping applications, especially patios. Its popularity stems from several key advantages:
- Affordability: Pea gravel is significantly cheaper than other paving materials like pavers, flagstones, or concrete. This makes it an excellent choice for budget-conscious homeowners.
- Versatility: Its small size allows for easy installation and adaptability to various design styles, from rustic to modern.
- Drainage: Pea gravel is highly permeable, allowing water to drain easily, preventing waterlogging and reducing the risk of weed growth.
- Maintenance: Compared to other patio materials, pea gravel requires minimal maintenance, making it a low-effort option for busy lifestyles.
- Aesthetics: Pea gravel comes in a wide range of colors, from natural tones like beige and grey to vibrant hues like red and brown, offering ample opportunities for customization.
Planning Your Pea Gravel Patio: A Step-by-Step Guide
Before you dive into the project, careful planning is crucial for a successful and budget-friendly outcome. This involves several key steps:
1. Design and Layout:
- Measure your space: Accurately measure the area where you intend to build your patio. This will determine the amount of pea gravel you need. Consider the overall shape and size of your patio – rectangular, square, circular, or a more free-flowing design.
- Sketch your design: Create a rough sketch or use online design tools to visualize your patio layout. Consider incorporating different zones, such as a seating area, a dining area, or a grilling zone.
- Choose your pea gravel type: Select the color and type of pea gravel that best complements your home's exterior and your personal style. Consider the local availability and pricing when making your selection.
2. Budget Allocation:
- Material costs: Calculate the cost of pea gravel based on the area you need to cover and the price per cubic yard or ton. Factor in potential transportation costs.
- Tools and equipment: List the tools and equipment you'll need, such as shovels, rakes, wheelbarrows, and possibly a landscape fabric. Consider renting equipment if purchasing is too expensive.
- Labor costs: If you're hiring professionals, factor in their labor costs. However, installing a pea gravel patio is a relatively DIY-friendly project, potentially saving you significant labor costs.
3. Site Preparation:
- Clear the area: Remove any existing vegetation, debris, and topsoil from the designated area. This ensures a level and stable base for your patio.
- Level the ground: Use a level to ensure the ground is even. Fill in low spots with compacted gravel or soil to create a flat surface. Consider adding a slight slope for proper drainage.
- Weed barrier (optional but recommended): Laying landscape fabric before adding the pea gravel will significantly reduce weed growth, saving you maintenance time and effort in the long run. This is a small investment with a big payoff.
4. Pea Gravel Installation:
- Determine the depth: Decide on the desired depth of your pea gravel layer (typically 2-4 inches). A deeper layer provides better stability and weed suppression.
- Spread the gravel: Evenly distribute the pea gravel over the prepared area using a shovel or rake.
- Compact the gravel (optional): For a more stable and less shifting patio, use a plate compactor or hand tamper to compact the pea gravel. This step is particularly important in high-traffic areas.
- Add edging (optional): Install edging materials, such as timber, pavers, or metal edging, to contain the pea gravel and create a neat, defined border. This adds a touch of sophistication and helps prevent the gravel from spreading.
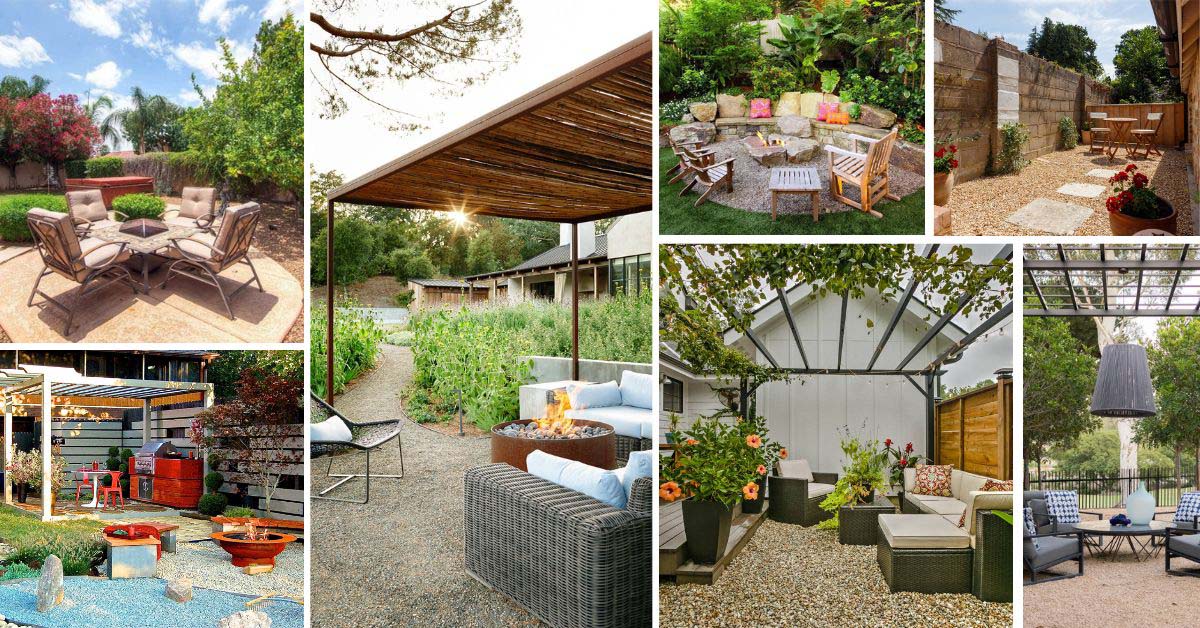
Enhancing Your Pea Gravel Patio: Design Ideas and Additions
Once your pea gravel base is laid, you can enhance your patio with various design elements to personalize your outdoor space.
1. Defining Zones:
- Seating areas: Use outdoor furniture, such as Adirondack chairs, wicker sofas, or even simple benches, to create comfortable seating zones within your pea gravel patio.
- Dining areas: Place a bistro set or outdoor dining table and chairs to designate a dining area.
- Grilling zone: Position a grill and side tables to create a dedicated space for outdoor cooking and entertaining.
2. Adding Plants and Greenery:
- Potted plants: Introduce potted plants and flowers to add pops of color and texture. Choose plants that thrive in your climate and soil conditions.
- Groundcover: Consider using low-growing groundcover plants along the edges of the patio to soften the hardscape and add a natural touch.
3. Incorporating Lighting:
- Path lighting: Install path lighting to illuminate walkways and enhance the ambiance of your patio at night.
- String lights: Hang string lights to create a warm and inviting atmosphere for evening gatherings.
- Solar lights: Utilize solar-powered lights for an eco-friendly and cost-effective lighting solution.
4. Decorative Elements:
- Outdoor rugs: Place outdoor rugs to define different areas, add warmth, and protect your feet from the cold pea gravel.
- Outdoor pillows and cushions: Add comfortable pillows and cushions to your outdoor furniture to enhance comfort and style.
- Sculptures and ornaments: Incorporate sculptures, statues, or other decorative elements to personalize your patio and reflect your aesthetic preferences.
- Water features: A small fountain or birdbath can add a soothing element and enhance the overall ambiance.
Maintaining Your Pea Gravel Patio: Tips and Tricks
Maintaining a pea gravel patio is relatively straightforward, but a few simple steps will help keep it looking its best:
- Regular weeding: Regularly remove any weeds that manage to sprout through the gravel. A weed barrier helps significantly reduce this task.
- Top-up gravel: Over time, some pea gravel may be displaced or lost. Periodically top up the gravel to maintain the desired depth and evenness.
- Leaf and debris removal: Regularly remove leaves, twigs, and other debris to prevent buildup and maintain a clean and inviting patio.
- Pressure washing (optional): For a deep clean, consider pressure washing the pea gravel periodically to remove stubborn dirt and grime.
Conclusion: Unlocking Budget Patio Bliss
Creating a beautiful and functional pea gravel patio doesn't have to be expensive. With careful planning, creative design choices, and a bit of DIY effort, you can transform your outdoor space into a haven of relaxation and entertainment without exceeding your budget. By following the tips and ideas outlined in this guide, you can unlock budget patio bliss and enjoy your stunning new outdoor oasis for years to come. Remember, the key is to personalize your space, reflecting your unique style and preferences while staying within your financial constraints. Happy patio building!


