
Tiny Tiles, HUGE Bathroom Transformation!
Tiny Tiles, HUGE Bathroom Transformation!
Let's be honest, sometimes the smallest changes make the biggest impact. And when it comes to revamping a space, few things pack such a powerful punch as a well-chosen tile. This isn't about a full-scale demolition and rebuild; this is about the magic of tiny tiles and how they can completely reinvent your bathroom, turning it from drab to fab.

From Frustration to Inspiration: Our Bathroom Before
My bathroom was, to put it mildly, tired. The dated beige tiles, the slightly cracked grout, the general feeling of…blah. It felt less like a sanctuary and more like a necessary evil. Every morning shower felt like a chore, not a rejuvenating experience. Sound familiar?
This wasn't about a massive budget; it was about maximizing impact with minimal expense. And that's where the power of tiny tiles came in.
The Tiny Tile Revelation: Why Small is Mighty
Forget the notion that only large format tiles are elegant. Tiny tiles – think mosaics, penny rounds, and even small subway tiles – offer a surprising array of benefits:
- Visual Interest: They create incredible texture and visual depth.
- Versatility: They can be used to create stunning patterns, borders, and accents.
- Perfect for Smaller Spaces: Paradoxically, tiny tiles can make a small bathroom feel larger by adding visual interest and avoiding the overwhelming effect of large, unbroken surfaces.
- Budget-Friendly (Sometimes!): While some high-end mosaic tiles can be pricey, many affordable options exist, particularly if you're willing to explore different materials.

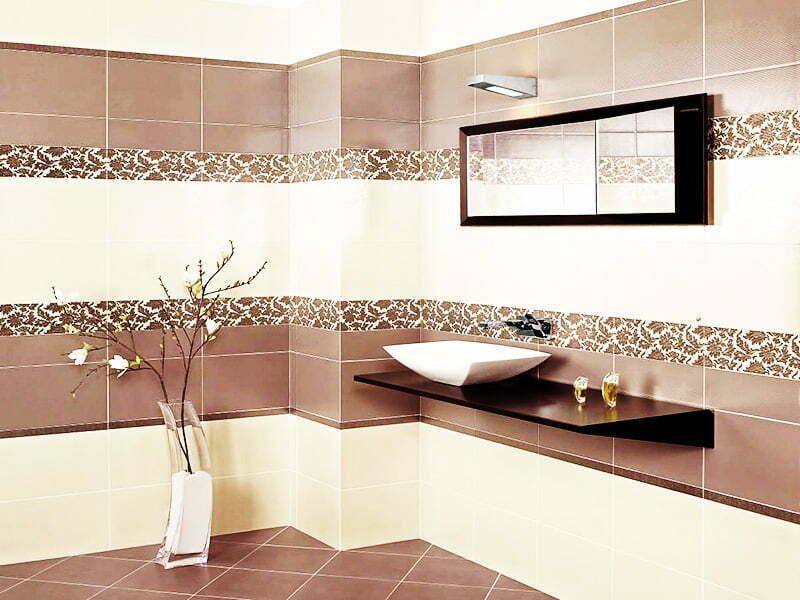
Choosing Your Tiny Tile Tribe: Materials & Styles
The world of tiny tiles is vast and varied. Here are some popular choices and things to consider:
- Ceramic: A classic and budget-friendly option. Comes in a huge range of colors and finishes. Easy to clean and maintain.
- Porcelain: More durable and water-resistant than ceramic. Excellent for high-traffic areas.
- Glass: Adds a touch of elegance and light reflection. Can be more expensive but offers a unique, shimmering effect.
- Stone (Marble, Travertine, etc.): Luxurious and visually striking, but typically more expensive and requires more careful maintenance.
- Metal (Copper, Brass, etc.): Adds a modern industrial feel.

Style Inspiration:
- Subway Tile Remix: Classic subway tiles, but in a smaller format, can create a fresh, modern look. Consider varying the grout color for extra impact.
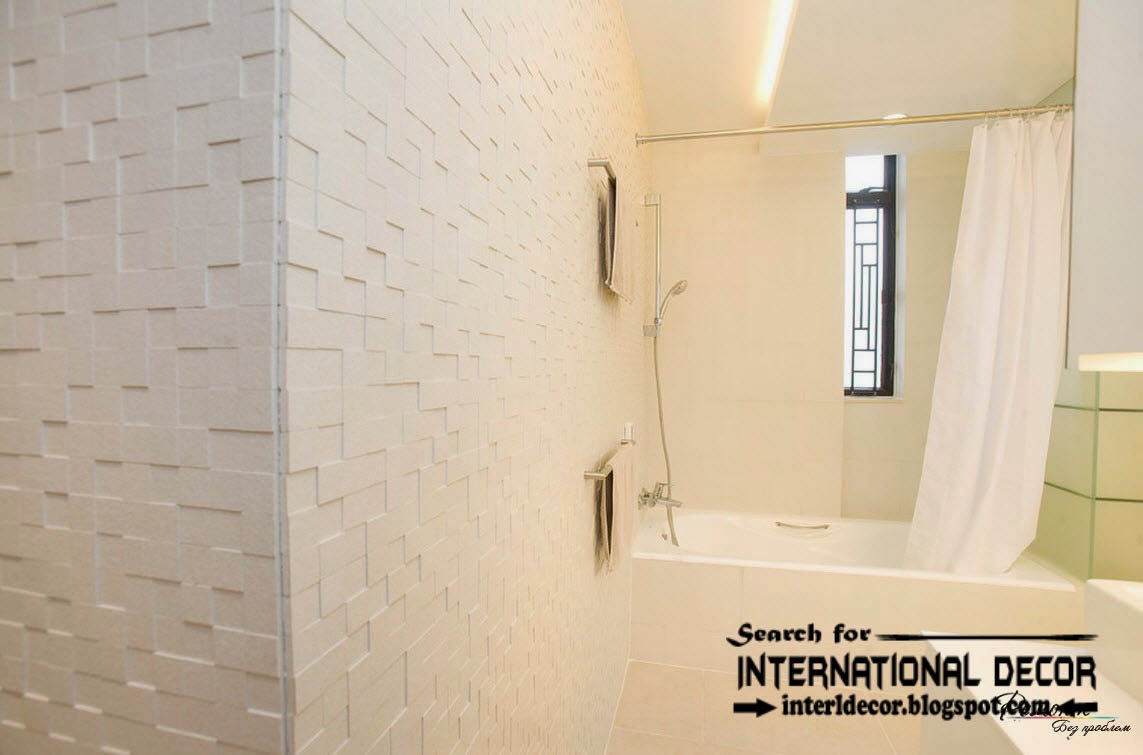
- Geometric Patterns: Use tiny tiles to create intricate geometric patterns, from simple chevrons to complex tessellations. Plan your layout carefully to achieve the desired effect. (See our step-by-step guide below!)
- Mosaic Magic: Mosaic tiles offer endless possibilities for texture and color. Choose from pre-made sheets or create your own custom design.
- Penny Round Pop: Penny round tiles add a touch of vintage charm and work well in both traditional and contemporary bathrooms.
From Idea to Installation: A Step-by-Step Guide (with Pictures!)

(Insert here a series of high-quality images showing each step. Ideally, 6-8 images, showcasing prepping the wall, laying the tiles, grouting, and the finished product.)
Step 1: Preparation is Key: Remove old tiles, clean the wall thoroughly, and apply waterproof sealant. This is crucial for longevity and preventing mold.
Step 2: Layout & Planning: Dry-lay your tiles (arrange them without adhesive) to visualize the pattern and ensure a balanced design.

Step 3: Adhesive Application: Use a notched trowel to apply thin-set mortar evenly to the wall section.
Step 4: Tile Placement: Press tiles firmly into the mortar, ensuring even spacing between them. Use spacers to maintain consistent gaps.
Step 5: Grouting: Once the adhesive is dry, apply grout using a rubber grout float. Wipe away excess grout immediately.

Step 6: Sealing: Apply a waterproof sealant to protect the grout and tiles from water damage.
(Note: Always follow the manufacturer’s instructions for your specific tiles and adhesive.)
Beyond the Tiles: Completing Your Transformation

New tiles are just the beginning! Here are some extra touches to elevate your bathroom:
- New Fixtures: Consider updating your faucets, showerhead, and lighting fixtures for a cohesive look.
- Fresh Paint: A new coat of paint on the walls or ceiling can complement your new tiles beautifully.
- Stylish Storage: Introduce new shelves, cabinets, or baskets to enhance organization and style.
- Soft Touches: Add plush towels, a luxurious bathmat, and scented candles to create a spa-like atmosphere.
- Plants: Introduce greenery to add life and vibrancy to your bathroom.
The Reveal: A Bathroom Reborn
(Insert here a stunning "after" photo of the finished bathroom.)
My "before" and "after" transformation speaks volumes. From a space that felt dated and depressing, I've created a bright, modern, and inviting bathroom—all thanks to the surprisingly impactful power of tiny tiles! It’s a reminder that even small changes can bring about a HUGE difference. It’s no longer a chore to use my bathroom, but a daily joy. And I know, you can achieve the same.
Your Turn!

Share your bathroom transformation ideas and experiences in the comments below! Let’s inspire each other. And don't forget to pin this post for later inspiration!


